Introduction
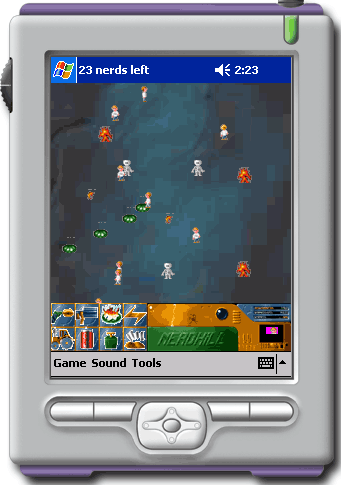
Nerdkill is a simple 2D stress-relieving game that involves targeting little nerds that scamper across the screen. I first wrote this game for the BeOS several years ago and last year I rewrote it in C# for .Net and DirectX Managed, mostly as a simple exercise to learn the DirectX Managed APIs.
The article describes the effort of porting a simple 2D game with sound to the Pocket PC, possibly as a 100% Managed application running under .Net Compact Framework, and exploring the limitations imposed by the device and framework capabilities.
The resulting fully functional game and full source code are provided under a GPL license. This game was tested on the Pocket PC simulator as well as on a Cassiopeia E-125 (MIPS 140 MHz.)
Underlying Architecture
At the heart of Nerdkill C# (the full desktop version, available at http://www.alfray.com/projects/Nerdkill/) is a reusable game framework that defines a simple architecture to host a game application. The architecture separates the game engine from the platform display, input, sound and resource management by defining the following components:
public interface Engine.IEngineProcess;
public interface Engine.IEngine2D;
public interface Engine.IEngineSound;
public interface Engine.IEngineInput;
public interface Engine.IEngineResources;
The
IEngineProcess interface is used to implement the game specific engine. It processes events generated by the input component, updates its internal states, generates asynchronous requests to play sounds and eventually refreshes the display by blitting sprites.
All the other interfaces form auxiliary modules which render services for the engine. They abstract the engine from the actual implementation of the resource handling.
In the case of the DirectX Managed version of Nerdkill C#, IEngine2D is implemented as a windowed DirectX surface embedded in a Windows.Form, IEngineInput is implemented using mouse and keyboard events generated by the Windows.Form, IEngineSound is implemented using DirectSound and IEngineResources is implemented accessing the data files embedded in the assembly.
Adapting to Pocket PC
The architecture used by Nerdkill is pretty flexible. To port the game to Pocket PC, it was merely necessary to reimplement the IEngine2D and IEngineSound interfaces.
The goal was initially to see if the combination of Pocket PC and the .Net Compact Framework was good enough for the two tasks at hand. Ideally the code should be 100% Managed and .Net. In reality, it is all managed yet some parts like the sound left me no choice but access the WinCE APIs through P/Invoke.
Part of the port effort, which I did not exactly expect at first, was adapting the game to the limited resources of the Pocket PC. Obviously every bitmap artwork had to be "shrunk" down to fit on the 240x320 screen and the sounds were sampled down to 11 kHz/8 bits/mono WAV files to reduce the size of the resources. The resulting assembly is 520 kB whereas the original desktop assembly is a mere 2.5 MB.
Luckily most of the gameplay is exactly the same. However, there are a couple of differences. For example on the desktop game, scrolling happens automatically when the mouse approaches the border of the screen. Since there is no MouseOver event with a stylus, I simply use the navigation pad of the Pocket PC instead. A menu that allows to quickly pause the game or disable the sound has been added, and most important it was necessary to automatically pause the game when the application looses the focus, otherwise the game would continue to update when in background, rendering the device extremely slow.
2D Rendering
Since the initial goal was a 100% .Net Managed approach to understand the limitations of this framework, the options for rendering 2D bitmaps were rather limited. The requirements for 2D rendering are simple:
- The 2D platform works by blitting sprites.
- Sprites are either fully opaque or have a single transparency color.
- Sprites are loaded directly from the bitmap stored in resources. Several small sprites can be packed in one bitmap.
I did not want to use a proprietary library such as GAPI, despite the obvious gain in performances it would give. I was initially tempted to reuse the classic Win32 approach with BitBlt and co. The bitmap manipulation capabilities of .Net are pretty limited, especially for the Compact Framework. Nevertheless it contains everything needed for the purpose here. Bitmaps can be loaded from resources. The Compact Framework does not allow direct access to the bits of the bitmaps except using GetPixel and SetPixel, which are clearly too slow to be acceptable. On the other hand, a Bitmap object can be used to create a Graphics context for GDI+, allowing C# code to simply draw in the offscreen bitmap.
The article Flicker Free Drawing In C# explains the usual DllImport trick to access the GDI+ functions which are not available directly in .Net: CreateCompatibleDC, CreateCompatibleBitmap, BitBlt, etc. But more important, it shows that most of what is needed is present in .Net Compact Framework. The trick is that a bitmap loaded from resources will not be compatible (thus very slow to draw) but it can be made compatible by creating a new empty bitmap (automagically made compatible), getting a Graphics DC from it (thus a compatible DC) and then using DrawImage to draw the independent bitmap into the compatible one.
Remember that it is mandatory to release any Bitmap and Graphics DC objects by calling their Dispose method. Failure to do so will cripple the application's available resources. It may not be apparent on a desktop version of Windows but it will be obvious on a Pocket PC when the limited resources get exhausted.
This code uses the .Net Compact Framework to load a bitmap from the assembly resources and make it compatible:
private Bitmap loadCompatibleBitmap(string filename)
{
System.Type st = this.GetType();
Assembly assembly = st.Assembly;
Stream stream = assembly.GetManifestResourceStream(
st.Namespace + "." + filename);
Bitmap bitmap = new Bitmap(stream);
stream.Close();
Color bg_col = bitmap.GetPixel(0,0);
Bitmap compatible = new Bitmap(bitmap.Size.Width, bitmap.Size.Height);
Graphics g = Graphics.FromImage(compatible);
g.Clear(Color.Black);
ImageAttributes ia = new ImageAttributes();
ia.SetColorKey(bg_col, bg_col);
g.DrawImage(bitmap,
new Rectangle(0, 0, compatible.Size.Width,
compatible.Size.Height),
0, 0,
bitmap.Size.Width, bitmap.Size.Height,
GraphicsUnit.Pixel, ia);
g.Dispose();
bitmap.Dispose();
return compatible;
}
To deal with transparent images, create an ImageAttribute instance, set the transparency color using ImageAttribute.SetColorKey and use the Graphics.DrawImage method that accept an ImageAttribute. The sample code above, the transparency color of the compatible bitmap is set to black. The actual color will generally depend on your artwork.
The 2D rendering implementation for Nerdkill Pocket uses the same principle everywhere:
- Some bitmaps loaded from resources contain several sprites. For each sprite a new compatible bitmap is created, a
Graphics context is created and the sprite is drawn from the independent bitmap onto the compatible one. Note that the .Net Compact Framework does not provide the Bitmap constructor that can extract part of another Bitmap so this workaround is necessary. - All rendering is done in an offscreen buffer. Then that buffer is drawn in
OnPaint directly in the provided Graphics context. This avoids flickering.
Note that drawing the compatible bitmap manually in OnPaint is actually pretty fast. A sample code that does just that achieved up to 200 fps on the simulator and up to 100 fps on my test machine, a Cassiopeia E-125.
The complete source of the 2D Rendering part is available in the source archive. It is implemented in the RGdiGraphics.cs file.
Sound
I could not find a 100% .Net Managed way to play sounds for the game. Instead I found two solutions, both using P/Invoke to access WinCE APIs:
- The
PlaySound function. - The WaveOut API.
The PlaySound function is fairly straightforward to use but it can only play one sound at a time. It can play asynchronously. By default it will stop the currently playing sound before starting the next one. There's a flag to avoid that, yet the result is that the new sound will simply not play. It doesn't mix. A sound can loop too and will stop when the next sound is requested.
In the context of this game, a better sound API is required. Several sounds should be able to play simultaneously. Some sounds need to loop automatically. Clearly, reimplementing my own sound mixer using WaveOut was necessary.
WaveOut has a simple but efficient workflow. Buffers first need to be constructed and prepared. They are then filled with data and output using waveOutWrite. Once a buffer has been used, it is returned to the application which can then fill it again and output it.
The implementation is composed of the following classes:
public class RSoundPlayer: Engine.IEngineSound;
public class RISoundReader: IDisposable;
public class RWavStreamReader: RISoundReader;
public class RWaveOut;
public class RMemAlloc;
RWaveOut maps the various WaveOut methods and structures using DllImport. RMemAlloc does the same for LocalAlloc and LocalFree which are used to allocate the WaveOut buffers.
The sound mixer does not access any sound resource directly. It uses the RISoundReader interface that knows how to read a new buffer of data. The actual reader is implemented by RWavStreamReader and is constructed from a Stream extracted directly from the assembly resources. Since memory is at a premium on Pocket PC, it is neither necessary nor useful to read the full assembly resource stream into a memory buffer. The data can be accessed directly from the resource stream.
The sound data is expected to be formatted as WAV files, mono, 8 bits, 11.025 kHz. The stream reader validates the WAV file header to ensure these properties.
Using the WaveOut API is pretty simple: memory buffers are created and "prepared" using waveOutPrepareHeader; they are then filled with data and set to play using waveOutWrite. When the WaveOut interface is done with each buffer, it sends a message to a HWND. The window callback recycles the buffer. The .Net Compact Framework does not allow access to the underlying implementation of a Windows.Form, that is its HWND cannot be retrieved and its WndProc callback cannot be used. To circumvent this limitation, the WinCE's .Net-specific class Microsoft.WindowsCE.Forms.MessageWindow is used:
private class RWaveOutMsgWindow: MessageWindow
{
  public delegate void Callback(IntPtr waveHdrPtr);

  public void SetBufferDoneCallback(Callback cb)
  {
    mBufferDoneCallback = cb;
  }

  protected override void WndProc(ref Message m)
  {
    if (m.Msg == RWaveOut.MM_WOM_DONE && mBufferDoneCallback != null)
      mBufferDoneCallback(m.LParam);
    base.WndProc(ref m);
  }

  private Callback mBufferDoneCallback = null;
}

public RSoundPlayer()
{
  ...
  mWceMessageWindow = new RWaveOutMsgWindow();
  mWceMessageWindow.SetBufferDoneCallback(
    new RWaveOutMsgWindow.Callback(this.waveOutBufferDone));
  ...
}
The sound mixer maintains a list of sounds that are currently being played. For each of these sounds, a structure holds the current read position, the total size, a stop flag and a repeat flag. The sound mixer also maintains a queue of available WaveOut buffers.
The actual mixer code runs in a thread with the following workflow:
- An event is used to signal the thread that new sounds are ready to play or that buffers previously played are now available. If there are no sounds to play nor available buffers to output, the thread just blocks on the event:
public RSoundPlayer()
{
mMixerEvent = new AutoResetEvent(false);
mMixerThread = new Thread(new ThreadStart(this.mixerLoop));
mMixerThread.Start();
}
private void addSound(RISoundReader reader)
{
lock(mPlayingSounds.SyncRoot)
{
RSoundData sd = new RSoundData(reader);
mPlayingSounds.Add(sd);
}
mMixerEvent.Set();
}
private void mixerLoop()
{
while (mMixerEvent != null && mMixerEvent.WaitOne())
...
}
- The thread loop takes the first available buffer and merges in the next incoming samples from every sound. Mixing several sounds is just a matter of adding them to the buffer. Each sample must be added to the one already in place and clipping must be done, as shown below.
- The new buffer is set to play using
waveOutWrite.
Mixing the actual data in the buffers is done using unsafe C# code (the unsafe keyword allows C# code to manipulate pointers and use pointer arithmetic). Here is a simplified version of the method mixBuffer from RSoundPlayer.cs (the full version is available in the source archive):
int max_data = 0;
unsafe
{
int *header = (int *) waveHdr.ToPointer();
uint *dest32 = (uint *)(header[0]);
int size = mWaveBufferSize / 4;
while(size-- > 0)
*(dest32++) = 0x80808080;
}
lock(mPlayingSounds.SyncRoot)
{
for(int i = mPlayingSounds.Count-1; i >= 0; i--)
{
RSoundData sd = mPlayingSounds[i] as RSoundData;
int read_size = sd.mSize - sd.mOffset;
if (read_size > kReadBufferSize)
read_size = kReadBufferSize;
sd.mReader.Read(mMixerBuffer, sd.mOffset, read_size);
sd.mOffset += read_size;
unsafe
{
unchecked
{
fixed(byte *source = mMixerBuffer)
{
int *header = (int *) waveHdr.ToPointer();
byte *dest = (byte *) (header[0]);
int rsn = read_size * mSampleSize;
if (rsn > max_data)
max_data = rsn;
byte *src = (byte *)source;
for (int c = read_size; c > 0; c--)
{
int a = (int)(*dest) + (int)(*(src)++) - 0x80;
if (a < 0)
a = 0;
else if (a > 0xFF)
a = 0xFF;
byte b = (byte)a;
for(int j = mSampleSize; j > 0; j--)
*(dest++) = b;
}
}
}
}
if (sd.mOffset >= sd.mSize)
{
if (sd.mRepeat)
sd.mOffset = 0;
else
mPlayingSounds.RemoveAt(i);
}
}
}
unsafe
{
int *header = (int *) waveHdr.ToPointer();
header[2] = max_data;
header[4] = header[4] & (~RWaveOut.WHDR_DONE);
}
The mixer is only targeted towards 8-bits output yet it can output to 11.025, 22.050 or 44 kHz streams, mono or stereo. This is done by expanding each byte of input as many bytes as necessary to fit in one output sample (no audio filtering is performed). This way the mixer code can stay very simple yet be reasonably adaptive.
In the code, note the usage of the C#-specific keyword fixed. This allows the code to retrieve a pointer on a Managed buffer. When doing this, .Net "pins down" the pointed object so that the Garbage Collector will not move it around. Operations on the pointer can be done as in C/C++ using the familiar "*(dest++)" syntax.
An important note is that since the mixer uses unsafe code, the assembly must be compiled as such. Under Visual Studio, this is done by setting the project's Configuration Property > Build > Allow Unsafe Code Blocks to True. This also means that special rights are necessary to run such an assembly. By default an application running from a desktop or a palm device has such rights. It wouldn't be the case if it was run as a Smart Client or in non-trusted sand box.
In the two previous blocks of code and throughout the RSoundPlayer.cs source, you can also notice the C# keyword lock. This primitive locks a Managed object for exclusive access (mutex). This is used here to synchronize access to the mPlayingSound ArrayList which holds the current list of sounds being played. The mixer thread reads from this list whilst the application thread appends new sound requests to it.
Conclusion
The .Net Compact Framework is a suitable candidate for games on the Pocket PC platform.
The main advantage is of course the CLR: compile it once and run it everywhere. Once the .Net Compact Runtime has been installed on the device, the assembly can be deployed no matter what the underlying architecture is.
Draw backs exists though. Blitting full-screen graphics in a Windows.Forms and performing offscreen rendering using solely the Managed interface to GDI+ is not exactly fast. It is barely usable. The game presented here does not try to optimize the rendering to its extreme, which I believe would come at the expense of a simple and somehow generic framework. As it is, the current engine is capped to 10 fps max. It can achieve this frame rate on the simulator but I never saw it go past 4 or 5 fps on a Cassiopeia E-125. By disabling part of the core rendering loop, it is easy to notice that the more small sprites need to be blitted in the offscreen bitmap, the slower the game gets. These graphic updates could probably be made a bit faster by analyzing the needs of the current game and reducing screen updates to the minimum.
The other obvious limitation of the .Net Compact Framework is the complete absence of sound support. This is not surprising since .Net focus is obviously on building applications relying on Windows.Form. Nevertheless it is a bit disappointing that not even WinCE's PlaySound made it to a Managed class available by default. Since this would not address the needs of a game, it is not a major issue here.
Deployment is another issue. Visual Studio 7.1 has the ability to generate CAB files. It generates 5 of them, for different architectures. This seems at first surprising since one of the main points of using .Net is to have a single platform-agnostic executable. The reality is that the CLR needs the .Net Compact Framework to be installed and the generated CAB files contain a little native DLL that will check if this is the case. So in effect, unless one assumes the framework is installed, it is necessary to have one CAB per targeted architecture. Fortunately, it seems reasonable to limit ourselves to ARM (for all recent Pocket PCs), MIPS (for older Pocket PCs) and maybe x86 (for the simulator).
The underlying framework presented here can be reused for other applications. It is made available freely under a GPL license. I tried as much as possible to dissociate the game logic from the framework, in the hope that it would be easy to reuse. As noted before, the frame per second speed of the current game is rather low. This is due to the code being written as generic and as modular as possible for the purpose of this article. In real life, you may want to introduce a phase of optimization -- analyze speed bottlenecks and rewrite part of the core/game loop or maybe use some unsafe code to perform internal bitblits for example. This is left as an exercise for the reader :-)
Finally, I'd like to thank Mathias for allowing me to use his Cassiopeia E-125 for testing. Since it is powered "only" by a 140 Mhz MIPS processor, it is by far not the fastest Pocket PC currently available, which makes it great to see performances issues first hand. I haven't had a chance to run the game on a recent ARM-powered Pocket PC.
History
- 2004/05/27: Version 1.0 of Nerdkill Pocket and original article.
- 2004/06/27: Article update (typos, etc.). Splitted demo project in per-architecture downloads.
This page is also mirrored on the Nerdkill home page: http://www.alfray.com/projects/Nerdkill/.
Raphael is a senior software engineer with a background in electronics engineering.
He enjoys programming in C++ since 1994.
He developed professional software for the BeOS and now focuses on Windows, MacOS and Linux software development.
He uses C++, C#, Java,VB.Net, PHP, Bash and Perl on a regular basis. He is familiar with C, Objective-C, VB6, Python, ML, Haskell, Lisp, Scheme, some obsolete languages (Basic and Pascal) and x86/Motorola assembly languages.
Raphael is a big fan of the .Net platform.
A number of open source personal projects can be found on his web site.


 General
  News
News  Suggestion
  Question
  Bug
Bug  Answer
  Joke
Joke  Praise
  Rant
Rant  Admin
Admin 


 constantly rushing to get the job done sucks LOL. It's nice to see something that has been well thought out and put together. Thanks!!!
