In the last blog post, we have discussed about opening the page in a new browser window in ASP.NET MVC. You can read that article here. In this article, we will go over HiddenInput and ReadOnly attributes.
HiddenInput attribute is useful when you want to render a property using input type=hidden. This attribute is extremely useful when you don’t want the user to see or edit the property, but you need to post the property value to the server when the form is submitted, so the correct record can be updated. HiddenInput is present in System.Web.Mvc namespace.
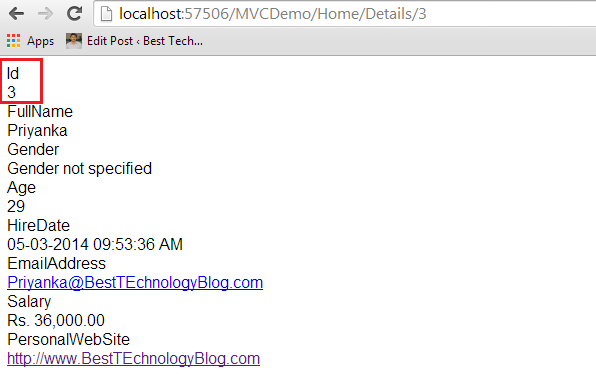
Let’s try to understand this with an example. We will be using the same example which we have used in the previous article. Notice that when we navigate to Details action method within Home controller, we can see the employee’s full details including the Id property.
But we don’t want to allow the user to see the Id property. To achieve this, we can simply decorate the Id property within the Employee class with HiddenInput attribute.

Let’s build our solution and refresh the View. We can see that the Id is now hidden.
Let’s check whether we can see the Id while we try to edit the Employee details. For this, the first step is to implement Edit action method within the Home controller. Modify the Edit action method like below:
public ActionResult Edit(int id)
{
    SampleDBContext db = new SampleDBContext();
    tblEmployee employee = db.tblEmployees.Single(x => x.Id == id);

    return View(employee);
}
The next step is to implement Edit View. Right click on the Edit action method and select Add View.
Copy and paste the following code to Edit.cshtml.
<div style="font-family:Arial">

@using (Html.BeginForm())
{
    @Html.EditorForModel()
    <br />
    <br />
    <input type="submit" value="Save" />
}
</div>
With all these changes, let’s build the solution and navigate to Edit mode. Notice that we can see the employee’s full details except the Id property.
If we right click on the page and select View page source, we can see an input element with name=Id, type=hidden and value=3. So when we click on the Save button, the Id of the employee also will be posted to the server and we can use that Id to update the correct employee record.
The next attribute that we are going to discuss is ReadOnly attribute. ReadOnly attribute is present in System.ComponentModel namespace. As the name suggests, this attribute is used to make a property read only. Please note that we will still be able to change the property value on the view, but once we post the form, the model binder will respect the ReadOnly attribute and will not move the value to the property.
For example, if we decorate the EmailAddress with ReadOnly property, we will still be able to change that on the View. But when we submit the form, the default model binder in ASP.NET MVC will not move that value from the posted form values to the class properties.
Let’s look at this in action. First of all, decorate the EmailAddress with ReadOnly attribute.
Within the Home controller, we need to implement the Edit action method that respond to the Post operation. Copy and paste following code to the Edit action method.
[HttpPost]
public ActionResult Edit(tblEmployee employee)
{
if (ModelState.IsValid)
{
SampleDBContext db = new SampleDBContext();
tblEmployee employeeFromDB = db.tblEmployees.Single(x => x.Id == employee.Id);
employeeFromDB.FullName = employee.FullName;
employeeFromDB.Gender = employee.Gender;
employeeFromDB.Age = employee.Age;
employeeFromDB.HireDate = employee.HireDate;
employeeFromDB.Salary = employee.Salary;
employeeFromDB.PersonalWebSite = employee.PersonalWebSite;
var Manager = ((IObjectContextAdapter)db).ObjectContext.ObjectStateManager;
Manager.ChangeObjectState(employeeFromDB, System.Data.Entity.EntityState.Modified);
db.SaveChanges();
return RedirectToAction("Details", new { id = employee.Id });
}
return View(employee);
}
Notice that we are populating all the properties except the EmailAddress. Let’s put a break point inside the Edit action method and run the solution in debug mode. Let’s change FullName to Priyanka2, Gender to Female2. Let’s also change the EmailAddress to Priyanka2@BestTEchnologyBlog.com.
After these modifications, when we click on the Save button, notice that all the properties are changed except the EmailAddress. EmailAddress is null because we have decorated EmailAddress property with ReadOnly attribute. So, it is not going to receive any value from the posted form.
If we press F5, the new values will be saved and we will be redirected back to the Details action method. Notice that FullName, Gender have changed, but EmailAddress has no change.
We can also make property of a class readonly simply by removing the SET accessor.
Reference
Arun Ramachandran (http://BestTEchnologyBlog.Com)
Arun Ramachandran is a Software Engineer having hands on experience in different Microsoft Technologies who is presently working in Experion Technologies, India. He has written over 95 articles on the subject on his blog at http://BestTEchnologyBlog.com. Along with 3 years of hands on experience he holds a Master of Computer Applications degree from Cochin University of Science & Technology (CUSAT).


 General
  News
News  Suggestion
  Question
  Bug
Bug  Answer
  Joke
Joke  Praise
  Rant
Rant  Admin
Admin 


