Contents
In this article, we will discuss all the basics of Azure Management to manage our Web API. Here, we will not discuss about the Azure Management, how it works and how we can create Virtual Machine, Create Cloud App and host Apps with Azure, although our focus will be to stick only to Managing Web APIs using Azure Management.
In this article, we will:
- Create an ASP.NET WEB API
- Host/deploy our services to Azure
- Manage our services using Azure API Management
To work with this article, we need:
- Visual Studio 2013 or later (you can use community edition)
- SqlServer 2012 or later (you can use Express edition)
- Basic knowledge of ORM (we will use FluentNHibernate in our demo app)
- Basic knowledge of ASP.NET WEB API
- Basic knowledge of ReSTful services
- A valid Windows Azure subscription (if you do not have it, get a one month free subscription)
To fulfill the purpose, we need ASP.NET WEB API, which hosts on the server. In this article, we are not going to discuss how to create an ASP.NET WEB API.
To know more about how to create an ASP.NET WEB API, please refer to this article: CRUD Operations with ASP.NET Web API using FluentNHibernate, Repository Pattern.
I hope you have gone through the article mentioned in the preceeding step. Now, download the demo project if you did not download it yet. Otherwise, you can find the complete source code here: Crudd operations with WEB API.
Let's now deploy our above created services to our Azure server.
- From Solution Explorer, Right click and Publish
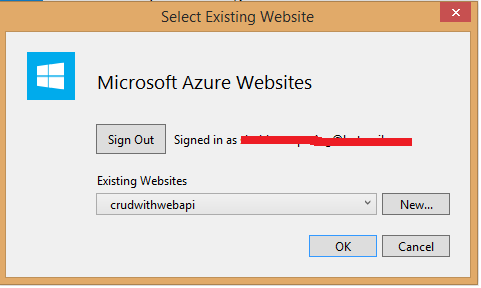
- We are deploying/publishing our ASP.NET WEB API as a Azure Website so, we can get a robust endpoint – we will discuss about this in upcoming sessions/articles.
- And then, click on Publish.

- After a few minutes, our WEB APIs will be available.
- Check by browsing URL: Crud With Web API.
Let's proceed to setup our Azure API Management.
Now, we are ready with our WEB API to host/manage these with AZURE MANAGEMENT. If you do not have any Azure subscription, try a trial one from here: Sign Up Azure Trial.
First, we need to create an API Management instance. Follow these step(s):
- Log into your Azure Management portal from here: https://manage.windowsazure.com.
- If you do not have any subscription, get one from here: http://azure.microsoft.com/en-us/pricing/free-trial.
- Click New, App Services, API Management, Create
- Now from NEW API MANAGEMENT SERVICE:
- In URL textbox, specify a unique sub-domain name to use for the service URL.
- Choose the desired Subscription and Region for your service instance. After making your selections, click the next button.
- Enter Organization name and E-mail id
- API Management service instances are available: Developer, Standard and Premium. By default, new API Management service instances are created using the Developer tier. To select the Standard or Premium tier, check the advanced settings checkbox and select the desired tier on the following screen.
(P.S.: Premium is not available in promotional and Free/Trial accounts).
- Finally, click to create.
- Here, we are on our API MANAGEMENT screen.
- Click on MANAGE from bottom of your dashboard and we will be on:
- To create our first API, click APIs from the API Management menu on the left, and then click Add API.
-
Let's discuss what we did in preceeding section(s):
- We provide a unique name to our API as ‘
Demo’ into the Web API Title textbox. Web API Title provides a unique and descriptive name for the API. It is displayed in the developer and management portals. - We provide the actual address where our WEB API is hosted, please refer to the above section, where we discussed about the deployment of our WEB API to Azure. http://crudwithwebapi.azurewebsites.net/ into the Web service URL. Web service URL references the HTTP service implementing the API. API management forwards requests to this address.
- We provide a suffix as ‘
demo’ to our API. Web API URL suffix is appended to the base URL for the API management service. Our APIs will share a common base URL and be distinguished by a unique suffix appended after the base. - Web API URL scheme determines which protocols can be used to access the API. HTTPs is specified by default.
(P.S.: Here we selected both HTTP and HTTPs protocols – will discuss about this
in coming sections/series of articles)
- The API section has six tabs.
- The Summary tab displays basic metrics and information about the API.
- The Settings tab is used to view and edit the configuration for an API, including authentication credentials for the back-end service.
- The Operations tab is used to manage the APIs.
- The Security tab can be used to set Proxy Authentications using Basic and Mutual certificates or can be used to set OAuth 2.0 – we will not discuss this in details.
- The Issues tab can be used to view issues reported by the developers using our APIs.
- The Products can be used to create and manage products for our APIs – in this article, we will be not discussing this section.
Follow these step(s):
- Go to Operation tab.
- We did not create anything so, this tab will be empty.
- Click on ‘Add Operation’ to add new API operation.
-
In our Web APIs, we have the following resources:
| Action | HTTP method | Relative URI |
| Get a list of serverdata | GET | /api/serverdata |
| Get a serverdata by ID | GET | /api/serverdata/id |
| Get serverdata by datatype | GET | /api/serverdata/type/datatype |
| Get serverdata by machine IP | GET | /api/serverdata/ip/ip |
| Create a fresh serverdata | POST | /api/serverdata |
| Update an existing serverdata | PUT | /api/serverdata/id |
| Delete an existing serverdata | DELETE | /api/serverdata/id |
- Let's add our very first API resource as an operation in API Management portal.
In the preceeding section, we specified:
- HTTP verb as a GET – for retrieving the things.
- URL template – our actual resource of Web API (as mentioned in the above table).
- For this operation, we did not have any Request parameters so, no need to define any one.
- Note that we can give parameters as query parameter or Body.
- Under RESPONSES, we select HTTP STATUS code 200 which is ‘OK’ means when everything will be fine, it will return specified application/json format.
We are done with our APIs work. We have hosted our Web API with Azure API Management. Now, these are ready to use or to consume by developers. Developers will use Azure API Management developer portal to use/see all APIs related documentations.
Unfortunately, yet we did not register any user as a developer, let's follow these steps to register our API products.
(P.S.: we will discuss in coming session – how to setup different products
and mange users with Azure API Management).
To create subscribers, we can do it by invitation and with the use of Administrator portal of API Management.
Here, we are using Developer portal where we have already invited/shared our development portal links to our end-users or targeted audience for development.
In this section, we are going to discuss all about Developer portal in brief.
This will be the default Home page for every developer. Developers can go through the app APIs documentation, your API Blog (if created) and other applications (if you are providing any for any Product).
Since we are not going into details of the Developer Portal, let's sign up as a Subscriber.
We can test our hosted APIs via any external Client or using Console from within API Developer Portal.
- Click on Open Console from current Get
ServerData API. - Here, you should need API key, select either Primary or Secondary.
- After hitting
HTTPGET (this is a GET Resource), you will get the related output.
We are done with everything to manage the Web API with Azure API Management.
This article explained the creation of an ASP.NET Web API, hosting to Azure and management using the Azure API Management.
In future sessions/articles, we will explain more about advanced topics/features of Azure API Management.
Learning never ends.


 General
  News
News  Suggestion
  Question
  Bug
Bug  Answer
  Joke
Joke  Praise
  Rant
Rant  Admin
Admin 


