Contents
Use the HTML Design View within Visual Studio .NET 2003 for documentation that would otherwise end up as plain text. Made fairly painless with a few provided external tools.
- Visual Studio .NET 2003 (other .NET versions untested).
- OS: Windows 98, Windows NT 4.0 Service Pack 3, or better.
- Perl (installation instructions below, no need to know Perl).
Here's a way to use the HTML Design View in Visual Studio .NET 2003 for your supporting documentation, including development logs, drafts of Help files, quick professional-looking reports, illustrated code samples, basically anything that could use pictures or a touch of style when you don't want to bother leaving Visual Studio.
If you liked the screenshot, here's the path ahead:
- Install Perl and a few helper Perl packages.
- Download the "stylishdocs" ZIP file at the top of this article, which contains document templates (log, report, help draft) and some Perl programs.
- Set up some external commands and shortcut keys in Visual Studio.
- Use one of the document templates as a starting point, and edit your document using the Design View in Visual Studio.
And here's what you'll get:
- Line wrapping and paragraph indenting will give you automatically reformatted paragraphs without having to use blank paragraphs as separators (log files included).
- VS built-in commands will let you use styled headings, create numbered lists (with automatic renumbering) and bulleted lists, use bold, italic and colors, create tables etc.
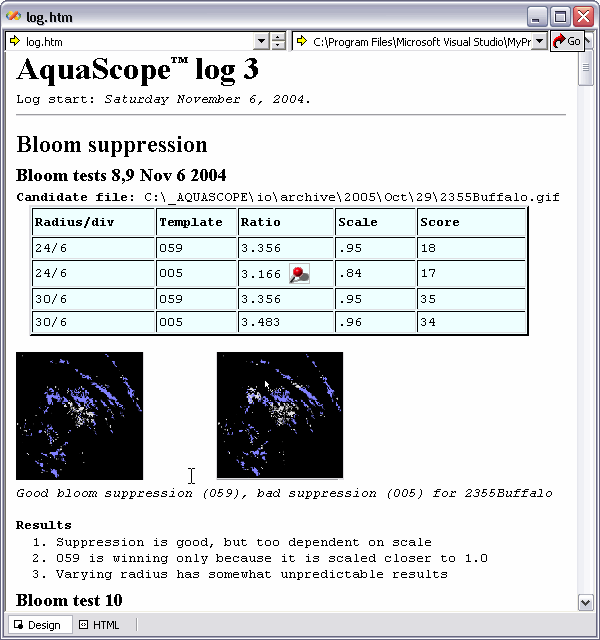
- New external tools to insert images simply, follow links, paste in code samples, and one "nice to have": take a table from a plain text document and paste it into your document as a true table, for example, the table in the picture above.
Installation details are next, then a small user's guide to finish up.
If you already have ActiveState's ActivePerl installed, skip ahead a bit to the (three extra packages) part below.
Otherwise, fire up your web browser and head to:
http://www.activestate.com/Products/ActivePerl/system_requirements.plex
This is the requirements page for installing ActiveState's version of Perl. If you're running WinNT/2000, you might want to install MSI before installing Perl, but it's not required. To download and install MSI, click on the "for WinNT/2000" link on the requirements page under the "Windows Installer requirements" section. If you're using XP, you already meet the requirements. Perl needs about 70 Meg for installation, which at a dollar a Gigabyte for disk space these days will set you back seven cents.
Click on the "DOWNLOAD" link at top-right of the requirements page to start off your Perl download. After optionally filling in some registration info, click on the "MSI" link on the download page (or the "AS package" link if you didn't install MSI), at top left under the "ActivePerl 5.8" heading in the "Windows" section. Your Perl download will take a minute....
Double-click the Perl installer you downloaded, to run it. You should especially accept the default location for Perl, C:\Perl, otherwise, accessing and updating Perl can be rather tedious. You should also allow Perl to be added to your environment Path variable. The other options aren't so important.
To verify that Perl was installed correctly: open a command prompt window, and type "perl -v": you will see a brief version message.
(Three extra packages): In your command prompt window again, type "ppm", which starts up the Programmer's Package Manager, a utility that lets you install Perl add-ins or packages. Then type (without the quotes) "install Win32-API"; when it finishes, type "install Win32-GUI"; and when that's done, type "install Win32-FileOp". Type "q" to quit PPM after the dust settles. If PPM says that these items are already installed, then you don't need to do anything else, your Perl is ready to go.
If you're new to Perl, you might enjoy looking at Start>Programs>ActiveState ActivePerl 5.8>Documentation, but you won't need to for stylish docs.
Download and expand stylishdocs.zip from the "Download everything you need for stylish documents" link up above. The resulting \stylishdocs folder contains HTM/CSS templates for starting new log, report and help documents, and a few Perl programs in the \vsprogs subfolder together with a small helper application, InvisiPerl.exe.
Move the entire \vsprogs subfolder from \stylishdocs into your new C:\perl folder, ending up with C:\Perl\vsprogs.
Next, we'll set up external commands to call the Perl programs. Afterwards, they will be available under Visual Studio's Tools menu, and in the last installation step, we'll assign shortcut keys to them.
There are four external commands to set up, each done the same way. In Visual Studio, select "Tools>External Tools...", then add the four commands as follows in the resulting "External Tools" dialog:
Click the Add button for each.
Then for each tool, copy and paste in the following (leave the "Initial directory" field blank, and remove any checks in the three checkboxes "Use Output window" etc. at the bottom of the dialog):
Tool 1:
- Title: Paste Code
- Command: C:\Perl\vsprogs\InvisiPerl.exe
- Arguments: C:\Perl\vsprogs\cpp2htm.pl 4 H > C:\Perl\vsperlerror.txt 2>&1
Tool 2: There's one potential change to make to the arguments for Paste Image. Any styled document you make will have an associated "images" directory at the same level, where all of its images are stored, and your img src attributes will all contain relative paths to that location. But you can also have a "common images" directory that can serve as a source for images in any styled document, perhaps a directory where you put all screenshots: you can use any directory you like, just change the "C:\CommonImages" argument below to your preferred directory. The "Pasting in an image" section under "Working with styled documents" below explains how this common directory is used, in more detail. If you don't want a common images directory, or like the name as-is, you can leave the arguments as shown below:
- Title: Paste Image
- Command: C:\Perl\vsprogs\InvisiPerl.exe
- Arguments: C:\Perl\vsprogs\imglink.pl H $(ItemPath) images "C:\CommonImages" > C:\Perl\vsperlerror.txt 2>&1
Tool 3:
- Title: Paste Table from text
- Command: C:\Perl\vsprogs\InvisiPerl.exe
- Arguments: C:\Perl\vsprogs\tableize.pl H yes > C:\Perl\vsperlerror.txt 2>&1
Tool 4:
- Title: Open File from full path
- Command: C:\Perl\vsprogs\InvisiPerl.exe
- Arguments: C:\Perl\vsprogs\openlink.pl > C:\Perl\vsperlerror.txt 2>&1
In addition to shortcut keys for those four external commands just created, we'll add a shortcut for "Paste as HTML", which is used by the Perl programs but can also be used by you directly.
While you're creating shortcuts, Visual Studio might interrupt and ask you to accept making a copy of your "Keyboard mapping scheme". This is a way of preserving your old keyboard shortcuts, and your new scheme will be given a new name such as "Copy of Visual C++ 6".
First, the "Paste as HTML" shortcut:
- Select "Tools>Options...", and then under the "Environment" heading, click on "Keyboard".
- In the "Show commands containing" field, type "HTML".
- Select the "Edit.PasteasHTML" command in the resulting list.
- Down lower in the dialog, under the "Use new shortcut in" menu, select "HTML Editor Design View".
- Then click in the "Press shortcut key(s)" field to the right of the menu.
- Hold the Shift and Ctrl keys down, and tap the "H" key to enter your shortcut.
- Click the "Assign" button just to the right, then click OK.
Now you can use the "Paste as HTML" command while in HTML Design View, by pressing CTRL-SHIFT-H. This pastes in your selection without escaping any special HTML characters such as "<"; in other words, it allows you to paste in HTML copied from a text file as functional HTML rather than having the HTML converted to text by using "<" in place of "<" etc.
That capital H for "Paste as HTML" is also used by three of the external tool commands we set up just above: if you take a look at the arguments for tools 1, 2 and 3, you'll see a capital H. If you decide that you'd rather not use capital H as the shortcut key for "Paste as HTML", revisit the "Tools>External Tools..." dialog and change the capital H in the arguments lists to the key you prefer. For example, if you'd rather use a lowercase j for the shortcut, change the H to j for the three tools: the arguments for "Paste Code" would then be "C:\Perl\vsprogs\cpp2htm.pl 4 j", and similar changes for "Paste Image" and "Paste Table...".
And finally, shortcut keys for those four new external commands. They're set up in the same way that we set up the "Paste as HTML" shortcut just above, but we're pushing the limits of Visual Studio's flexibility here, so when we go to "Tools>Options...>Environment>Keyboard", we won't be looking for the names of the tools we set up ("Paste Code" etc.); instead, we'll be looking for "Tools.ExternalCommandN" where N is a number between 1 and 24, e.g.: "Tools.ExternalCommand14".
Take a look under your "Tools" menu and you'll see the four new external commands, "Paste Code" etc., listed in a subsection of the Tools menu, between two separator lines: the position of the command within this subsection is the external command number to remember; so for example, if "Paste Code" is the first item below the divider line, then the command to set up the shortcut for it is called "Tools.ExternalCommand1". If you've added the commands in the same order as described above, then the next menu item below "Paste Code" will be "Paste Image", corresponding to "Tools.ExternalCommand2" in our example. Take a note of the numbers to use for the four commands, and then you can add the shortcut keys for them.
Select "Tools>Options...", and then under the "Environment" heading, click on "Keyboard". In the "Show commands containing" field, type "external", which will reduce the list of commands to the "Tools.ExternalCommandN" items.
For each of the four shortcuts to add:
- Pick the one with the number corresponding to the command you're adding a shortcut for, e.g.: "Tools.ExternalCommand14".
- Down lower in the dialog, under the "Use new shortcut in" menu, select "HTML Editor Design View".
- Click in the "Press shortcut key(s)" field to the right of the menu.
- Enter your shortcut, and click the "Assign" button for each as you go. This list is just a suggestion, and you can use any shortcut keys you prefer instead.
- "Paste Code": CTRL-P (hold down the Ctrl key and then press the "P" key, no shift for this or any of the following)
- "Paste Image": CTRL-I
- "Paste Table from text": CTRL-T
- "Open File from full path": CTRL-U
Click the OK button and then take a look under your Tools menu to see your new shortcuts beside the command names.
Done! We'll finish this up with a brief guide, mainly about using those four new tools you just added.
To start a new development log, copy "log.htm" and "log.css" from the \stylishdocs folder that you retrieved to the place where you want to keep your new log. Rename "log.htm" to suit your purpose. The reason you're copying "log.htm" is that it contains a link to the "log.css" stylesheet. If you expect to put any images in your document, create an "images" directory at the same level as your document and CSS files. Now you can open your document in Visual Studio and edit it in Design View.
If you're doing a report or help file draft, you'll find report and help templates in the \stylishdocs folder that you can use instead as a starting point, though you might want to tune up the CSS a bit. [I would have done that for you, but I seem to have misplaced your corporate style guide:)]
By default, your document and its associated CSS file and images subdirectory are all in the same place. This way, if you want to move or copy your document, you know where to find the CSS file and images that go with it.
The "Formatting" toolbar contains styling buttons and menus allowing you to use headings, create numbered lists, use bold and italic etc.
For plain text, use the "Normal" style. In a log using log.css, normal paragraphs will start flush left, and there will be no extra spacing between paragraphs, giving the same look as plain text - but second and subsequent lines in a paragraph will be indented slightly.
Numbered lists will be automatically renumbered as you edit them, as promised. Bulleted lists are also usable. For tables, there's an entire main "Table" menu (and see "Pasting in a table" below). For logs, the log.css entry for table cells (TD) just sets the font to Courier New, otherwise no style overrides are supplied for tables. Want bold table headings? Drag across the heading row and click the "B" button.
Copy your code, switch to your document, and select the "Paste Code" command. Code in just about any language should paste fine. Results look best if you copy complete lines. The appearance is partly governed by the <PRE> element entry in your CSS file, but tabs are converted to spaces before pasting because the width of a tab in a <PRE> element is 8 spaces. If you don't use 4 spaces per tab, edit the arguments supplied to the Paste Code command, "C:\Perl\vsprogs\cpp2htm.pl 4 H" etc. Changing the "4" to a "5" there will give you 5 spaces per tab when you paste code into your log, and also prove to your associates that you don't acknowledge peer pressure.
To go back to a source file from HTML, do an Edit>Advanced>Format Selection after pasting the code. Some tools, such as Visual Assist, can be set up to do this for you.
Paste Image works in two ways, depending on where your image is to begin with. Let's take an image called "logo.gif" as an example. You can:
- First, copy the logo.gif image to your document's local "images" folder, or your "common images" folder, which is "C:\CommonImages" by default. To place your image element, copy just the name of the image "logo.gif" from somewhere; for example, type it into your Design View and Cut, then click where you want the image, and select Paste Image. If the image is in your common images folder, it will be copied to your document's local images folder if it isn't there already.
- Or copy a full path or URL for the image, such as "C:\snapshots\logo.gif" or "http://www.somewhere.com/images/logo.gif", then click and select Paste Image. In this case, the image will be copied to your local "images" folder, replacing any previous version. For a second paste of logo.gif, you would just need to copy the image name.
In both cases, there will be a copy of the logo.gif image in your document's local images folder at the end, and the image element will have a relative path to that folder such as <img src="images/logo.gif">.
Your common images folder can be any folder you like. To change it, replace the "C:\CommonImages" argument to Paste Image with your preferred folder. You can then make an image available to all your styled documents by placing it in your common images directory.
Having local copies of all images in your document's images folder with relative paths makes copying your document or working offline easier. One disadvantage is that your images done with Paste Image are all static copies, so you should consider inserting links by hand to images outside of your document's local images folder that are likely to change.
By the way, you can paste images correctly into any styled document no matter what VS project or solution is open, it doesn't have to be the one that "owns" the document.
To change the displayed size of the image, it's best to switch from "Design" view to "HTML" view and edit the HTML directly. If you right-click on an image in Design View, there's a menu item that lets you add default width/height attributes to your image, saves a bit of typing.
Select the table in a plain text document, switch to your styled document, and use the "Paste Table from text" command. The fields in your plain text tables should be separated by either "one or more consecutive tabs, with optional spaces on either side of the group of tabs", or by just "one or more spaces". If a row contains any tabs, the former rule will be used to split your fields up into table cells: otherwise, any run of spaces will count as a field splitter. So you can have a row of column titles separated by tabs, and then rows of numbers separated by just spaces, for example. If your column titles are underlined with ---- or ==== characters, that row will be skipped when pasting in your table.
In the Design View for your document, click anywhere in a line that contains a full path to a file or a URL, select the "Open File from full path" command, and the corresponding file will open in a new window.
If the file has an extension that is recognized as appropriate for Visual Studio, then the file will be opened in Visual Studio. If the extension is not recognized, or the path is actually a URL, then the file will be opened using the default application for the file's extension. To add or remove extensions associated by the "Open File from full path" command with Visual Studio, edit the list of extensions at the bottom of "C:\Perl\vsprogs\openlink.pl".
Examples (with default extension settings):
- C:\Program Files\Microsoft Visual Studio\MyProjects\Nowcaster\Docs\indexes.txt - opens in Visual Studio.
- C:\Program Files\Microsoft Visual Studio\MyProjects\Nowcaster\Docs\Images\aquascope.gif - opens in the default "GIF" editor, not VS.
- http://www.somewhere.com/tocBrowseCL_E.asp?lang=en&selLetter=A#A - opens in the default web browser, not VS.
- www.somewhere.com - also opens in the default web browser.
If line wrapping breaks your full path or link across multiple lines, click in any of the lines. Note: this command isn't sophisticated enough to deal with two or more paths on one line, and will typically open the leftmost one.
With several styled documents in the same folder, all of their images will end up in the same "images" subfolder. Fine for you, but what if you want to send the document to someone else, and don't want images from other documents to go along for the ride?
If you originally created the styled document in its own folder, then it will have its own images subfolder, and you can just copy the entire folder containing the styled document.
Otherwise, a good portable way to copy a single styled document (let's call it "docname.htm") is to open it in Internet Explorer and use "Save As..." to save it as a "Web Page, complete". This puts your document's CSS file and any associated images into a "docname_files" folder at the same level as your copy, and copies only the images that are actually used in your document.
Feel free to tune up the CSS. The "log.css" file, for example, contains entries for paragraphs, ordered lists, and table elements etc. which adjust font and margin settings. Basically, you have Courier New with minimal margins.
The name of your standard images folder is used in just one place, in the arguments for the "Paste Image" tool, C:\Perl\vsprogs\imglink.pl H $(ItemPath) images "C:\CommonImages" etc. If you prefer a different name for the folder, change "images" in the argument list to your preferred name. As mentioned above, the "C:\CommonImages" argument is the name of a directory to use for images common to all your styled documents, and you can replace this with any location you like. The quotes are only needed if there's a space in the path to the directory.
"Paste Table from text" can be persuaded to apply a bit of styling to your pasted-in tables, an example being the table in the screenshot up above. To apply the styling, bring up the arguments list for the "Paste Table from text" command and change the last argument from "no" to "yes". To change the table styling details, look for "$tableStart" near the top of C:\Perl\vsprogs\tableize.pl.
- When you do a normal paste into your HTML Design view, what you paste will remain selected. Tapping the right arrow key moves you onwards.
- On rare occasions, a paste into a Design View might end up off by a few characters: the only fix I know of is to undo, click very firmly at the spot where you really want the paste, and paste again.
- Cursor maintenance sometimes falls asleep in the Design view - waving the mouse around often wakes it up. Cursing doesn't help:)
- If you add additional Tools, the numbering of your external commands will change if the new tools are inserted before the ones you added here; in that case, you'll need to reassign the shortcuts for the four commands after determining their new positions in the Tools menu.
If one of the Perl-based tools that you added runs into trouble, it puts a message in C:\Perl\vsperlerror.txt. Commonest error for me at least, is trying to paste in a link to an image that doesn't exist (pushpinn.gif).
If you run a Perl program directly as a VS external tool, you'll have a "did you use that flashy thingy on me?" experience as a command prompt window briefly appears. InvisPerl.exe runs the Perl program but suppresses the command prompt window. There's a download link for the InvisiPerl project at the top of this article, but note: you don't need the project for stylish logs. InvisiPerl is just a wrapper for the RunSilent function in the Code Project article Running console applications silently by Steven Szelei - thanks Steven!
I briefly explored automation (OLE) for the added commands, but couldn't find a way to access the selection in an HTML Design View. So the Perl programs manipulate Visual Studio by means of "simulated typing" - the openlink.pl program behind "Open file from full path" mostly just does what you would do, it selects the full path, copies it, calls up the Open dialog, pastes in the path, and presses Enter.
I used Perl for this because it was the quickest approach for me, and I'm not in the VS add-in business (anyone should feel free to rewrite them as add-ins if that sounds like fun). The Perl programs are intended to be simple to read and tweakable by you, rather than models of modern Perl style. There are some snippets that you might find useful, such as "sub SendCharacters" which sends simulated key presses to the front window, and regular expressions near the top of perl/vsprogs/openlink.pl to recognize full file paths and URLs.
And that's a wrap. I hope you enjoy having stylish documents in Visual Studio, and if you come up with improvements or additions, don't be shy about sharing them!
Ken likes tennis, the piano, Buffy, and programming, in no particular order.


 General
  News
News  Suggestion
  Question
  Bug
Bug  Answer
  Joke
Joke  Praise
  Rant
Rant  Admin
Admin 


