Introduction
If you are anything like me, you've been spoiled by Intellisense and want everything to go as quickly as possible when
coding. So, when I make dialog boxes (as I am sure you do too), why should I have to set 4-5 things every time I want an OK
or Cancel button on a form?
Whenever I drop a button on a form, I inevitably forget one of the following 4 steps (except #3, that one's kind of
obvious).
- Set the Name to something resembling "OK" or "Cancel" so that it's not just called "button1".
- Set the DialogResult to DialogResult.OK or DialogResult.Cancel.
- Set the Text to "OK" or "Cancel".
- Set the Form's AcceptButton/CancelButton to your new OK/Cancel button (or pressing Enter/ESC won't press OK/Cancel).
I can't tell you how many times I have hit OK or Cancel and then wondered why it didn't do anything. Or the right thing.
Or only half of the right thing--the half in the OK button's event handler but not the half in the form's
if

(dialog.ShowDialog() == DialogResult.OK)
block. It seems like when it comes to OK and Cancel buttons, they should
"just work".
Out of completeness, I have added "Yes" and "No" buttons as well, which allows us to do Yes/No and Yes/No/Cancel scenarios
as well. I'll leave the useless Abort/Retry/Ignore scenario as a reader exercise.
Background
It's a (fairly) simple matter to overload these controls to get very close to what we want. This article is nothing
groundbreaking, just a nice time-saver. If you don't have any experience in making custom controls, this will be a nice
primer for you.
Using the code
If you just want to use the buttons, right-click on your Toolbox and select Choose Items... from the menu. Then just hit
Browse and go to where you saved the DLL. Hit OK.
Four new buttons will appear in your Toolbox. They all have the [ab] graphic like the built-in buttons, but they are
called OK, Cancel, Yes and No.
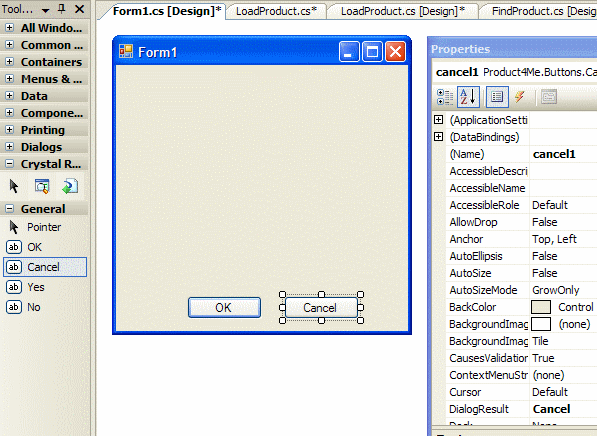
Just drop the OK button on a Form and you will see that the button is named "ok1", has the text "OK", has a DialogResult
of OK, and has the bold outline which signifies that this is the AcceptButton. If your dialog only has an OK button, you are
done.
If you have a Cancel button, just drop one of those. You will see it's named "cancel1" and has the text "Cancel" and is ,
in fact, a working Cancel button (even if you hit Esc).
You can do the same with Yes/No buttons as well. For a Yes/No/Cancel scenario, just be sure you drop the Cancel button on
the form after the No button, so that Esc behaves as expected.
Points of Interest
How does this code work? Well, it's fairly simple, but a little more difficult than I thought at first glance.
First, we need to inherit from the Button class. Simple enough, but to get the correct Bitmap in the
Toolbox, we have to use the Attribute [ToolboxBitmap(typeof(Button))]. We wanted something that is immediately
identifiable as an OK button, so I just called the class OK. This way, it is labeled "OK" in the ToolBox,
telling us immediately what this is for.
[ToolboxBitmap(typeof(Button))]
public class OK : Button
From this, Visual Studio will make controls named ok1, ok2, etc. (although I don't know why you
would ever need 2 OK buttons). I really wanted it to just be called OK, but I will settle for ok1,
since I have a feeling it will be very difficult to convince Visual Studio to cooperate on this point.
OK, it was simple enough to satisfy requirement #1. A button in a dialog named "ok1" is obviously the OK button. Nobody
reading the code should be confused when they see a method called ok1_Click. Next we need to set the
DialogResult, which can be easily done in the constructor.
public OK()
{
    this.DialogResult = DialogResult.OK;
}
There, #2 is easily solved as well. Changing the text to read "OK" when you drop it was not so simple. Because at some
point during the design process (after your control is created and shown), Visual Studio goes into it's default text-setting
mode of setting the Text to the same as the Name. I wasn't exactly sure of the best way of
handling this, so I just did something that seemed easy enough.
I attached a handler to the TextChanged event and then see if the Text is the same as the
Name. If it is, I change it to "OK". This should make it "OK" when dropped but still allow you the freedom of
changing it to "Submit" or "Save" or "Exit" later if somebody so desires ("somebody" being a company-wide committee that
doesn't understand Windows CUA guidelines, but that's a story for another day--and yes, they acutally had us rename all our
OK buttons to "Exit", even when it said "Exit" and "Cancel", which would be considered by most to be the same thing--but I
digress).
public OK()
{
    this.DialogResult = DialogResult.OK;
    this.TextChanged += OK_TextChanged;
}

private void OK_TextChanged(object sender, EventArgs e)
{
    if (this.Text == this.Name)
        this.Text = "OK";
}
OK, #3 is solved. Now, the button will immediately change it's own Text to "OK" when Visual Studio goes
through it's renaming operation. It's fun to watch it drop on there and always be labeled "OK". I feel like I'm cheating
the system somehow.
Setting the form's AcceptButton was the most difficult part of all. The problem is, the OK
could be dropped on a Panel or any other container.
I figured that the method I used to set the Text would be a good one here as well. Specifically, when the
OK is dropped on a Form (or anywhere else), it's Parent property would change at that
moment. So, I just travel up the generational tree parent to grandparent to great-grandparent, etc., until I find a
Form or a null. If I find a Form, I set it's AcceptButton property to
myself (this).
public OK()
{
    this.DialogResult = DialogResult.OK;
    this.TextChanged += OK_TextChanged;
    this.ParentChanged += OK_ParentChanged;
}

private void OK_ParentChanged(object sender, EventArgs e)
{
    Control parent = this.Parent;

    while (!(Parent is Form) && !(parent == null))
    {
        parent = parent.Parent;
    }

    if (parent is Form)
    {
        Form f = (Form)parent;
        f.AcceptButton = this;
    }
}
The design of the Cancel, Yes and No buttons are extremely similar, with the
CancelButton property being set instead for the Cancel and No buttons. I probably
could have used some inheritance, but the code is short enough that I didn't bother. I don't expect to make that many changes to it anyway.
Again, it is important to remember if you are making a custom Yes/No/Cancel dialog that you must drop the buttons in that
order if you want the Cancel button to, in fact, be the form's CancelButton.
History
2006-08-31 Uploaded to the CodeProject.
Paul Reid is the CEO (and still part-time programmer) of Product4Me Corporation, a web site company devoted to helping consumers get the individualized best fit for home theater (and other) products.


 General
  News
News  Suggestion
  Question
  Bug
Bug  Answer
  Joke
Joke  Praise
  Rant
Rant  Admin
Admin 


