Introduction
In contrast to WPF, there's no support for 3D in Silverlight 2.0. Still, it has the power of the .NET runtime built-in, so there's nothing to stop you from rolling your own little 3D engine in Silverlight. Not a high end one, but something to play around with and to add some neat effects to your RIA.
All you need is some understanding of math and the basic primitive of all things 3D - the triangle primitive. Specifically, I'm talking about a textured triangle with an image mapped on it.
Consequently, this article is all about implementing a triangle primitive as a custom control in Silverlight 2.0.
Using the triangle control
Using the control from XAML
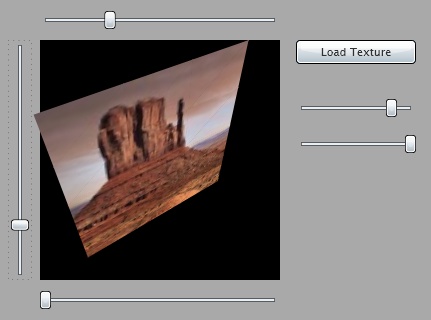
Here's a snippet that shows how the ImageTriangle control can be used directly in XAML:
<UserControl x:Class="Controls.Page"
    xmlns="http://schemas.microsoft.com/client/2007"
    xmlns:x="http://schemas.microsoft.com/winfx/2006/xaml"
    xmlns:xk="clr-namespace:XamlKru.Controls.Primitives;assembly=XamlKru.Controls"
>
    <Canvas ...>
        <xk:ImageTriangle Point1="0,0" Point2="180,20" Point3="0,200"
                          TexturePositions="0,0 1,0 0,1"
                          TextureSource="/Controls;component/checker.jpg"
        />
    </Canvas>
</UserControl>
As always, when you reference custom classes from XAML, you must add a namespace reference to the control assembly first:
xmlns:xk="clr-namespace:XamlKru.Controls.Primitives;assembly=XamlKru.Controls"
You can then reference the triangle in XAML with <xk:ImageTriangle ... /> and set the corner points (Point1, Point2, and Point3) via attributes as well as the TextureSource. TextureSource is an ImageSource that takes the image that will be rendered as texture onto the triangle. You can also set the texture coordinates by setting the TexturePositions, e.g., TexturePositions="0,0 1,0 0,1".
Using the control from code
Doing that in XAML is perfect for playing around with the control and getting to know how the various properties work and play together. However, when you want to use it for 3D or something similar, you're going to do it in code, be it C#, VB, or maybe IronPython.
In addition to the properties mentioned above, you can set all three corner points in a single method call in imperative code, which has some performance advantages:
tri1.SetPoints(new Point(0,0), new Point(100,0), new Point(0,100));
The TextureSource can be set directly to a BitmapImage, which allows you to use images downloaded from the web, or even from the local file system, as textures:
var texture = new BitmapImage();
texture.SetSource(inputStream);
tri1.TextureSource = texture;
There is also an IsClockwise property that you might want to use for backface culling in 3D.
tri.IsClockwise
How does it work?
How would you draw a textured triangle in Silverlight? There are two ways I could think of:
- use an
Image control, and clip half of it away with a clipping path - Use a
Path to draw the triangle shape, and add the image as an ImageBrush
I chose the second way, because it seemed to be a little bit faster.
Point1, Point2 and Point3 are implemented as Dependency Properties. Dependency Properties allow to perform calculations in the PropertyChanged callback and add the capability to take part in data-binding and animations.
In order to transform the triangle to fit the three corner points, I've added a MatrixTransform to the Path-element's RenderTransform. It is fairly straightforward to calculate the matrix elements from the given points. An article that explains how that works can be found here.
When you look at the control template and the UpdateCorners method, you will notice that there's a second transform applied as RenderTransform. When I got the code to work for the first time and created two triangles next to each other, I noticed a small, but irritating seam between them. This is due to how the antialiasing works in Silverlight. That's what the second transform is for. It scales the triangle up just a little bit (0.5 - 1 pixels on each side), just enough to overlap the seam.
Adding the texture
Great, now we've got a triangle that we can position arbitrarily. Are we done? Actually, no! Up to that point, the image on the triangle is fixed. What if you want to create a plane made of two triangles (or better 4 or 16, as I will explain below) - you don't want to load a separate image for each half!
We need a way to stretch and move the image position on the triangle itself. We need texture coordinates.
Again, this is done with a MatrixTransform. This time it is applied to the ImageBrush, filling the Path with a texture image. In this case, it is a little bit more tricky, though.
Effectively, what texture coordinates say is, where on the texture image the triangle lies. For the matrix applied to the ImageBrush, it has to be the other way round, we want to position the image as seen from the triangle's coordinate system.

We can do this by first calculating the matrix that maps the triangle onto the image and then inverting that matrix to get a transformation that maps the image onto the triangle. Exactly this is what's happening in the UpdateTexturePositions method:
var m = new Matrix(m11, m12, m21, m22, ox, oy).Invert();
_brushTransform.Matrix = m;
Limitations
When you create a plane from two triangles and transform it to 3D, you might notice that it doesn't look quite right. This is because the depth information is not used. The only way to get around that is by adding more triangles. If you use eight triangles instead of two, the texture will look more realistic in 3D. You have to find the right tradeoff between performance and visual correctness.
Moving on
This article doesn't explain how to do 3D, it just provides you with a basic building block! However, the project files contain some 3D code to get you started.
My experiments have shown that rendering something around 100 triangles is possible at an acceptable frame-rate on a recent machine. Nothing to get too excited about, you won't be able to build a Halo or Second Life in Silverlight anytime soon. At least, not on a PC. But, it will be enough to do Coverflow-style animations, spinning 3D globes, and 360° panoramas, or maybe even games.
History
- First version posted by Florian Krüsch on May 03, 2008.
- Updated the code in alignment with Silverlight 2 Beta 2 on June 11, 2008.
Florian Krüsch works as a Freelance Software Architect, Developer and Consultant in Düsseldorf, Germany.
He is excited about WPF, Silverlight and ASP.net as well as Enterprise Development on the .NET platform.
When not thinking, coding or listening to podcasts, he enjoys spending his time with his family and his little son Nicki.


 General
  News
News  Suggestion
  Question
  Bug
Bug  Answer
  Joke
Joke  Praise
  Rant
Rant  Admin
Admin 


