At the end of this tutorial, you will be able to create an animation of a ball being thrown and bouncing across the ground. You can see a sample here.
Introduction
This tutorial shows you how to create an animation of a ball being thrown across the screen, landing and bouncing. Is this useful? Well, not as useful as the navigation bar article I posted earlier on The Code Project, but I found a way to use it on my website so maybe you can as well. I did have a vision of Silverlight based shopping cart where any product you selected would be thrown across the screen, land in the shopping cart, and bounce around, but I will save that for another article! In the meantime, if nothing else you can use this article to learn a little more about the internals of a Silverlight animation Storyboard.
Step by Step Tutorial
Create a new project in Expression Blend.
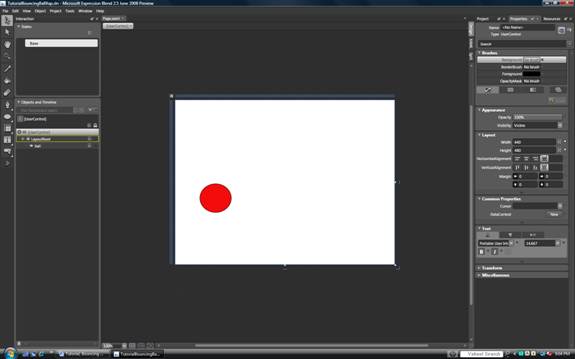
Draw an ellipse and name the ellipse “ball”:
The key to creating a bounce effect is to realize that in physics the vertical motion of a ball in motion is completely independent of the horizontal motion. What we're going to do is create two separate storyboards for each of these independent motions and then we're going to go into the XAML and combine them into one storyboard.
Create a new storyboard called “Bounce”.
Record a keyframe at time 0 for the ball to capture the current position. Then drag the yellow timeline bar to the 1 second position.

Now drag the red ball directly up. And record a key frame. At the one second point. Hit play and you should see the ball move directly up at a smooth rate and then stop.
Now let’s add some gravity. Click on the second keyframe bubble of the storyboard. Set the easing as shown below. This will make the motion slow down as the ball gets to the top of its motion. Confirm this by playing the storyboard. Once you've confirmed this, close out the storyboard.
Create a storyboard called Horizontal. Create a keyframe at 0 seconds, and then set the timeline to 2 seconds. Drag the ball horizontally to the right and create a keyframe at the 2 second point. Close out the storyboard.
Now let’s look at the XAML for the Bounce storyboard. Unless you drag the ball perfectly vertically you'll have two sections in the storyboard, one for animating the x direction and one for animating the y direction. You can tell which is which by looking for the line that ends TranslateTransform.Y or TranslateTransform.X. Delete the section that handles the X motion.
Now let’s make the ball return to its starting point.
Here’s the XAML beforehand:
<DoubleAnimationUsingKeyFrames BeginTime="00:00:00"
 Storyboard.TargetName="ball"
 Storyboard.TargetProperty=
 "(UIElement.RenderTransform).(TransformGroup.Children)
 [3].(TranslateTransform.Y)">
 <SplineDoubleKeyFrame KeyTime="00:00:00" Value="0"/>
 <SplineDoubleKeyFrame KeyTime="00:00:01" Value="-206">
  <SplineDoubleKeyFrame.KeySpline>
   <KeySpline ControlPoint1="0,1" ControlPoint2="1,1"/>
  </SplineDoubleKeyFrame.KeySpline>
 </SplineDoubleKeyFrame>
</DoubleAnimationUsingKeyFrames>
Notice it’s moving the ball from a position of 0 to a position of -206 in 1 second. ControlPoint1’s value of 0,1 indicates we are going to start at full speed and reach minimum speed at the end of the motion. To make the ball return back down, we'll copy the second keyframe, change time of the key to 2 seconds, change the destination of the animation to 0, and we'll reverse the sense of the easing defined by ControlPoint2. The results are as follows:
<DoubleAnimationUsingKeyFrames BeginTime="00:00:00"
 Storyboard.TargetName="ball"
 Storyboard.TargetProperty=
 "(UIElement.RenderTransform).(TransformGroup.Children)
 [3].(TranslateTransform.Y)">
 <SplineDoubleKeyFrame KeyTime="00:00:00" Value="0"/>
 <SplineDoubleKeyFrame KeyTime="00:00:01" Value="-206">
  <SplineDoubleKeyFrame.KeySpline>
   <KeySpline ControlPoint1="0,1" ControlPoint2="1,1"/>
  </SplineDoubleKeyFrame.KeySpline>
 </SplineDoubleKeyFrame>
 <SplineDoubleKeyFrame KeyTime="00:00:02" Value="0">
  <SplineDoubleKeyFrame.KeySpline>
   <KeySpline ControlPoint1="1,0" ControlPoint2="1,1"/>
  </SplineDoubleKeyFrame.KeySpline>
 </SplineDoubleKeyFrame>
</DoubleAnimationUsingKeyFrames>
Select the bounce storyboard and hit play. You should see the ball go up and down as if it’s been thrown up and down.
Now let’s add the X motion. Take a look at the second storyboard we made earlier called horizontal. Copy the DoubleAnimationUsingKeyFrames section that ends TranslateTransform.X and paste it into the Bounce storyboard. Open the bounce storyboard from the design review and hit play. You should see the ball move in a nice smooth arc as if it has been thrown.
<Storyboard RepeatBehavior="Forever" x:Name="Bounce">
 <DoubleAnimationUsingKeyFrames BeginTime="00:00:00"
  Storyboard.TargetName="ball"
  Storyboard.TargetProperty=
  "(UIElement.RenderTransform).(TransformGroup.Children)
  [3].(TranslateTransform.X)">
  <SplineDoubleKeyFrame KeyTime="00:00:00" Value="0"/>
  <SplineDoubleKeyFrame KeyTime="00:00:02" Value="297"/>
  <SplineDoubleKeyFrame KeyTime="00:00:03" Value="320"/>
 </DoubleAnimationUsingKeyFrames>
 <DoubleAnimationUsingKeyFrames BeginTime="00:00:00"
  Storyboard.TargetName="ball"
  Storyboard.TargetProperty=
  "(UIElement.RenderTransform).(TransformGroup.Children)
  [3].(TranslateTransform.Y)">
  <SplineDoubleKeyFrame KeyTime="00:00:00" Value="0"/>
  <SplineDoubleKeyFrame KeyTime="00:00:01" Value="-206">
   <SplineDoubleKeyFrame.KeySpline>
    <KeySpline ControlPoint1="0,1" ControlPoint2="1,1"/>
   </SplineDoubleKeyFrame.KeySpline>
  </SplineDoubleKeyFrame>
  <SplineDoubleKeyFrame KeyTime="00:00:02" Value="0">
   <SplineDoubleKeyFrame.KeySpline>
    <KeySpline ControlPoint1="1,0" ControlPoint2="1,1"/>
   </SplineDoubleKeyFrame.KeySpline>
  </SplineDoubleKeyFrame>
  <SplineDoubleKeyFrame KeyTime="00:00:02.5" Value="-20">
   <SplineDoubleKeyFrame.KeySpline>
    <KeySpline ControlPoint1="0,1" ControlPoint2="1,1"/>
   </SplineDoubleKeyFrame.KeySpline>
  </SplineDoubleKeyFrame>
  <SplineDoubleKeyFrame KeyTime="00:00:03" Value="0">
   <SplineDoubleKeyFrame.KeySpline>
    <KeySpline ControlPoint1="1,0" ControlPoint2="1,1"/>
   </SplineDoubleKeyFrame.KeySpline>
  </SplineDoubleKeyFrame>
 </DoubleAnimationUsingKeyFrames>
</Storyboard>
To add a bounce, we simply follow the same pattern and add additional key frames. To the DoubleAnimationUsingKeyFrames section that ends TranslateTransform.X, add one more keyframe at 3 seconds by adding the following XAML:
<SplineDoubleKeyFrame KeyTime="00:00:03" Value="320"/>
This XAML sets the position that the ball will move to at the end of the third second to 320 which is 22 to the right of where it was at the end of the previous keyframe. For the vertical portion of the bounce copy the last two keyframes of the DoubleAnimationUsingKeyFrames section that ends TranslateTransform.Y. Set the keyframe time for the peak of the bounce to 2.5 seconds and a height of -20. Have the bounce return to 0 at 3 seconds. This results in the addition of the following XAML:
<SplineDoubleKeyFrame KeyTime="00:00:02.5" Value="-20">
<SplineDoubleKeyFrame.KeySpline>
<KeySpline ControlPoint1="0,1" ControlPoint2="1,1"/>
</SplineDoubleKeyFrame.KeySpline>
</SplineDoubleKeyFrame>
<SplineDoubleKeyFrame KeyTime="00:00:03" Value="0">
<SplineDoubleKeyFrame.KeySpline>
<KeySpline ControlPoint1="1,0" ControlPoint2="1,1"/>
</SplineDoubleKeyFrame.KeySpline>
To make the throw occur over and over, add a RepeatBehavior to the Storyboard.
<Storyboard RepeatBehavior="Forever" x:Name="Bounce">
Finally let’s add code to start the throw on the load of the page:
public Page()
{
InitializeComponent();
Loaded += new RoutedEventHandler(PageLoaded);
}
void PageLoaded(object sender, RoutedEventArgs e)
{
Bounce.Begin();
}
}
That’s it. Hit F5 and you should see the ball being thrown and bouncing.
History
Mike Dobbles is a freelance software developer specializing in Silverlight and C#. Mike has over 15 years of software development experience.


 General
  News
News  Suggestion
  Question
  Bug
Bug  Answer
  Joke
Joke  Praise
  Rant
Rant  Admin
Admin 


