Inception
Having recently written something that required some buttons with a bit of polish, I started thinking about writing a button class for my little Wav recorder.. My first thought was of WMC's buttons.. There are a lot of things I don't like about WMC (that dumb summary page - and why is there a delete button there?, the lack of UI options -what's up with the other two styles.. did you fire the graphics guy?, and why don't they cache the damn thumbnails?!!! geez..), but one thing they did a decent job on was the user interface. It definitely has some wow-factor when seen for the first time. So.. I opened up WMC on my dev box, and took a closer look.. after some brisk inner dialog (aww man, that's gonna take a week to get right!), and as reckless with my free time as I am famous for being, I (you), now have a media button in my war chest.
Styles
There are three distinct styles of buttons in WMC: the 'Menu' button on the main page that sends you to a category of options, the 'Media' button controls that have no animation, and the 'Custom' buttons found throughout the option pages. I'll focus this article primarily on the more complex of the three: the Menu style.
Menu Style
Before creating sprites or starting timers and so forth, I did my best to get near the visual style of the button. The WMC frame has a black outer frame 1px wide (it looks better without it), with a 2px frame drawn with a diagonal gradient. This is achieved using a BackwardDiagonal blended gradient brush drawn via a GraphicsPath:
private void DrawMenuButtonBorder(Graphics g, RectangleF bounds)
{
using (GraphicsPath borderPath = CreateRoundRectanglePath(
g,
bounds.X, bounds.Y,
bounds.Width, bounds.Height,
CornerRadius))
{
using (LinearGradientBrush borderBrush = new LinearGradientBrush(
bounds,
Color.FromArgb(140, Color.DarkGray),
Color.FromArgb(140, Color.White),
LinearGradientMode.BackwardDiagonal))
{
Blend blnd = new Blend();
blnd.Positions = new float[] { 0f, .5f, 1f };
blnd.Factors = new float[] { 1f, 0f, 1f };
borderBrush.Blend = blnd;
using (Pen borderPen = new Pen(borderBrush, 2f))
g.DrawPath(borderPen, borderPath);
}
}
}
The menu style has a substantial drop shadow, also achieved with a gradient brush, and using a clipping region to contain the effect:
private void DrawMenuButtonDropShadow(Graphics g, RectangleF bounds,
int depth, int opacity)
{
RectangleF shadowBounds = bounds;
shadowBounds.Inflate(1, 1);
shadowBounds.Offset(depth, depth);
bounds.Inflate(1, 1);
using (GraphicsPath clipPath = CreateRoundRectanglePath(
g,
bounds.X, bounds.Y,
bounds.Width, bounds.Height,
CornerRadius))
{
using (Region region = new Region(clipPath))
g.SetClip(region, CombineMode.Exclude);
}
using (GraphicsPath gp = CreateRoundRectanglePath(g, shadowBounds.X,
shadowBounds.Y, shadowBounds.Width, shadowBounds.Height, 8))
{
using (PathGradientBrush borderBrush = new PathGradientBrush(gp))
{
borderBrush.CenterColor = Color.FromArgb(opacity, Color.Black);
borderBrush.SurroundColors = new Color[] { Color.Transparent };
borderBrush.SetBlendTriangularShape(.5f, 1.0f);
borderBrush.FocusScales = new PointF(.4f, .5f);
g.FillPath(borderBrush, gp);
g.ResetClip();
}
}
}
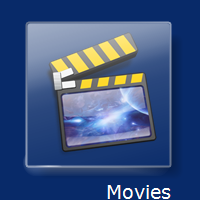
Now we have something that looks like this:

Then, we draw a nearly transparent mask within this, using a LinearGradient brush and a blend between translucent white and a nearly transparent silver, adjusting the blend and factors to achieve a tear effect near the top edge:
private void DrawMenuButtonMask(Graphics g, RectangleF bounds)
{
RectangleF maskRect = bounds;
int offsetX = (this.ImagePadding.Left + this.ImagePadding.Right) / 2;
int offsetY = (this.ImagePadding.Top + this.ImagePadding.Bottom) / 2;
maskRect.Inflate(offsetX, offsetY);
using (GraphicsMode mode = new GraphicsMode(g, SmoothingMode.AntiAlias))
{
DrawMenuButtonDropShadow(g, maskRect, ShadowDepth, 120);
DrawMenuButtonBorder(g, maskRect);
maskRect.Inflate(-1, -1);
using (GraphicsPath gp = CreateRoundRectanglePath(g, maskRect.X, maskRect.Y,
maskRect.Width, maskRect.Height, CornerRadius))
{
using (LinearGradientBrush fillBrush = new LinearGradientBrush(
maskRect,
Color.FromArgb(160, Color.White),
Color.FromArgb(5, Color.Silver),
75f))
{
Blend blnd = new Blend();
blnd.Positions = new float[] { 0f, .1f, .2f, .3f, .4f, .5f, 1f };
blnd.Factors = new float[] { 0f, .1f, .2f, .4f, .7f, .8f, 1f };
fillBrush.Blend = blnd;
g.FillPath(fillBrush, gp);
}
}
_tSwirlStage = new SwirlStage(0);
maskRect.Inflate(1, 1);
_tSwirlStage.mask = Rectangle.Round(maskRect);
}
}
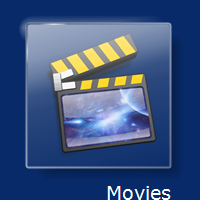
This gives us the focused mask:

OK, with that out of the way, now comes the fun part (me->sarcasm). The menu button employs a four stage compound animation. The first stage has two simultaneous effects: line sprites, and an ambient glow that appears to emanate from under the button. In the first stage, the two line sprites start at (0,0), then split off in two directions: one down the left side, and another across the top. While travelling, they are also losing luminance, until about a third of the way across, they disappear. While this is happening, a textured glow pulses once across the top edge. Now, the trick, I think, with this sort of animation, is subtlety. If the animation is too busy or the effect too obvious, the observer will get it all on the first cycle and quickly lose interest. So, just as in WMC, the effects are very subdued, and require some scrutiny to get the whole effect.
Given that C# graphics leave a lot to be desired as far as speed goes (30 overloads on Graphics.Draw, no wonder it's so slow; by the way, it calls an API that only takes an integer..), we need to buffer the drawing, and create the sprites needed just once when the control loads. This control uses my StoreDc class, used to draw the control into a static buffer; a second buffer is used for the sprites, in effect, triple buffering the control, but also saving a lot of CPU time, and creating a seamless animation.
The animation state is stored in a custom type that keeps state on things like the sprite size, timer tick, and relative coordinates. This is all run from a custom timer class FadeTimer, that fires events from a synchronized timer in ascending/descending counts or a loop. I named this animation segment 'Swirl', for the swirling edge sprites. The DrawSwirl() routine is the hub, too large to simply drop on this page, but here's the segment up to the end of the first animation stage:
private void DrawSwirl()
{
if (_cButtonDc != null)
{
int endX = 0;
int endY = this.Height / 2;
float alphaline = 0;
int offset = 0;
Rectangle cliprect;
Rectangle mistrect;
Rectangle linerect;
BitBlt(_cTempDc.Hdc, 0, 0, _cTempDc.Width,
_cTempDc.Height, _cButtonDc.Hdc, 0, 0, 0xCC0020);
switch (_tSwirlStage.stage)
{
#region Stage 1 - Top/Left
case 0:
{
endX = _tSwirlStage.mask.Width / 2;
if (_tSwirlStage.tick == 0)
{
_tSwirlStage.linepos.X =
_tSwirlStage.mask.X + (int)CornerRadius;
_tSwirlStage.linepos.Y = _tSwirlStage.mask.Y;
_ftAlphaLine = .95f;
_ftAlphaGlow = .45f;
}
if (endX - _tSwirlStage.linepos.X > 0)
{
_ftAlphaLine -= .02f;
if (_ftAlphaLine < .4f)
_ftAlphaLine = .4f;
linerect = new Rectangle(_tSwirlStage.linepos.X,
_tSwirlStage.linepos.Y, _bmpSwirlLine.Width,
_bmpSwirlLine.Height);
DrawMenuButtonLine(_cTempDc.Hdc, _bmpSwirlLine,
linerect, _ftAlphaLine);
alphaline = _ftAlphaLine - .1f;
linerect = new Rectangle(_tSwirlStage.linepos.Y,
_tSwirlStage.linepos.X, _bmpSwirlLineVert.Width,
_bmpSwirlLineVert.Height);
DrawMenuButtonLine(_cTempDc.Hdc,
_bmpSwirlLineVert, linerect, alphaline);
}
if (_tSwirlStage.linepos.X < endX / 3)
{
_ftAlphaGlow += .05f;
if (_ftAlphaGlow > .9f)
_ftAlphaGlow = .9f;
}
else
{
_ftAlphaGlow -= .05f;
if (_ftAlphaGlow < .1f)
_ftAlphaGlow = .1f;
}
cliprect = _tSwirlStage.mask;
cliprect.Inflate(1, 1);
cliprect.Offset(1, 1);
mistrect = new Rectangle(_tSwirlStage.mask.Left,
_tSwirlStage.mask.Top, _bmpSwirlGlow.Width,
_bmpSwirlGlow.Height);
offset = (int)(ShadowDepth * .7f);
mistrect.Offset(-offset, -offset);
DrawMenuButtonMist(_cTempDc.Hdc, _bmpSwirlGlow,
cliprect, mistrect, _ftAlphaGlow);
_tSwirlStage.linepos.X++;
_tSwirlStage.tick++;
if (_tSwirlStage.linepos.X > (endX - _tSwirlStage.linepos.X))
{
_tSwirlStage.stage = 1;
_tSwirlStage.tick = 0;
_ftAlphaGlow = 0;
_ftAlphaLine = 0;
}
break;
}
#endregion
...
You may have noticed the routines DrawMenuButtonMist and DrawMenuButtonLine; these call to the AlphaBlend routine. Now initially, I used GdiAlphaBlend, but I found that the Graphics ColorMatrix/ImageAttribute method worked rather well..
private void DrawMenuButtonLine(IntPtr destdc, Bitmap source,
                                Rectangle bounds, float intensity)
{
    using (Graphics g = Graphics.FromHdc(destdc))
    {
        g.CompositingMode = CompositingMode.SourceOver;
        AlphaBlend(g, source, bounds, intensity);
    }
}

private void AlphaBlend(Graphics g, Bitmap bmp,
                        Rectangle bounds, float alpha)
{
    if (alpha > 1f)
        alpha = 1f;
    else if (alpha < .01f)
        alpha = .01f;
    using (ImageAttributes ia = new ImageAttributes())
    {
        ColorMatrix cm = new ColorMatrix();
        cm.Matrix00 = 1f;
        cm.Matrix11 = 1f;
        cm.Matrix22 = 1f;
        cm.Matrix44 = 1f;
        cm.Matrix33 = alpha;
        ia.SetColorMatrix(cm);
        g.DrawImage(bmp, bounds, 0, 0, bmp.Width,
                    bmp.Height, GraphicsUnit.Pixel, ia);
    }
}
Also note the CompositingMode change to SourceOver in the calling method.
The glow that emanates from behind the button in the top corner is rendered using a clipping region placed around the mask and the border. As I mentioned, I initially used the API AlphaBlend, and the Graphics clipping method, for some reason, did not work in that context, so I wrote an API based clipping class, ClippingRegion, which seems to work well in either instance.
The other sprite movements on the focused state are similar to the first, but this button also uses a second effect, it resizes when pressed. It also grows in size when WMC first loads. This was a problem, because it was resizing before the control became visible. You see, the Visible property is only an indication that the WS_VISIBLE style bit has been set, and not that the control has drawn itself. I posed this question on MSDN, but got no answer (you can't swing a dead cat without hitting an MVP on MSDN, but nobody knows how to determine if a control is truly visible?!). I fixed this with a simple wait timer, and give the option of using this effect with the ResizeOnLoad property, which should be assigned to the button getting the focus when the form loads. The resize effect was achieved by blitting the mask image fragment into a temporary DC, then sizing the image in stages via the FadeTimer tick count, like this:
private void DrawResized()
{
Rectangle canvas = new Rectangle(0, 0, this.Width, this.Height);
Rectangle maskRect = canvas;
int offsetX = (this.ImagePadding.Left + this.ImagePadding.Right) / 2;
int offsetY = (this.ImagePadding.Top + this.ImagePadding.Bottom) / 2;
maskRect.Inflate(-offsetX, -offsetY);
int sizediff = _cResizeTimer.TickCount;
maskRect.Inflate(-sizediff, -sizediff);
if (_cButtonDc != null)
{
using (Graphics g = Graphics.FromHdc(_cButtonDc.Hdc))
{
using (GraphicsMode mode =
new GraphicsMode(g, SmoothingMode.AntiAlias))
{
g.InterpolationMode = InterpolationMode.HighQualityBicubic;
using (Brush br = new SolidBrush(this.BackColor))
g.FillRectangle(br, canvas);
if (this.Text.Length != 0)
{
SizeF sz = MeasureText(this.Text);
maskRect.Height -= (int)sz.Height +
TextPadding.Top + TextPadding.Bottom;
Rectangle textRect = GetTextRectangle(TextAlign, canvas,
new Rectangle(0, 0, (int)sz.Width, (int)sz.Height));
DrawText(g, this.Text, textRect);
}
g.DrawImage(_bmpResize, maskRect);
}
}
}
using (Graphics g = Graphics.FromHwnd(this.Handle))
{
BitBlt(g.GetHdc(), 0, 0, _cButtonDc.Width,
_cButtonDc.Height, _cButtonDc.Hdc, 0, 0, 0xCC0020);
g.ReleaseHdc();
}
RECT r = new RECT(0, 0, canvas.Width, canvas.Height);
ValidateRect(this.Handle, ref r);
}
Note the use of ValidateRect in the above code. We are telling Windows that all the painting has been done (and to leave it alone ;o).
Custom Button
Now, you didn't think that I forgot about this one; it's almost as complicated as the menu button (well, not quite..). The custom style has two animations: the pulse effect when focused (that is very subtle; when I first noticed it in WMC, I thought it was glare from the TV, or sunspots, or that 3 day old pot roast I should have just left alone..), and the 'Swish' effect when pressed, i.e., that little blob flying by.. I think the hardest part about creating those effects is in matching up the gradient textures. I am fairly sure they are using images for some of the effects, the glow under the menu button, and the flying blob seemed to have annoyed/vexed me most, but rather than drop some more boring code here, I'll give you a tip. Whilst recreating the gradients, I did not so much look at color as at shape; get the shape right, then tweak the colors. For example, when creating the ambient glow for the custom button, it's subtlety made it hard to grasp, so I used the color red instead of white to get an idea of shape and texture; that out of the way, I adjusted the color.

Network and programming specialist. Started in C, and have learned about 14 languages since then. Cisco programmer, and lately writing a lot of C# and WPF code, (learning Java too). If I can dream it up, I can probably put it to code. My software company, (VTDev), is on the verge of releasing a couple of very cool things.. keep you posted.


 General
  News
News  Suggestion
  Question
  Bug
Bug  Answer
  Joke
Joke  Praise
  Rant
Rant  Admin
Admin 


