Introduction
Many software companies hold a ‘Build Dependency Graph’ for their code projects. This dependency graph allows us to check how projects are correlated between each other and to identify common libraries. But most importantly, it allows us to know which projects a project relies on (its dependencies). This dependency graph allows us to have the proper build order among a set of projects; thus allowing the automation of the build process.
In this article, I’ll be automating the build process for Visual Studio projects. To achieve this, I’ll be creating a Dependency Graph with all the projects found on a given root folder (the root folder of our code repository). The algorithm will automatically load the projects, build the dependencies between them and automate the build of a project by building the required dependencies first and in the proper order for all the projects needed.
Background
In companies with large source code repositories, usually, this dependency graph is built once and stored. For any subsequent project updates, there would also be an update on the dependency graph to properly reflect the changes made on the project(s). On the other hand, for smaller source repositories (hundreds of projects), we can dynamically build the dependency graph whenever we need it. The process to build the graph on a small set of projects will take at most a couple of minutes and we can guarantee that the graph is updated with the latest relations between projects. This dependency graph will come in handy to figure out the proper build order in a set of projects, especially when we don’t hold any configuration file with the build order.
Approaches
Doing some research, I came up with two possible alternatives to implement as a solution. The first and perhaps the most basic would be to parse each Visual Studio project as an XML file to retrieve all the properties needed; then we proceed to build the dependency graph. Finally, to automate the build process, I would be calling as an external process the MSBuild command line tool (http://msdn.microsoft.com/en-us/library/ms164311.aspx). As a second approach, we could load the Visual Studio projects on a Project class under the Microsoft.Build.Evaluation namespace in Microsoft.Build.dll. This option saves us all the hard work of parsing and retrieving all the properties and dependencies of a project. Furthermore, the Project class exposes a Build method which builds the project with the given targets. In this article, I’ll be using this second approach in order to explore each project and build the ‘Build Dependency Graph’.
Features
- Build Log: Provides a detailed log with the output of the build.
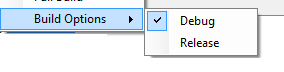
- Build Options: Sets the build options. I just added Debug/Release mode, but you can add and extend this functionality to meet your requirements.
- Automate build process: Automates the process of building a set of projects in the proper order.
- Tree visualization of build dependencies

Project as a Node of a Graph
In order to build the dependency graph, I’ll be treating each Visual Studio project as a node. To keep it simple, the properties that will be tracked with this Node class are:
private CompilationStatus compiled;
private string assemblyName, projectName;
private string compilationLog;
private string projectPath;
private List<Node> _Dependencies;
You can add and extend the properties of this class to fit your needs.
Load Projects
The idea here is to explore all the projects, in my case, the Visual Studio C# projects (.csproj files) found under a given directory/folder. Once all the projects have been retrieved, for each project, I’ll be creating a new instance of the class Node with the mentioned properties and initializing the dependency list with the libraries referenced by this project. Fortunately, there is no need for a recursive call or stack. Each project will eventually be reached by the main for loop. If it doesn’t, we can safely assume that such project is a third party library which we don’t own, and thus we don’t have such source code but just the binary file.
In order to get the dependencies of a project (the libraries referenced by this project in order to build), I’ll be getting all the references containing the keyword “HintPath”. This key word is used for libraries referenced outside the .NET Framework and its value has the path of such reference.
private void LoadProjects(string path)
{
Node _temp, _t;
string assembly, dependency;
string[] projects = Directory.GetFiles(path, "*.csproj", SearchOption.AllDirectories);
foreach (string _proj in projects)
{
Project p = _ProjCollection.LoadProject(_proj);
assembly = p.GetPropertyValue("TargetName");
dic.Add(assembly, p);
if (_NodeList.ContainsKey(assembly))
{
_temp = _NodeList[assembly];
}
else
{
_temp = new Node(p.GetPropertyValue("ProjectName"));
_NodeList.Add(assembly, _temp);
}
_temp.Path = _proj;
_temp.AssemblyName = assembly;
foreach (ProjectItem _item in p.GetItems("Reference"))
{
if (_item.Metadata.Count>0)
{
ProjectMetadata _m = _item.Metadata.FirstOrDefault
(x => x.Name.Contains("HintPath"));
if (_m != null)
{
dependency = Path.GetFileNameWithoutExtension(_m.EvaluatedValue);
if (_NodeList.ContainsKey(dependency))
{
_temp.Dependencies.Add(_NodeList[dependency]);
}
else
{
_t = new Node(dependency);
_temp.Dependencies.Add(_t);
_NodeList.Add(dependency, _t);
}
}
}
}
}
}
So far, the expected output is to have a list of Nodes, each Node corresponds to a Visual Studio project found under the root folder. Also, each node will be properly loaded with its attributes and a list of dependencies. Each dependency points to a Node object. So that, if two projects need the same dependency, the Node for that dependency is allocated on memory just once, and each project points to the same Node. The result of this is a graph of dependencies for the explored projects.
Building the Dependency Tree
Once we have the dependency graph built, we need a way to visualize it and show it to the user. The best visual built control for this I could find is the TreeView. However, we can’t translate a graph into a tree. Since in a graph, a node can be referenced by several other nodes, and in a tree representation, a node can only be referenced by one parent. To solve this, the Tree representation will be duplicating child nodes. For example:
Graph Representation and Tree Representation
This duplication process will only be used for the visualization of the Tree. For the build process, I’ll be using the built graph. The code to build the tree would be as follows:
private void BuildTree()
{
myTreeView1.Nodes.Clear();
foreach (KeyValuePair<string, Node> _node in _NodeList)
{
if (!string.IsNullOrEmpty(_node.Value.Path))
{
myTreeView1.Nodes.Add(BuildTreeNode(_node.Value));
}
}
}
private TreeNode BuildTreeNode(Node node)
{
TreeNode _tn = new TreeNode(node.ProjectName, 2, 2);
_tn.Name = node.AssemblyName;
for(int i=0; i<node.Dependencies.Count; i++)
{
_tn.Nodes.Add(BuildTreeNode(node.Dependencies[i]));
}
return _tn;
}
Automating the Build Process
For each of the selected nodes (projects), I’ll be calling the CompileProject function. If a project is not found on the given root folder, it won’t be built; but also, it won’t affect the build of the parent project. In this case, we can assume that we are dealing with an external binary of which we don’t have the source code. If a dependency of a given project failed to build, I’ll be skipping the build of the current project and mark it as failed, since one of its dependencies has already failed.
Also, the Build process will set the Configuration property to Debug or Release, as selected by the user. The build process will automate the build of all the selected projects by first building each dependency in a recursive call, until we reach a project with no further dependencies (a leaf node). Finally, in order to visualize the result of the build, the nodes of the tree will be updated with a success or fail icon, depending on the result.
private bool CompileProject(Node node)
{
if (node.Compiled == Node.CompilationStatus.NotCompiled)
{
bool _success = true;
for (int i = 0; i < node.Dependencies.Count; i++)
{
if (!string.IsNullOrEmpty(node.Dependencies[i].Path))
if (!CompileProject(node.Dependencies[i]))
{
_success = false;
node.CompilationLog = string.Format(
"Compilation failed due to dependency: {0}", node.ProjectName);
break;
}
}
if (_success)
{
BasicFileLogger _fl = new BasicFileLogger();
_fl.Parameters = _FileLog;
if(_buildDebug)
dic[node.AssemblyName].SetProperty("Configuration", "Debug");
else
dic[node.AssemblyName].SetProperty("Configuration", "Release");
_success = dic[node.AssemblyName].Build(_fl);
node.CompilationLog =_fl.OutputString;
}
if (_success)
{
node.Compiled = Node.CompilationStatus.Success;
UpdateImageNode("ok", node.AssemblyName);
}
else
{
node.Compiled = Node.CompilationStatus.Failed;
UpdateImageNode("wa", node.AssemblyName);
}
return _success;
}
}
When calling the Build method of the Project class, I’m passing as a parameter a File Logger in order to have a log with the details of the build process. This comes in especially handy when the project fails to build and you need to check the reason of the failure. You can find the original source code of the File Logger I’m using at this link.
Conclusion
Automating the build process resulted as an important enhancement when building project that consumes several dependencies. This automation not only helps to build large scale projects faster, especially when we haven’t preconfigured any build older; but also it helps to identify breaking changes. If we submit a change for a project A as a bug fix to be consumed by project B, having an automated full build of all our projects would detect if this change would affect a third project C, which also consumes project A. From our point of view, both project A and project B, will build. But we have might missed other projects which we don’t own but consume our libraries.
Finally, in order to use the project with your configuration, you need to specify the root folder:
_rootFolder = Path.Combine(Environment.GetEnvironmentVariable(
  "enlistmentPath", EnvironmentVariableTarget.Machine));
And the drop folder (output folder with the binaries) for the full build option:
if (_buildDebug)
    dropFolder = Path.Combine(_rootFolder, @"drop\Debug");
else
    dropFolder = Path.Combine(_rootFolder, @"drop\Release");
History
- 19th December, 2013: Initial version
This member has not yet provided a Biography. Assume it's interesting and varied, and probably something to do with programming.


 General
  News
News  Suggestion
  Question
  Bug
Bug  Answer
  Joke
Joke  Praise
  Rant
Rant  Admin
Admin 


