Introduction
ASP.NET MVC consists of three main parts - Model, View and Controller. Model represents the business entity or domain object and it manages the state of View. Controller controls the application logic and communication between Model and View. A view represents the user interface, which receives input from user and sends to controller for further action. In this article, I explain about ASP.NET MVC special views like Partial Views and Layouts.
Using the Code
To understand this article, the reader should have some basic knowledge on ASP.NET MVC. Even if you are new to ASP.NET MVC don't worry just go through these articles, it will give some basic knowledge on ASP.NET MVC. For more information, you can refer to the link www.asp.net/mvc , it is the official website of ASP.NET MVC.
Throughout this article, I used Student Management application to demonstrate the ASP.NET MVC features. So you can download it from this source and refer it for better understanding. Please the read the Nuget Package Configuration document from source archive before you start running the application.
The following tabulation lists out few helper methods which are used in this article. ASP.NET MVC provides a rich set of Helper extension methods, which are used to deliver the HTML markup or its related stuffs. ASP.NET Web Form application has many server controls to render markups and helper methods are doing same in ASP.NET MVC applications.
| Helper Name | Description |
@Html.ActionLink() | Renders the URL specific to an action, which we can use it on anchor tag to navigate to a view. |
@Html.Partial() | Renders the given partial view into the current view. |
@RenderBody() | Renders the content of child view in layout pages. |
@RenderSection() | Renders the content of a named section. |
Partial Views
Partial Views are special views which render a portion of View content. It’s like a user control in Web Form application so it can be reusable on multiple views. We can simplify the high complexity markup by splitting in to one or more partial views. Thus Partial views are increasing the maintenance of HTML markup in ASP.NET MVC application.
HTML helper provides an extension method called Html.Partial to render partial views. The following tabulation shows the different flavors of Partial method:
| Helper Name | Description |
@Html.Partial(string partialViewName) | Renders the given partial view content into the referred view. |
@Html.Partial(string partialViewName,object model) | Renders the partial view content into the referred view. Model parameter passes the model object to the partial view. |
@Html.Partial(string partialViewName, ViewDataDictionary viewData) | Renders the partial view content into the referred view. View data parameter passes view data dictionary to the partial view. |
@Html.Partial(string partialViewName,object model, ViewDataDictionary viewData) | Renders the partial view content into the referred view. Model parameter passes the model object and View data passes view data dictionary to the partial view. |
The following section explains how to create and use a partial view.
-
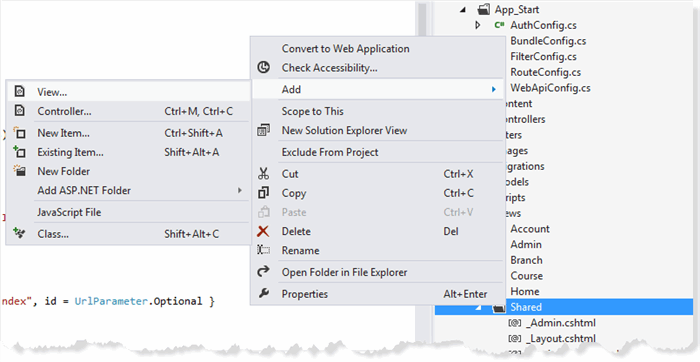
Right Click on Shared folder then select Add -> View, it will show the Add View dialog.

-
Enter Name as _StudentItem.
-
Leave Template Engine value as default.
-
Check on Create a strongly typed view and select Student from Student Management.Models namespace.
-
Check Create as a partial view. Now Add View dialog will look like following snap shot.
-
Click on Add button.
Visual Studio will create a file named as _StudentItem.cshtml under Shared folder. Open the student’s Index view, it contains markup for displaying all students and its module type is IEnumerable<Student>. Here we are going to move a portion of markup into the partial view and link it to the index view. The following steps explain how to do it.
- Move the following Markup portion to
_StudentItem partial view.
<td>
    @Html.DisplayFor(modelItem => item.Name)
</td>

<td>
    @Html.DisplayFor(modelItem => item.BranchName)
</td>

<td>
    @Html.DisplayFor(modelItem => item.CourseName)
</td>
<td>
    @Html.DisplayFor(modelItem => item.Gender)
</td>
<td>
    @Html.DisplayFor(modelItem => item.Address)
</td>
<td>
    @Html.ActionLink("Edit", "Edit", new { id = item.StudentId }) |
    @Html.ActionLink("Details", "Details", new { id = item.StudentId }) |
    @Html.ActionLink("Delete", "Delete", new { id = item.StudentId })
</td>
- Find and replace the
modelItem and item to model except for action link items, for action link items you should replace the item with Model instead of model. - Add
@Html.Partial("_StudentItem",item) to index view, here the first parameter is name of the partial view and item is the model object for partial view. Now the new markup in the index view will look like below markup:
@foreach (var item in Model) {
<tr>
@Html.Partial("_StudentItem",item)
</tr>
- Build the application and test it in browser. There is no change in the output but we moved a portion of data listing markup in to the partial view. This is a simple example to explain the concept of partial view; you can use it in a variety of scenarios.
Layout
Layout is another special view type in ASP.NET MVC, it is something similar to master page in ASP.NET Web Form. Layout used to keep the UI elements and theme consistency throughout the application. Razor layout introduced two new concepts called web page body and web page section. Web body is just rendering the content of the referencing view at specific place. Web page sections are used to declare multiple sections in a layout and these section defined by the referencing views. It has two flavors, one is without required flag and another is with required flag, by default the required flag is true. When required flag is true, then referencing view must provide the definition for specific named section.
Web body concept uses the @RenderBody method to render the referencing view content at where it is placed. When razor call this method, it executes all referencing views (nested layouts and view) and renders the views html output. We can’t use this method more than one time in the same layout. @RenderSection() is used to declare a named section in the layout and the referencing view defines the content with @section block. @RenderSection() method takes two arguments, one is name of the section and another one is required flag, when required flag is true then the referencing view must give the definition otherwise it is optional. There is another helper method is called IsSectionDefined which is used to check from a layout whether the definition has given for a specific named section in any one of referencing view or not.
ASP.NET MVC template provides a default layout and it named as _Layout.cshtml/.vbhtml, you can find this file under Shared folder. By default, all views use the default layout and if you search for layout property in a view, you can’t find it but still referring to default layout. _ViewStart.cshtml is doing this trick for us, it assigns the default layout to all views which are not explicitly assigned the layout and it will execute just before a view starting and this is the good place to put some common codes which required for all views.
The following steps explain how to create and use a layout:
- Right Click on Shared folder, then select Add -> View, it will show the Add View dialog.
- Enter View Name as _Admin.
- Leave Template Engine value as default.
- Leave Create strongly typed view and Create Partial view as unchecked.
- Uncheck the Use a layout or master page.
- Click on Add button. Now Add View dialog will look like following snap shot.
Now a file is created under shared folder and named as _Admin.cshtml. Modify the layout content as you want but make sure you have placed the @RenderBody() and @RenderSection() method. Here @RenderBody() is mandatory and @RenderSection is optional.
For student management admin console layout, we are going to use the following markup:
<!DOCTYPE html>
<html lang="en">
    <head>
        <meta charset="utf-8" />
        <title>@ViewBag.Title - Admin</title>
        <link href="~/favicon.ico" rel="shortcut icon" type="image/x-icon" />
        <meta name="viewport" content="width=device-width" />
        @Styles.Render("~/Content/css")
        @Scripts.Render("~/bundles/modernizr")
    </head>
    <body id="admin">
        <header>
             <div id="topbar" class="topbar">
                  <div class="float-left">
                      <nav>
                          <ul id="menu">
                              <li>@Html.ActionLink("Home", "Index", "Admin")</li>
                              <li>@Html.ActionLink("Branch", "Index", "Branch")</li>
                              <li>@Html.ActionLink("Course", "Index", "Course")</li>
                              <li>@Html.ActionLink("Student", "Index", "Student")</li>
                          </ul>
                      </nav>
                  </div>
                  <div class="float-right">
                    <section id="login">
                        @Html.Partial("_LoginPartial")
                    </section>
                </div>
             </div>
        </header>
        <div id="body">
            @RenderSection("featured", required: false)
            <section class="content-wrapper main-content clear-fix">
                @RenderBody()
            </section>
        </div>
        <footer>
            <div class="content-wrapper">
                <div class="float-left">
                     <p>© @DateTime.Now.Year - Student Management Company</p>
                </div>
            </div>
        </footer>
        @Scripts.Render("~/bundles/jquery")
         @Scripts.Render("~/bundles/student")
        @RenderSection("scripts", required: false)
    </body>
</html>
Now create a new Controller for Branch, Course and Student with the above new layout. Follow the following steps to do it.
- Right click on controller folder then select Add Controller, it will show the following dialog to create controller.
- Enter Controller Name as
BranchController. - Select Template as MVC with read/ write actions and views with Entity Framework.
- Select Model Class as
Branch from StudentManagement.Models namespace. - Select Data Context Class as
AdminContext from StudentManagement.Models namespace - Click on Advanced Option Button.
- Make Sure Use a layout or a master page.
- Select Layout as _Admin.cshtml from Shared folder.
- Click on OK button on Advanced Option dialog
- Click on Add button on Add Controller dialog. Now Controller dialog will look like following snap shot.
Visual Studio will create following folders and files under Controller and Views folder.
Controller:
- BranchController
Views:
- Branch
- Create.cshtml
- Details.cshtml
- Delete.cshtml
- Edit.cshtml
- Index.cshtml
For creating controller for other modules like Course and Student, please repeat the above steps for each module.
Once controllers created for all modules, add the following links in _Admin.cshtml under header section.
@Html.ActionLink("Branch", "Index", "Branch")
@Html.ActionLink("Course", "Index", "Course")
@Html.ActionLink("Student", "Index", "Student")
If you already have views for above modules, then just open all view files and add the Layout property with value as ~/Views/Shared/_Admin.cshtml at header of the each view.
Layout Property
Layout = "~/Views/Shared/_Admin.cshtml";
The above line explicitly sets the Layout property with new layout so the default layout will not be applicable. If you closely watch all views content, some views are given definition for Scripts named section and some views are not. But no views are given any definition for featured section, since its required flag set to false the definition for this section is optional. The razor @section tag used to define the definition for a specific named section in a referencing view.
Now we are ready to test the application with new layout, so build the application and navigate to Admin console then check the new layout output. It will look like the below snapshot.
Nested Layout
ASP.NET MVC allows us to create nested layout, through which you can create new child layout for existing layouts. It is useful when you want to spilt the layout further. One important thing is the parent markup can carry forward to child layout but named sections (@RenderSection()) will not carry forward. Due to this, you may encounter with an error like unable to locate RenderSection on child layout. You can fix this by re-declaring all parent sections into child layout.
The following steps showing how to create and use a nested layout:
- Right Click on Shared folder then select Add -> View, it will show the Add View dialog.
- Enter View Name as
_AdminNestedLayout. - Leave Template Engine value as default.
- Leave Create strongly typed view and Create Partial view as unchecked.
- Select Use a layout or master page as _Admin.cshtml.
- Click on Add button. Now Add View dialog will look like following snap shot.
Visual Studio will create a file under shared folder and it named as _AdminNestedLayout.cshtml. It will have the following content.
@{
    ViewBag.Title = "_AdminNestedLayout";
    Layout = "~/Views/Shared/_Admin.cshtml";
}
        <h2>_AdminChildLayout</h2>
Remove ViewBag.Title property from the markup and replace the existing content with the following content.
@{
    Layout = "~/Views/Shared/_Admin.cshtml";
}
<h2 class="hr">@ViewBag.Title</h2>
@RenderBody()
The purpose of this nested layout is to provide unique action title format across all admin views. Now we need to link this new layout to all admin views, so go ahead and do the following modification in Layout property of all admin views.
Layout = "~/Views/Shared/_ AdminNestedLayout.cshtml";
Remove the <h2>Action name</h2> markup where ever you find in all admin views and alter your title little bit how you want to show. Now run the application and check the result, in index views you will not find any issue but when you are trying to navigate the Create New link of any module, it will show the following error,
The following sections have been defined but have not been rendered for the layout page "~/Views/Shared/_AdminNestedLayout.cshtml": "Scripts".
Above error says that the Script section used in the current view doesn’t declared in the nested layout, the parent layout _Admin.cshtml already defines the @RenderSection for Scripts but still it is not able to recognize in the nested layout. The reason behind is the parent sections will not automatically carry forward to child layout until redefining these sections in child/nested layouts, once you re-declare the scripts section in _AdminNestedLayout.cshtml the above error will go off. The following snippet shows the re-declaration scripts section in the nested layout.
_AdminNestedLayout.cshtml
@section scripts{
    @RenderSection("scripts",false)
}
We can use IsSectionDefined method to check whether the definition for a named section defined in the referencing view or not, with this method we can change the above razor block as below,
@if (IsSectionDefined("Scripts"))
{
@section scripts{
@RenderSection("scripts",false)
}
}
Build and run the application then check the result. It will look like the below snapshot.
Conclusion
In this article, we discussed about what is Layout and Partial Views, how to create and use them. Also we learned some important things that we should follow while using them. Please provide your valuable feedback under comment section. Thanks for spending your time to read this article. I hope, it has delivered some useful information to you.
This member has not yet provided a Biography. Assume it's interesting and varied, and probably something to do with programming.


 General
  News
News  Suggestion
  Question
  Bug
Bug  Answer
  Joke
Joke  Praise
  Rant
Rant  Admin
Admin 


