Table of Contents
- Introduction
- Objective
- Servo Motors
- Raspberry PI Robot Module
- PI Robot Design
- Speech Recognition
- Installing Pocketsphinx on Raspberry PI
- Programming with Pocketsphinx
- PI Robot Class
- Make a Web Call
- Compiling the Code
- Intel Galileo Robot Module
- Setting up Windows on Intel Galileo Gen 2
- Galileo Robot Design
- Making a Web Call and C++ REST SDK
- Microsoft Azure
- PaaS - Azure SQL Database
- PaaS - Azure Website and ASP.NET MVC Web APIs
- PaaS - Microsoft Azure Mobile Service
- IaaS - Windows Server 2012 Virtual Machine
- TO DOs
- Bloopers
- Conclusion
It was in my previous article on Internet of Things, I have mentioned that "making robots moving around without hitting each other is not easy". But, wait! Is that really not easy? may be yes or may be not that hard. But why not try building one by our own to see how it works. This article is an attempt to build two small robots which can interact with human as well as within each other. We are going to do almost everything from the scratch. Just imagine the Sonny character from I Robot movie. No, we are not going to do that. But, up to some level where our robot can respond to our commands and learn new commands, communicate with other robot etc., then you can extend this to any level as you wish. Sky is the limit for your imagination.
Trailer video of this article:
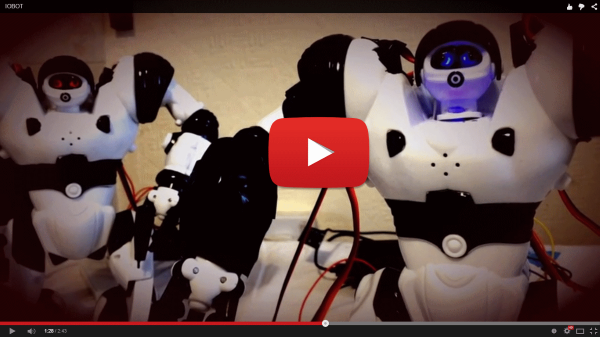
The robot bodies used in this article are Mini Roboactor. But, thats just outlook and plastic cover, all internal stuffs are done using servo motors, LEDs, speaker/microphones with Raspberry PI and Intel Galileo boards. You can use any toy robot body of your convenient, not necessarily a mini Roboactor body, but I liked the look of Roboactor, so I chose it.
We are going to discuss different topics in detail together during the course of this article starting with how servo works till Microsoft Azure services for our Robot. Let us assume our objective as follows,
We'll have to build and sell smart Robots in the world market (just assumption). The robots initially will know nothing to do except their basic commands like raise hand, open eyes, look left etc., But we will give a wonderful feature to our customers that they can teach the robot with their own commands. For example, one can teach the robot how to wink and the other may teach the robot how to wave his hands. What if there are two same commands with different actions? The robot will take its own decision to pick a command based on few rules. The interesting part will be when people start teaching dance actions + a song play assigned with a command! All right, I am going to limit the features in this article only to do the new commands limited to the robot's basic commands, that means you can teach a new command with a combination of basic commands, but you can't teach him "how to jump" and definitely can't teach him "what is love"!!!

This article will follow a detailed approach to explain everything to make yourself to do your own robot with voice recognition and with different Azure services. In a summary, below are the important topics we will cover,
- Servo motors - PWM, PPM : How to do it yourself?
- Pocketsphinx Speech Recognition - JSGF/FSG formats and Multiple grammars.
- Raspberry PI Linux Module for one Robot named "PI"
- Intel Galileo Windows Module for another Robot named "Galileo"
- How to use Microsoft Windows on Intel Galileo
- Android module to control Galileo remotely
- Microsoft Azure Platform as a Service (PaaS) for our Robots communication
- Microsoft Azure Infrastructure as a Service (IaaS) for our Robots communication
3. Servo Motors
This is not the first time this is being explained in an article and there are libraries available to handle Servo motor as well like wiringpi for raspberry pi. But what is the point on using a library without understanding what it does. So, use any library you want to control your servos, but let us try to understand how a servo actually works.
Servo motors are working based on pulses it gets from the controlling circuit. Normally, servos will have three wires - brown for GND, red for Vcc and orange for pulse signal. The servo used for this article is TowerPro Micro Servo S90 which is sufficient enough for a toy robot and the details given here are more specific to this Servo type, but is mostly common for other Servos as well. A servo motor generally can rotate its position from 0 degree to 180 degrees, but in Servo terms they are not degrees, they are PWMs (Pulse Width Modulation). When servo gets a pulse (PWM) on its orange wire, it changes its position. What is a pulse? A pulse is nothing but OFF, ON, OFF. When servo's orange wire power goes from 0v to 5v to 0v. it is called a pulse (a square wave). So, to achieve a pulse you can just do,
digitalWrite(LOW);
digitalWrite(HIGH);
digitalWrite(LOW);
But, this pulse will have no meaning for a servo!!! Why? Because, Servo needs PWMs, not just pulses. PWM is nothing but the width/duration of the pulse, how long the pulse stayed ON/HIGH, that is a PWM. As I said earlier, PWM defines the position of servo motor, so depends on the duration it stayed ON/HIGH defines the position of the servo motor. For eg: TowerPro Micro Servo needs 0.5ms duration of pulse to go to 0 degrees and needs 2.4ms duration of pulse to go to 180. So a total of 2.4ms - 0.5ms = 1.9ms (1900µs) defines the position of this Servo motor. So, can we write the pulse code again like this to get a PWM,
digitalWrite(LOW);
digitalWrite(HIGH);
usleep(2400); digitalWrite(LOW);
The above code can make the 5v signal stay for 2.4ms, so now the servo can understand this pulse in the form of PWM. But, this is still not enough to make the position correct, as the pulse duration is just 2.4ms and the servo needs to move its position all the way from 0 (or any other degrees) to 180 degrees. So, a single pulse cannot make it happen, what we need is a sequence of pulses called pulse train or PPM (Pulse Position Modulation). Before going for PPM, we need to understand one another important thing called a "frame". Servos have a refresh cycle of 20ms to look for a PWM, so a pulse given every 20ms of time will be identified by the Servo's refresh cycle. Any pulse ignores this refresh cycle will be ignored by the servo. It is always better to keep a gap of 20ms between each PWMs. This 20ms refresh cycle is called a Frame or Period , and one Frame/Period at least should have one valid PWM to make the servo respond. So the sequence of pulses or PPM makes the servo moves to a given position. If we need the servo to keep the hold of its position, we need to continue with the pulses given to the servo otherwise, servo will lose its hold and the position can be changed by any external force. By giving continuous pulses to the servo makes it hold the position, we will not be able to rotate the position manually by hand, the maximum force it can take to keep its holding position is defined as torque of the servo. Torque is important to be considered if we expect the servo to lift, push or move some objects.
Alright, so far, we know what is PWM, PPM, 20ms frame etc., one other term we may need to understand about Servo is Frequency of a Servo. Frequency of a Servo is nothing but, how frequently you can give pulses to the servo for rotation. Frequency of servo is calculated by pulses per second. For eg: TowerPro Micro Servo SG90 has 50Hz frequency. We know 20ms is a frame/period to have atleast one pulse. How many 20ms in a second? 50x20ms = 1second. So, this servo can have 50 pulses in a second i.e., 1 second divided by Period(20ms)=50Hz frequency. Below diagram shows a sequence of pulses PPM to achieve 60 degrees.
Well, for a human mind it is easy to understand what is 130 degrees position. But, the servo can't understand what is 130 degree, we will have to say 1865µs of PWM to achieve 130 degree. How to do that? There is a bit of simple calculation to get it. We need to find pulse width required for a single angle position. We know 1900µs is to achieve the complete 180 degrees. So, 1900/180 = 10.5µs required to get one single angle movement. So the PWM needed will be 500µs + (angle * (1900/180)). Now we can easily move the servo position to given angle value. Below is the code snapshot of PI Robot module from BOTServo.cpp,
int pulsewidth = 500; if (pindata->bAngle)
pulsewidth = (int)(pindata->nValue *10.5) + 500; else pulsewidth = 500 + pindata->nValue; pindata->gpioControl->digitalWrite(pindata->nPin, HIGH); usleep(pulsewidth); pindata->gpioControl->digitalWrite(pindata->nPin, LOW); delay(20 - (pulsewidth / 1000));
As I've mentioned earlier, if we want the servo to keep hold of its position or if we want the servo to hold some object (eg: robot hand holding a heavy object), we should repeat the PWM continuously, otherwise depending on the weight of the object the servo may lose its position. But, just for this article purpose, I have made the BOTServo class code to keep the PPM for just 1 second to give servo some time to move to new position. That means, if you use the code in BOTServo class as is, the servo will move to the new position, but will not hold it - it can be altered by a hand push.
Code Reference: BOTServo.cpp/BOTServo.h
IOBOT design is simple and straight forward. The difficult part will be setting up this within a toy robot body which was not really designed for these internal stuffs. It took some hours for me to break and cut plastics inside the robot toy to set this up. Below is the circuit design for the Raspberry PI robot model. Leg and Elbow part of the design is not included in this article.
There are many ways if we want to implement speech recognition into our projects. When it comes to Linux platform, I feel pocketsphinx is the best of its own as it can be used offline and it can be fine tuned for accuracy and we can define our own language model as well. At this section of this article, we are not going to discuss everything about pocketsphinx, but I will try to cover everything needed for our article purpose. The version of pocketsphinx used in this article is 0.8. If you need better understanding of this topic, please go through Pocketsphix online documentations, as this article will be more focused on what we are going to use from pocketsphinx.
Pocketsphinx gives many options to define the way we want it to recognize the speech. Basically it can be categorized into two type of language models Grammar (jsgf, fsg, gram) and statistical language model (lm, dmp). This article uses Grammar model, to define more realistic commands with more accuracy. Language model also has customization so that you can define your own model to improve accuracy.
JSGF stands for Java Speech Grammar Format is a text form of grammar specification for speech recognition. JSGF model defines a grammar to be followed when recognizing the speech. For eg: "Hi, <question> are you?", if we define <question> as "how" or "where" or "what" in your grammar you can expect Pocketsphinx to recognize "Hi, how are you?" or "Hi, where are you?" or "Hi, what are you?". Alright, how we define a JSGF grammar,
#JSGF V1.0;
grammar iobot;
public <command> = turn head (left | right | straight);
In the above grammar, first line is the Grammar header #JSGF V1.0 and followed by grammar declaration (iobot) and then Grammar body which contains public rule definition <command>. The speaker using this grammar can say "turn head left" or "turn head right" or "turn head straight". | symbol refers to OR condition and left, right, straight are grouped together using parentheses(). We can also define an optional condition like below,
public <command> = [please] turn head (left | right | straight)
In the above grammar, the speaker have the option of using please in his sentence. Fine, how our PI Robot grammar defined,
#JSGF V1.0;
grammar iobot;
public <commands> =  (<eyes> | <hands> | <head> | <other> | (new command) | (finish) | ([ok] learn <other> | forget <other> | remove <other> | (enable | disable) sharing));
<eyes> = ((close | open) your (eyes | ((left | right) eye)));
<hands> = ((raise | let) your (hands | ((left | right) hand)) [down]);
<head> = (turn head (left | right | straight));
<other> = ( refresh commands | wink );
The above grammar tries to put all combinations to make our PI Robot understand the basic commands. The <other> rule will be be updated with new commands and the grammar will be refreshed in ps decoder. The rules <eyes>, <hands> and <head> are considered as basic commands which Robot will normally do and the commands defined in <other> rule are extended commands which Robot learned from us to do.
The C++ class code (BOTS2T.cpp) written for speech recognition is just extended from pocketsphinx_continuous source comes with pocketsphinx. So, the entire credit for microphone recording, recognition, hypothesis stuffs goes to pocketsphinx. But, not all of that, the class source handles multiple grammar files and does grammar switching as well. Also, the class initiates a separate thread for speech recognition, so the entire recognition stuff runs on a different thread indefinitely until program ends.
4.2.1 Installing Pocketsphinx on Raspberry PI
Installing pocketsphinx on Raspberry Pi is simple, but a little bit time consuming, but worth a wait. Follow the below commands to get pocketsphinx setup on your raspberry pi,
wget http:
mv download sphinxbase-0.8.tar.gz
wget http:
mv download pocketsphinx-0.8.tar.gz
tar -xzvf sphinxbase-0.8.tar.gz
tar -xzvf pocketsphinx-0.8.tar.gz
apt-get install bison
apt-get install libasound2-dev
cd sphinxbase-0.8
./configure --enable-fixed
make
make install
cd ..
cd /pocketsphinx-0.8/
./configure
make
sudo make install
Well, after all the above done, if you can able to run the ./pocketsphinx_continuous and see "READY", you are actually ready to do speech recognition. If you face any trouble on using speech recognition, it may be your mic setup, check with alsamixer whether your microphone is detected and installed properly.
Configuration object is a mandatory parameter for initializing pocketsphinx decoder, this config settings carries various parameters required to initialize pocketsphinx decoder. Mainly, our JSGF file. cmd_ln_init() function takes variable parameter, so you can keep adding parameters to it as needed (only supported params by ps decoder) and it returns the config object which is needed for ps_init() call. The below code initializes our config object with our defined JSGF grammar file iobot.jsgf.
m_config = cmd_ln_init(NULL, ps_args(), TRUE,
"-hmm", hmm.c_str(),
"-jsgf", "./iobot.jsgf",
"-dict", lm.c_str(),
NULL);
Initializing our pocketsphinx decoder is a single liner,
m_ps = ps_init(m_config);
If both the above calls went successful, then our decoder is ready for speech recognition. You can start utterance by calling ps_start_utt(m_ps), then ps_process_raw(m_ps,...) to process raw audio data, then ps_end_utt(m_ps) to stop utterance and finally ps_get_hyp(m_ps,...) to get the recognized word. I recommend you to go through Pocketshpinx online documentation and examples for more understanding on this. As I've mentioned earlier, you can refer to pocketsphinx_continuous source code for more understanding as well.
One of the other important thing our PI Robot needs to do apart from speech recognition is grammar switching. Pocketsphinx decoder allows multiple grammars added to it at run time using fsg_set_add() function (BOTS2T::Init()), but only one grammar can be active at a time. fsg_set_select() function allows to select or set active grammar for the decoder (BOTS2T::SetGrammar()). Similar to add function, we can also remove a grammar from the decoder using fsg_set_remove_byname() function (Refer: BOTS2T::RemoveGrammar()). Below is a code snapshot of adding iobot.jsgf to the decoder.
fsg_set_t* fsgset=ps_get_fsgset(m_ps);
jsgf_t* jsgf=jsgf_parse_file ("./iobot.jsgf",NULL);
jsgf_rule_iter_t* iter=jsgf_rule_iter (jsgf);
jsgf_rule_t* rule=NULL;
while(jsgf_rule_iter_rule(iter)) {
    if(jsgf_rule_public (jsgf_rule_iter_rule(iter))) {
        rule=jsgf_rule_iter_rule(iter);
        break;
    }
    jsgf_rule_iter_next(iter);
}
jsgf_rule_iter_free(iter);
fsg_set_add (fsgset,"iobot",jsgf_build_fsg (jsgf,rule,ps_get_logmath(m_ps),cmd_ln_int32_r(m_config, "-lw")));
jsgf_grammar_free (jsgf);
The above code tries to find the first occurrence of a public rule from iobot.jsgf and then adds that to fsg set of running ps decoder. But, as we already know our grammar name (iobot) and the public rule name (command) which we want to use, we can even simplify the above code as below by giving the grammar name and rule name directly to build fsg,
fsg_set_t* fsgset=ps_get_fsgset(m_ps);
jsgf_t* jsgf=jsgf_parse_file ("./iobot.jsgf",NULL);
fsg_set_add (fsgset,"iobot",jsgf_build_fsg(jsgf,jsgf_get_rule(jsgf, "iobot.command"), m_ps->lmath, cmd_ln_int32_r(m_config, "-lw")));
jsgf_grammar_free (jsgf);
We can keep on adding multiple grammars to our decoder during runtime. What will be the use of multiple grammars and switching them during runtime? There are many, importantly our PI Robot uses a different grammar for learning new commands. Since, we define a grammar set for our robot's speech recognition, robot will not be able to understand if you want to teach a new word. So, for that, we need to switch the grammar to a generic language model file with all English words or a grammar file with alphabets to spell the new word to our robot, but either way, our Robot needs to switch to other grammar or language model for learning new words.
Code Reference: BOTS2T.cpp/BOTS2T.h
As we already know how servo works and how to add speech recognition to our robot, the rest of the things are to convert the recognized speech to text and process the text to find the known commands and based on recognized commands rotate the servo motors fitted on to our Robot or light up LEDs to mimic eye close/open actions.
Robot robot;
robot.Init("iobot.azurewebsites.net",
6 ,
12 ,
27 ,
18 ,
17
);
robot.InitSpeechRecognition("./iobot.jsgf","./iobotalpha.jsgf");
robot.AddAction("raise your left hand", LEFT_HAND_UP);
robot.AddAction("raise your right hand", RIGHT_HAND_UP);
robot.AddAction("let your left hand down", LEFT_HAND_DOWN);
robot.AddAction("let your right hand down", RIGHT_HAND_DOWN);
robot.AddAction("close your eyes", CLOSE_LEFT_EYE);
robot.AddAction("close your eyes", CLOSE_RIGHT_EYE);
robot.AddAction("open your eyes", OPEN_LEFT_EYE);
robot.AddAction("open your eyes", OPEN_RIGHT_EYE);
robot.AddAction("open your right eye", OPEN_RIGHT_EYE);
robot.AddAction("open your left eye", OPEN_LEFT_EYE);
robot.AddAction("close your right eye", CLOSE_RIGHT_EYE);
robot.AddAction("close your left eye", CLOSE_LEFT_EYE);
robot.AddAction("turn head left", LOOK_LEFT);
robot.AddAction("turn head right", LOOK_RIGHT);
robot.AddAction("turn head straight", LOOK_STRAIGHT);
robot.Start();
The above code just shows how you can use the Robot class defined in Robot.cpp/h. The functions are easy to understand. Init() function to initialize GPIO pins to use LEDs and Servos, InitSpeechRecognition() is to initialize pocketsphinx objects with given jsgf grammar files and a thread to handle speech recognition with a mic, AddAction() is to map a command value to command string recognized from speech and finally, Start() is an infinite loop runs to continuously listen for commands and do actions until we press Ctrl+C which will be handled by sigaction() to release the objects we were using.
Code Reference: ROBOT.cpp/ROBOT.h
The things we discussed so far is for a robot to recognize spoken commands and do its basic actions defined within it, like raise hands, open eyes etc. But, our goal is not just that, sooner we are going to discuss about Microsoft Azure and WebAPIs in detail and our Robot has to learn and share its commands over to other Robots as well. We will make our Robot to make web calls to Azure Services. Below is the code snapshot of how we do that through socket,
int Robot::CallWebAPI(string server, string verb, string function, string userid, string param, string &outData)
{
int status;
struct addrinfo host_info;
struct addrinfo *host_ilist;
memset(&host_info, 0, sizeof host_info);
host_info.ai_family = AF_UNSPEC;
host_info.ai_socktype = SOCK_STREAM;
string uri="/api/"+ function + "/" + userid;
if(param!="") uri += "?" + param;
printf("\n%s : %s --> %s\n",verb.c_str(), server.c_str(), uri.c_str());
status = getaddrinfo(server.c_str(), "80", &host_info, &host_ilist);
if (status != 0) return -1;
int skt ;
skt = socket(host_ilist->ai_family, host_ilist->ai_socktype,
host_ilist->ai_protocol);
if (skt == -1) return -2;
status = connect(skt, host_ilist->ai_addr, host_ilist->ai_addrlen);
if (status == -1)
{
close(skt);
return -3;
}
string msg = verb+" "+uri+" HTTP/1.1\nhost: "+server+"\ncontent-length:0\nConnection:Close\n\n";
ssize_t bytes_sent;
bytes_sent = send(skt, msg.c_str(), msg.length(), 0);
ssize_t bytes_recieved;
char buffer[1001];
outData="";
int received=recv(skt, buffer,1000, 0);
while ( received > 0 ) {
buffer[received]='\0';
outData+=buffer;
received=recv(skt, buffer,1000, 0); }
printf("\n%s\n",outData.c_str());
freeaddrinfo(host_ilist);
close(skt);
}
The code above is just pretty familiar, straight forward, classic, old socket stuff we always used and still being used to talk to a server. getaddrinfo() call to get address info for the given server address (eg: google.com) and then create a socket with the address info using socket() call. connect() function establishes a connection to the server using the socket created. Then, we frame the data to be sent to the server. For GET/PUT/DELETE method calls, the data format is going to be same (server/uri?querystring). For, POST method calls, we need to frame the headers, content type, length, body of the data etc. We are not expecting a POST method call on this function, so content-length is set to 0. After framing the data to be sent to the Server, the function uses send() call with the socket created to send the data to the server. Well, our Robot expects some data back from server right? so, recv() function receives the response data from the server. Finally, close() function call is to close the socket. All functions are typical socket connection stuffs, all we need to know is how to frame the data based on the method/verb we are going to use.
Now, our Robot can make web calls to get the actions from Azure like this,
string param="command="+command;
CallWebAPI(m_server,"GET","IOBOTActions", m_uid,param,result);
where m_server is iobot.azurewebsites.net and "GET" is the method we are using, IOBOTActions is the function we are expecting to be called, m_uid is the id for our Robot, param is the query string for GET which carries the command and result is the data response from the server. So with this call, we are asking our Web Service, what is the action code for this "command"? and we get the action code in "result" from the Web Service. Well, hold your breath, just one more section to cover before we dive into Azure topics.
Code Reference: ROBOT.cpp/ROBOT.h
Download PIRobot source code and extract it to your PI device in seperate folder and run the following,
g++ -o iobot iobot.cpp ROBOT.cpp BOTS2T.cpp BOTGPIO.cpp BOTServo.cpp -lpthread -I/usr/local/include/sphinxbase -I/usr/local/include/pocketsphinx -lpocketsphinx -lsphinxbase -lsphinxad
Make sure you have the entire robot circuit setup and execute the robot by running ./iobot.
Our Intel Galileo Robot module is different from Raspberry PI module because, I used Windows on this Intel board. So, let us first see how to setup Windows Operating System on Intel Galileo Gen2 in short.
- Download the Gen2 Windows image from this link Windows image for Galileo Gen 2
- Download apply-BootMedia.cmd from this link apply-BootMedia.cmd. This is to create image on your MicroSD card.
- Format MicroSD card with FAT32
- Open your command prompt in Administrator mode and run the below command, (replace and change the parameters according to your need)
apply-bootmedia.cmd -destination {YourSDCardDrive} -image {.wimFile} -hostname {hostname} -password {password}
{YourSDCardDrive} - Drive letter of your MicroSD card (Eg: E: )
{.wimFile} - The Windows Image file we downloaded from point 1.
{hostname} - hostname for your Intel Galileo
{password} - password for the default Administrator account.
On Windows 7, apply-bootmedia.cmd will not work straight away, you will have to download and install Windows Assessment and Deployment Kit for Windows 8.1 on your Windows 7. Its a time consuming installation on Windows 7, so start it and get into some other job for a while. Once installed, open apply-bootmedia.cmd in notepad and replace "%SystemRoot%\System32\Dism.exe" with the Dism.exe with full path on your computer (from ADK installation). For more details, check this link.
- Download and Install Visual Studio 3013 Express for Desktop (or a full version) on your computer.
- Download and Install Windows Developer Program for IOT
- Almost done, put your MicroSD card on Galileo Gen 2 board and connect to Ethernet cable, power cable and switch ON. Oops, where to see whats going on, on the the board. Open command prompt on your computer and type "telnet {hostname}". You can even try ping {hostname} before telnet to make sure Galileo is up and running.
Telnet will prompt for username and password. username is "Administrator" and password is the {password} you have used with apply-bootmedia.cmd during MicroSD image creation. Normally, it is recommended to use "mygalileo" as the hostname just for only one reason. "Windows Developer Program for IOT" gives a project template on Visual Studio and that template configures the remote debugging with "mygalileo" name by default. So if you want to use different hostname, go and change the "Remote Server Name" under Project Properties --> Configuration Properties --> Debugging --> Remote Server Name with the {hostname} you preferred.
As I have already mentioned, Windows Developer Program for IOT installation gives you a template on Visual Studio and that is where we are going to start our Intel Galileo Gen 2 Windows programming. Run Visual Studio 2013 for Desktop --> New Project --> Templates | Visual C++ | Windows for IoT --> Galileo Wiring App. Give a project name, location, solution name and click OK. You will be presented with default code written by template already on you screen now. Open Main.cpp and you will see a very much familiar code if you have done arduino programming ever already,
int _tmain(int argc, _TCHAR* argv[])
{
    return RunArduinoSketch();
}
void setup()
{
}
void loop()
{
}
This format of the code is just a mimic of arduino coding method, you can even skip these and have your code like this,
int _tmain(int argc, _TCHAR* argv[])
{
while(true)
{
}
return 0;
}
you can now do your pinMode(), digitalWrite() calls and click on "Remote Windows Debugger" to run your program on Intel Galileo Gen 2 board. Remember one fact, "it is Windows", any abrupt shutdown may cause delay during bootup process, so always make sure you shutdown Galileo (with Windows) properly, for that open Telenet as explained earlier and type "shutdown /p".
Galileo robot design is very much similar to PI robot, but a bit different as this will not have a microphone or speaker connected, instead this will receive command from an Android phone, we will see how to do that in Azure Mobile Service section. Below is the simple design of Galileo Robot,
Galileo Robot also uses similar Servo class used in PI, this is just a windows version of it with windows thread running on it. Otherwise, the robot code goes very similar like this,
Robot robot;
robot.init(L"iobot.azurewebsites.net",
12,
13,
6,
5,
4
);
robot.Eyes(OPEN);
.
.
.
void doCommand(char* command)
{
switch (atoi(command))
{
case LEFT_HAND_UP: robot.MoveLeftHand(0); break;
case LEFT_HAND_DOWN: robot.MoveLeftHand(180); break;
case LEFT_HAND_STRAIGHT: robot.MoveLeftHand(90); break;
case RIGHT_HAND_UP: robot.MoveRightHand(180); break;
case RIGHT_HAND_DOWN: robot.MoveRightHand(0); break;
case RIGHT_HAND_STRAIGHT: robot.MoveRightHand(90); break;
case TURN_HEAD_LEFT: robot.TurnHead(LEFT_SIDE); break;
case TURN_HEAD_RIGHT: robot.TurnHead(RIGHT_SIDE); break;
case TURN_HEAD_STRAIGHT: robot.TurnHead(STRAIGHT); break;
case CLOSE_LEFT_EYE: robot.LeftEye(CLOSE); break;
case CLOSE_RIGHT_EYE: robot.RightEye(CLOSE); break;
case OPEN_LEFT_EYE: robot.LeftEye(OPEN); break;
case OPEN_RIGHT_EYE: robot.RightEye(OPEN); break;
case CLOSE_BOTH_EYES: robot.Eyes(CLOSE); break;
case OPEN_BOTH_EYES: robot.Eyes(OPEN); break;
}
}
PI Robot module is using socket to connect to the web services whereas Galileo module is using WinHTTP APIs using WinHttpOpen(), WinHTTPConnect(), WinHTTPOpenRequest(), WinHTTPSendRequest() and WinHTTPReceiveResponse(). There is not much to explain about these function calls as these are available in MSDN for more than a decade now. The function Robot::CallWebAPI() is using WinHTTP API calls to make GET, PUT requests to Web Service. But, there is always different ways to do the same job, below is the other way which can be used for HTTP connections for our Galileo and the way is C++ REST SDK. The REST SDK version which can be used on Intel Galileo at the time of writing this article is 2.2. So, while on your Visual Studio 2013, goto Tools--> NuGet Package Manager --> Package Manager Console and enter "Install-Package cpprestsdk -Version 2.2.0" to install REST SDK version 2.2 for you project. By having NuGet package on you project, now you will be able to compile you project without any errors. But, if you deploy your exe to Galileo, you will get "dependency dll error". For this, you will have to do one small workaround to get REST SDK working for our Galileo. The workaround is as follows,
- Download Casablanca REST SDK version 2.2.0 source code.
- Open casablanca120.desktop.sln on Visual Studio 2013.
- Goto casablanca120 solution properties --> Configuration Properties --> C/C++ --> Code Generation --> Enable Enhanced Instruction Set. Change "Not set" to "No Enhanced Instructions (/arch:IA32)" for both Debug and Release modes.
- "Rebuild All" casablanca120 solution.
- Copy cpprest120d_2_2.dll and cpprest120_2_2.dll from Debug and Release folders respectively to your Galileo's C:\test folder. "C:\test" is the default deployment folder for dev on Galileo Windows. You can change it on project properties. Note the "d" character on debug dll name.
Thats done, now your Galileo is ready for C++ REST SDK programming. Below is the REST SDK way of doing a web call using http_client on Galileo.
void Robot::CallWebAPIREST(const wchar_t* pszServer, const wchar_t* pszURL, wchar_t* pszData, wchar_t* pszResponseData)
{
    std::wstringstream url;
    url << L"http://" << pszServer << L"/" << pszURL;
    if (wcscmp(pszData, L"") != 0) url << "?" << pszData;
    web::http::client::http_client client(url.str());
    client.request(web::http::methods::GET).then([pszResponseData](web::http::http_response response)
    {
        if (response.status_code() == web::http::status_codes::OK)
        {
            utility::string_t result = response.extract_string().get();
            wcscpy(pszResponseData, result.c_str());
        }
    });
}
Code Reference: ROBOT.cpp/ROBOT.h
PI and Galileo Robots are ready for doing their basic commands now. But, how they will share commands with each other. At this point of this article, we discussed about how to make the robots and how to make a web call. So, rest of the little bit stuff we need to discuss is not actually little - Microsoft Azure, the cloud platform to host our web service to help our Robots share their command and in fact our Galileo Robot can work only if it has a web service to help him receive his commands. Microsoft Azure - with this title on this section we are going to discuss below topics,
- Microsoft Azure's Platform as a Service (PaaS)
- Azure SQL Database for storing our Robot commands
- Azure Website for our Web API
- ASP .NET MVC Web API for Azure Website
- Azure Mobile Service for Android
- Microsoft Azure's Infrastructure as a Service (IaaS)
- Windows 2012 Server on Virtual Machine
- Hosting Web API on Virtual Machine
Creating a SQL Database is no more a difficult task, its a matter of couple of clicks on Azure. No more physical Server maintenance or even a Virtual Server maintenance with Azure's Platform as a Service. For our robots to store and share commands, we have to create one database. To create an Azure SQL Database,
After clicking "Custom Create" option, its a two step process. On first step, give database a name, select "New SQL database server" for Server and leave others to default unless you really look for specific configuration. On step two, enter a login name for your database and password, select a region which you think your database service should be available. Its done! You have a database created and it running on your preferred location as well. It will take couple of minutes for Azure to create your database actually. Actually, your database is running on a Server, you can find the Server details on "SQL Databases" main page. You may need to know about this as there are still few things you need to take care with your Server like Database Backup, Allowed IPs to access your database etc.,
For further things to do with your created database, download and install SQL Management Studio 2012 or a version latest. Connect to Azure SQL Database we created by providing "Server" name as "{servername}.database.windows.net", "Authentication" as "SQL Server Authentication", Login as "the name you have given" on Azure SQL database and "Password" as "the password you have given" on Azure SQL database, finally click on Connect. Dont get surprised if you are getting an error, it may be the IP access to your Azure SQL Database. Goto Azure --> SQL DATABASES --> Servers --> Click on your SQL Server --> Configure. You may have the attempted IP address listed already there or you can enter the IP address in the box available there to allow Database Server access for the IP and dont forget to click "Save" in the bottom of the page.
Now, time to create some tables on our database and thats going to be as simple as we create any SQL Database table with SQL Management Studio. Right click on the database name to open a query window or Right click on "Tables" to create a table through wizard. Let us create few small tables on which our Robots can store data.
ROBOT table for PI Robot and Galileo Robot to look for common commands which are not their basic commands. COMMAND is a string value which Robots will look for and ACTIONS is comma separated integer values where each value represent one basic action. USER_ID is the id given for Robot.
CREATE TABLE [dbo].[ROBOT](
    [CID] [int] IDENTITY(1,1) NOT NULL,
    [COMMAND] [nvarchar](max) NOT NULL,
    [ACTIONDATA] [nvarchar](max) NULL,
    [USER_ID] [varchar](20) NULL,
    [SHARE_TYPE] [int] NULL,
 CONSTRAINT [PK_ACTIONS] PRIMARY KEY CLUSTERED
(
    [CID] ASC
)WITH (PAD_INDEX = OFF, STATISTICS_NORECOMPUTE = OFF, IGNORE_DUP_KEY = OFF, ALLOW_ROW_LOCKS = ON, ALLOW_PAGE_LOCKS = ON)
)
USERDATA table for Robot id management and there is an Access code column which will be used for accessing web portal for Robot management. This access code expires in 2 minutes from the time it created. To create an access code, we need to speak to our Robot. For eg: for getting access code for PI Robot, ask him "Give me an access code" and you will get one.
CREATE TABLE [dbo].[USERDATA](
    [CID] [int] IDENTITY(1,1) NOT NULL,
    [USER_ID] [varchar](20) NOT NULL,
    [ACCESS_CODE] [varchar](20) NOT NULL,
    [ACODE_EXP] [datetime] NULL,
    [DISPLAY_NAME] [varchar](20) NULL,
 CONSTRAINT [PK_USERDATA] PRIMARY KEY CLUSTERED
(
    [USER_ID] ASC
)WITH (PAD_INDEX = OFF, STATISTICS_NORECOMPUTE = OFF, IGNORE_DUP_KEY = OFF, ALLOW_ROW_LOCKS = ON, ALLOW_PAGE_LOCKS = ON)
)
Thats it, we have created an Azure SQL database and some tables which can be used by our Robots. Now, time to create some Web APIs to access the data in our database for our Robots.
Before creating an ASP.NET MVC Web API project, we will have to create one Azure Website on which we can host our Web APIs. As I said earlier for database, creating a website is also a couple of clicks away. In fact, its more simpler than that. Goto your Azure portal --> Click on New in the bottom of the page --> Compute --> Web App --> Custom Create. Enter an url name "{urlname}.azurewebsites.net" and select your preferred region (optionally select a database to link if you want). Thats it, you will have your website created and running now. Click on your created website and goto "Configure" to check all the configuration items for your website like application to support (.NET, PHP etc), default documents (index.htm, Default.asp etc) and more.
Let us create our ASP.NET MVC Web APIs now for our Robots to access the Azure database. To create Web API project I used "Visual Studio 2013 Express for Web" which is free from Microsoft. Open Visual Studio Express 2013 for Web and create a "New Project", choose "ASP.NET MVC 4 Web Application",
Select "Web API" from the Project Template on "New ASP.NET MVC 4 Project" and click OK.
Now, you will be presented with default code generated with some Get, Put, Post and Delete functions under ValuesController.cs. Sounds familiar words we heard somewhere else? Yes, aren't they GET, PUT, POST and DELETE methods/verbs we use on HTTP protocol? Definitely yes, they are the same. This project is going to be deployed as Web package on to our Azure website which we just created and any GET, PUT, POST and DELETE method calls to our given Web API url will be handled by these function internally. So, the job is easy now, isn't it? Just write all our needed stuffs into these functions and make our Robot aware of the web url to call GET, POST etc. Correct, thats what we are going to do! But, there is one more thing we need to know is how to access Azure SQL Database from these functions. That is the whole idea right? Before going into that, let us first see how to use these functions. Try running the project as is without modifying any code. Note that you can choose your preferred browser to run the project.
You will have localhost running with a port number chosen by the debugger and you can see a default ASP.NET Web API home page as well. Now, try modifying the URL as "http://localhost:{portnumber}/api/Values" and enter. Have you got the xml or json results on your browser showing "value1" and "value2"? Good, thats all we need to understand here. The class name "ValuesController" tells you that "Values" is the API name for that class functions to be called after trimming down "Controller" from it. So making a GET request to "http://localhost:{portnumber}/api/Values" will invoke ValuesController class function and since it was a GET request the default Get() function will get called. To call Get(int id) function, the url goes like this "http://localhost:{portnumber}/api/Values/1", doing a GET request using this url will call Get(int id) function where id will have value 1 on it. Further, what if you want to pass more parameters? Let us modify the code a bit now, add couple of more Get() functions like this to your default code now,
public string Get(int id, string val)
{
    return "Get with 2 params called";
}

public string Get(int id, string val1, string val2)
{
    return "Get with 3 params called";
}
The url now will have to pass querystrings to get these functions called. Check the below table for a sample of function and web url mappings.
So we know what is the job of a Controller in our Web API project. Now, let us go back to our earlier question, how to connect to Azure SQL Database on these functions. For this, we will have to understand Microsoft's "Entity Framework", we are not going to deep dive into what it is, but as a definition this is what Microsoft says,
"Entity Framework (EF) is an object-relational mapper that enables .NET developers to work with relational data using domain-specific objects. It eliminates the need for most of the data-access code that developers usually need to write."
We will create an Entity class which will simplify our job to connect to a database. Here is how we are going to do that, right click on your "Models" folder or your project under Solution Explorer and select "Add" --> "Class".
Select "Data" under "Visual C#" and choose "ADO.NET Entity Data Model", give a name for your Entity Model and click on OK.
You will have "Entity Data Model Wizard" now. Choose "EF Designer from Database" as we are going to build a model class from already desinged database. Click "Next" and you will get the most important page we are looking for here - "Data Connection". Click on "New Connection", which will popup "Connection Properties" window, on which enter your Azure SQL Database Servername and connection details,
You will have your database server listed on "Choose your data connection" page of "Entity Data Model Wizard". Choose "Yes, include the sensitive data in the connection string", leave "Save connection settings in Web.Config as" checked and give a name for the Entities, then click "Next". You may be asked to choose Entity Framework version, in our case just leave it to Entity Framework 5.0 and proceed Next. The page we will get right now is "Choose your Database Objects and Settings". Here choose the database tables for which you want the model class to be created.
Thats it. We have created an Entity Model class which can represent our Azure SQL database on our Web API functions. Let us see how we are going to use these model classes on our Web APIs. The default Container (ValuesContainer) is not useful enough for us, as we need to have our own APIs with right name and Entity Model we created right? So, let us create our own containers with our created Entity Model. Before doing that, just rebuild the project once. Right Click on "Controller" folder under Solution Explorer --> Add --> Controller. Give a name for your Controller. Remember that this will be the Web API name on your url (excluding "Controller" word). Choose "API controller with read/write actions, using Entity Framework" and choose the model class for the table you are creating the Controller. Finally choose the Data context which is the name you have given on "Choose your data connection" page of "Entity Data Model Wizard".
Click on OK and you will get your new Controller created with the complete class code for GET, PUT, POST and DELETE functions. Notice the additional line added before the first Get() function, the entity class and object, that is going to be our database representative through which we will do database query, insert, delete etc.,
private IOBOTDBEntities db = new IOBOTDBEntities();
public IEnumerable<ROBOT> GetROBOTs()
{
return db.ROBOTs.AsEnumerable();
}
public ROBOT GetROBOT(int id)
{
ROBOT robot = db.ROBOTs.Find(id);
if (robot == null)
{
throw new HttpResponseException(Request.CreateResponse(HttpStatusCode.NotFound));
}
return robot;
}
The default code gives you exactly what a Get/Put/Post/Delete functions supposed to do, but you can change it to whatever you want it to do. Here is one of the modified functions for our IOBOT project Robots,
public string GetROBOTs(string id)
{
    string commands = "";
    DbSqlQuery<ROBOT> sres = db.ROBOTs.SqlQuery("SELECT * FROM ROBOT WHERE USER_ID = @p0", id);
    if (sres == null)
    {
        return "NOK";
    }
    foreach (ROBOT robot in sres)
    {
        commands += robot.COMMAND + "|";
    }
    commands = commands.Trim(new char[] { ' ', '|' });
    return commands;
}
Notice the SqlQuery() function call, the parameter is passed separately to the query using @p0. If you want to pass more parameters, keep adding @p1, @p2 and so on. For more than one parameter the second parameter of SqlQuery() function will have to be an object array like the below one,
DbSqlQuery<ROBOT> sres = db.ROBOTs.SqlQuery("SELECT * FROM ROBOT WHERE USER_ID = @p0 and COMMAND= @p1",
                new object[] { id, command });
For adding new record to the table if not exist our Web API uses PUT,
public string PutROBOTs(string id, string command, string actions)
{
DbSqlQuery<ROBOT> sres = db.ROBOTs.SqlQuery("SELECT * FROM ROBOT WHERE USER_ID = @p0 and COMMAND= @p1",
new object[] { id, command });
if (sres == null)
{
return "NOK";
}
ROBOT robot;
if (sres.Count() == 0)
{
robot = new ROBOT();
robot.USER_ID = id;
robot.ACTIONDATA = "";
robot.COMMAND = command;
robot.SHARE_TYPE = 0;
db.ROBOTs.Add(robot);
}
else
{
robot = sres.ElementAt(0);
robot.ACTIONDATA = actions;
db.Entry(robot).State = EntityState.Modified;
}
try
{
db.SaveChanges();
}
catch (DbUpdateConcurrencyException ex)
{
return "NOK";
}
return "OK";
}
Note the db.ROBOTs.Add(robot) code which adds a new record to our ROBOT table (consider the table name should have been named as ROBOTCommands) and db.SaveChanges() makes the changes we made add/modify to the Azure database which we configured already.
Refer to the source code of the project attached to this article for all functions which handles table record addition, deletion and modification on the database tables.
Publish Web APIs to Azure website
Visual Studio provides an easiest way to publish our Web API project to Azure. Right click on our project under Solution Explorer and click on "Publish". Select "Publish Target" as "Microsoft Azure Websites", you will be prompted to sign in to your Microsoft Account. On successful sign in, you can select your Azure website you have created earlier from the combo box under "Existing Websites". Clicking OK will download Web Deploy credentials requried for publishing your project to your Azure website. You can verify your destination URL as well. Click Next, leave all defaults and then click "Next" again, then "Publish". Few seconds later, your Web API will be live on Microsoft Azure website and you can access the URL APIs like this,
http:
where IOBOTActions is the controller name, PI23432 is the first parameter value of Get function and this call will return the non basic commands available for Robot with id PI23432.
As I have mentioned earlier, PI robot recognize commands through microphone, but Galileo recognize commands through an Android phone. So, in this section we are going to create an Android application which consumes Microsoft Azure Mobile Service to connect to our Azure SQL Database. Let us start creating our Android project now.
Setting up Android Studio and Mobile Service SDK
- Download and install Android Studio
- Open Android Studio and Select a project template (a Blank Activity) and create a project named "IOBOTMobile"
- Download Microsoft Azure Mobile Service SDK for Android.
- Extract the zip file to a local drive folder.
- Select all jar files on the extracted folder and right click --> Copy
- gson-2.2.2.jar,
- mobileservices-1.1.5.jar,
- mobileservices-1.1.5.jar.properties,
- mobileservices-1.1.5-javadoc.jar,
- mobileservices-1.1.5-sources.jar
- Goto Android Studio --> Project IOBOTMobile --> app --> libs and right click on libs --> "Paste" all your copied SDK files.
- Goto to individual SDK jar files under libs folder and right click --> Choose "Add as library"
- Save your Android project and click on "Sync project with Gradle Files".
Now we have created an Android project with Microsoft Azure Mobile Service SDK libraries configured on it. Time to go back to Azure portal to create a mobile service.
Click on "Create". As we always have seen so far with Azure, its a couple of clicks process. First page for entering an unique url for your mobile service, choose a new database or existing database (or a free 20 MB database), select a region on which you prefer to host your mobile service and select the Backend as "Javascript", finally click "-->" to go to next page. Depending on your choice earlier, the second page will ask database details, in our case I used existing SQL Database which we created already, so this page will ask for login details of our existing database. Thats it! we have created an Azure Mobile Service which can be used with our Android project now.
Go back to our Android Studio project, open Activity Class of the project and declare Mobile Service Client objects.
private MobileServiceClient mClient;
private MobileServiceTable<IOBOTCommand> mIOBOTCommand;
and onCreate() of Activity add the below code,
try {
mClient = new MobileServiceClient(
"https://iobot.azure-mobile.net/",
"yourmobileservicekeyfrommanagekeys",
this);
mIOBOTCommand = mClient.getTable(IOBOTCommand.class);
}
catch(MalformedURLException e)
{
MessageBox(e.getMessage(),true);
}
If you notice, mClient is the Mobile Service Client which is going to help us connect to Azure Mobile Service. new MobileServiceClient() takes three params and the first two are the keys to open Azure Mobile Service for our project. First one the url we created for our Azure Mobile Service and the next one the "Application Key" we can generate from "Mange Keys" option.
So, with the Mobile Service URL and Application key, we are already connected to Azure Mobile Service. Let us start doing table stuffs now. Goto Azure portal --> Mobile Services --> Choose you Mobile Service --> Data --> Click Create button in the bottom of the portal to create a Table by giving a name to it and leave the rest of it to default values. Goto the created table and click on columns, you will get the default columns created already as shown below (red boxed),
We have "id" created already as a column by default, let us add "command" as a column to the created table (green boxed in the above screenshot). Click on "ADD COLUMN", give a column name (command) and type (string). Thats enough for our Galileo to read.
Now, whenever the user clicks on button to speak a command on his Android phone, we will create a command record on Azure SQL Database which will be read by Galileo on the other end. Our Web API will delete the command record once it is read. So, adding new command record to the created Azure table goes like this,
if(mClient!=null && !command.isEmpty())
{
final IOBOTCommand robotCmd=new IOBOTCommand();
robotCmd.mCommand=command;
robotCmd.mRobotId="32123";
mIOBOTCommand.insert(robotCmd,new TableOperationCallback<IOBOTCommand>() {
public void onCompleted(IOBOTCommand entity, Exception exception, ServiceFilterResponse response) {
if (exception == null) {
Show("Command Sent Successfully!",true);
} else {
Show("Command was not sent!",true);
}
}
});
}
IOBOTCommand object has been created and inserted into SQL Database table. But, how? What is IOBOTCommand class? From where it came? Note the declaration of mIOBOTCommand object which is from MobileServiceTable class with the template IOBOTCommand class. IOBOTCommand class is the template class defined to match with our Database table. The entire IOBOTCommand class is given below,
package iobot.iobotmobile;

public class IOBOTCommand {
    @com.google.gson.annotations.SerializedName("command")
    public String mCommand;
    @com.google.gson.annotations.SerializedName("id")
    public String mRobotId;

    public IOBOTCommand() {

    }
}
Two member variables declared mCommand and mRobotId to match with two columns we have as command and id in our Azure Mobile Service table. Hence, this class acts as a template class and being used with MobileServiceTable to read/write data to Azure table. Finally, dont forget to add the important entry in AndroidManifest.xml file,
<uses-permission android:name="android.permission.INTERNET" />
As I have mentioned earlier, the user speaks on phone to command Galileo, so our Android application should be capable of recognizing speech and convert it to text right? Let us do that as well, check the below code,
findViewById(R.id.spkButton).setOnClickListener(new View.OnClickListener() {
            @Override
            public void onClick(View view) {
                Intent i = new Intent(RecognizerIntent.ACTION_RECOGNIZE_SPEECH);
                i.putExtra(RecognizerIntent.EXTRA_LANGUAGE_MODEL, "en-US");
                try {
                    startActivityForResult(i, 1234);
                } catch (Exception e) {
                    MessageBox("Error initializing speech to text engine.", true);
                }
            }
        });
The code uses a speech recognition intent class of Android with language model set to "en-US". startActivityForResult() invokes the intent and wait for result which we will get it in onActivityResult(). Note the request code on startActivityForResult(), that is the id (1234) for our request for running the speech recognition activity. It can be any number and the same number has to be checked onActivityResult() to get the correct result. thingsYouSaid String array will be filled with set of strings recognized by the Speech Recognizer. Sorted as the best one at the top.
@Override
protected void onActivityResult(int requestCode, int resultCode, Intent data) {
    super.onActivityResult(requestCode, resultCode, data);
    if (requestCode == 1234 && resultCode == RESULT_OK) {
     ArrayList<String> thingsYouSaid = data.getStringArrayListExtra(RecognizerIntent.EXTRA_RESULTS);
        ((TextView) findViewById(R.id.textView)).setText(thingsYouSaid.get(0));
        ProcessSpokenText(thingsYouSaid.get(0).trim());
        if(bSpeakerReady) {
            Say(thingsYouSaid.get(0).trim());
        }
    }
}
There is a Text2Speech code as well in the project. Check the source code of the project for more details.
So far, we have discussed about making a robot using Raspberry PI and Intel Galileo and creating different services on Microsoft Azure for our robots to use. Before concluding this article, let us have a look into one other Service Microsoft Azure provides called Infrastructure as a Service aka IaaS and see a bit of how it can be used for our purpose.
It cannot be made easier than this. Creating a Server with a Server Operating System of your choice in few clicks! Microsoft Azure makes it happen in front of your eyes. We have discussed already all Azure stuffs needed for our Robot. Let us take one of the PaaS service and see how we can do it in IaaS service - Azure Virtual machine. Creating a Virtual Machine is, as usual a couple of clicks away,
After clicking on "CREATE A VIRTUAL MACHINE", you are just few seconds away from getting your fresh, powerful Server hosted on Microsoft Azure platform. Let us not do it this way now. We will do it through Visual Studio to make it more easy and simple as you will have your Virtual Machine created with Webdeploy enabled as well to make the publish job more easier.
Go back to our ASP.NET MVC Web API project on Visual Studio 2013. Right click on project name under Solution Explorer and click on "Publish" to get the "Publish" wizard. Click on "More options" while on Profile section. Then click on "Microsoft Azure Virtual Machine". You may have to login with your Microsoft Azure account. Click on "New" button to create a Virtual Machine through our Visual Studio now.
Click OK to create our new Virtual machine with Web deploy enabled and Endpoints configure by default. Wait for sometime to get the Virtual machine created. You can check the progress on the Output window of the Visual Studio.
Once created, go to Publish wizard again on Visual Studio, and you can notice your Virtual Machine profile created already for you to publish your project to Azure Virtual Machine. Now click on publish on your Publish wizard and access your Web API live from azure website.
To connect to the virtual machine go to Azure portal --> Virtual Machines --> Select your virtual machine and click on Connect >< icon in the bottom of the screen. You will get a rdp file downloaded. Click and open the rdp file to connect to your Virtual Machine.
If you want to share files between your computer and virtual machine, there are many ways, but the way which I found very easy and comfortable is through RDP resource share. Goto Run windows, type mstsc and enter. Select "Show options" and select "Local Resource" as shown in the below picture. Finally you will have your selected drive mapped to the virtual machine.
Following are to todo list of the Robot which I thought of doing/doing right now or will be doing. However, if you want to try these,
- Walking Feature with self balancing, finger actions - difficult task, but will be done at sometime in near future.
- PI Robot has the feature of creating an access code with 2 mins expiry. So everytime when we need to access a Robot Management portal, we will have to ask PI Robot "Give me an access code" and it will tell you a 6 digit access code to access the web portal. But the web portal is not ready yet.
- Private, Public and protected commands - The idea is to keep private commands for the robot and public commands which can be accessed by any robots and protected commands only for friendly robots (group).
- A camera for face recognition - difficult task again, but can be done with extra efforts if I get some time to spend.
- PI Robot uses alphabets to learn new commands like to teach him "wink" you will have to say "letter as in whiskey, letter as in india, letter as in november, letter as in keyboard". This is to avoid loading entire English words into recognition which will decrease the accuracy. But, for every new command (only once), you will have to use phonetic alphabets method to teach him a new word. I will have to find a different way of doing it.
- Earlier the idea was to have only PI Robot, but thanks to "The Codeproject" for the Intel Galileo board, I used it as a companion for PI Robot on this article.
- The trailer video was created completely using IPhone camera and Microsoft Powerpoint.
- The Galileo Robot was planned little late, so couldnt able to buy a similar Robot piece (as the PI Robot) in the market as it was out of stock. Luckily got a last one with some fault from a shop. Just grabbed it as anyhow I was planning to break it completely inside.
- Last 50% of this article was completed in a week time whereas first half took 2 months.
- Trailer video has a clip where I say "Enable Sharing" to enable PI Robot to share commands with Galileo on which Galileo mimic what PI does. But this was removed later in the source to keep Galileo Robot independent and do its own commands through Azure.
- IOBOT name was chosen as an acronym of Internet Of BOTs, but coincidently, it resembles I Robot movie name as well. (The final part of trailer video shows IOT turning into IOBOT).
This article was an attempt to explain all basic needs for creating a small Robot with Azure backend. There are still more can be done for the Robot features and this article is not the end of it. The options are open and you can keep exploring and add features yourself for your Robot. I will have to take a break and start working on my Robot's finger movements, walking abilities etc.,.
For article's simplicity, I have not done any encryption stuffs to the data being passed between Robots and Azure. But, better to have some security features added to the project when you do it. Thanks for your time reading the article.
Naren started coding during 1999 with FORTRAN, then COBOL, PASCAL, C, C++, VC++ ..... C#, Java, ASP so on, till today. He claims himself as techie who loves coding, but he is not even sure which technology or platform he loves, most of the time Windows, some time WinCE, some time Linux, nowadays Android and embedded platforms. He can do some query stuffs with Oracle, SQL Server, MySQL. He strongly believes that C/C++ is a must for all programmers, "if you know C/C++, you can do programming on any language". He is an electronic gadget guy who likes to buy small gadgets all the time, at least he will do window shopping on a gadget shop. His interest always have been with Automation in any form, call it a little automated program sitting in his Laptop or a home automation program runs on his mobile. Apart from coding, he likes to do...???


 General
  News
News  Suggestion
  Question
  Bug
Bug  Answer
  Joke
Joke  Praise
  Rant
Rant  Admin
Admin 


 article.