Introduction
A few members asked me to write an article on ASP.NET MVC security and so I planned to create a series of articles. In this series we will see:
In this article we will see how to use ASP.NET Identity in MVC Application for creating user roles and displaying the menu depending on user roles.
Here we will see how to:
- Create default admin role and other roles.
- Create default admin users.
- Add Username for new User Registration.
- Select User Role during User Registration.
- Change Login Email with User Name.
- Display Role Creation Menu only for Admin User.
- Display message for normal user.
- Redirect Unauthenticated users to default home page.
Authentication and Authorization
Authentication
Check for the Valid User. Here the question is how to check whether a user is valid or not. When a user comes to a website for the first time he will register for that website. All his information, like user name, password, email, and so on will be stored in the website database. When a user enters his userID and password, the information will be checked with the database. If the user has entered the same userID and Password as in the database then he or she is a valid user and will be redirected to the website home page. If the user enters a UserID and/or Password that does not match the database then the login page will give a message, something like “Enter valid Name or Password”. The entire process of checking whether the user is valid or not for accessing the website is called Authentication.

Authorization
Once the user is authenticated he needs to be redirected to the appropriate page by his role. For example, when an Admin is logged in, then he is to be redirected to the Admin Page. If an Accountant is logged in, then he is to be redirected to his Accounts page. If an End User is logged in, then he is to be redirected to his page.
Prerequisites
Visual Studio 2015: You can download it from here.
Using the code
Create your Web Application in Visual Studio 2015
After installing our Visual Studio 2015 click Start, then Programs and select Visual Studio 2015 - Click Visual Studio 2015. Click New, then Project, select Web and then select ASP.NET Web Application. Enter your project name and click OK.
Select MVC and click OK.
Create a Database
Firstly, we will create a Database and set the connection string in web.config file for DefaultConnection with our new database connection. We will be using this database for ASP.NET Identity table creation and also our sample attendance Web project. Instead of using two databases as one for default ASP.NET user database and another for our Attendance DB, here we will be using one common database for both user details and for our sample web project demo.
Create Database: Run the following and create database script to create our sample test database.
USE MASTER;
IF EXISTS (SELECT [name] FROM sys.databases WHERE [name] = 'AttendanceDB' )
BEGIN
ALTER DATABASE AttendanceDB SET SINGLE_USER WITH ROLLBACK IMMEDIATE
DROP DATABASE AttendanceDB ;
END
CREATE DATABASE AttendanceDB
GO
USE AttendanceDB
GO
Web.Config
In web.config file we can find the DefaultConnection Connection string. By default ASP.NET MVC will use this connection string to create all ASP.NET Identity related tables like AspNetUsers, etc. For our application we also need to use database for other page activities instead of using two different databases, one for User details and one for our own functionality. Here I will be using one database where all ASP.NET Identity tables will be created and also we can create our own tables for other page uses.
Here in connection string change your SQL Server Name, UID and PWD to create and store all user details in one database.
<connectionStrings>
    <add name="DefaultConnection" connectionString="data source=YOURSERVERNAME;initial catalog=AttendanceDB;user id=UID;password=PWD;Integrated Security=True" providerName="System.Data.SqlClient"  />
  </connectionStrings>
Create default Role and Admin User
Firstly, create default user role like “Admin”,”Manager”, etc and also we will create a default admin user. We will be creating all default roles and user in “Startup.cs”
OWIN (OPEN WEB Interface for .NET) defines a standard interface between .NET and WEB Server and each OWIN application has a Startup Class where we can specify components.
Reference
In “Startup.cs” file we can find the Configuration method. From this method we will be calling ourcreateRolesandUsers() method to create a default user role and user. We will check for Roles already created or not. If Roles, like Admin, is not created, then we will create a new Role as “Admin” and we will create a default user and set the user role as Admin. We will be using this user as super user where the user can create new roles from our MVC application.
public void Configuration(IAppBuilder app)
{
ConfigureAuth(app);
createRolesandUsers();
}
private void createRolesandUsers()
{
ApplicationDbContext context = new ApplicationDbContext();
var roleManager = new RoleManager<IdentityRole>(new RoleStore<IdentityRole>(context));
var UserManager = new UserManager<ApplicationUser>(new UserStore<ApplicationUser>(context));
if (!roleManager.RoleExists("Admin"))
{
var role = new Microsoft.AspNet.Identity.EntityFramework.IdentityRole();
role.Name = "Admin";
roleManager.Create(role);
var user = new ApplicationUser();
user.UserName = "shanu";
user.Email = "syedshanumcain@gmail.com";
string userPWD = "A@Z200711";
var chkUser = UserManager.Create(user, userPWD);
if (chkUser.Succeeded)
{
var result1 = UserManager.AddToRole(user.Id, "Admin");
}
}
if (!roleManager.RoleExists("Manager")) {
var role = new Microsoft.AspNet.Identity.EntityFramework.IdentityRole();
role.Name = "Manager";
roleManager.Create(role);
}
if (!roleManager.RoleExists("Employee"))
{
var role = new Microsoft.AspNet.Identity.EntityFramework.IdentityRole();
role.Name = "Employee";
roleManager.Create(role);
}
}
When we run our application we can see new default ASP.NET user related tables will be created in our AttendanceDB Database. Here we can see in the following image as all ASP.NET user related tables will be automatically created when we run our application and also all our default user roles will be inserted in AspNetRoles table and default admin user will be created in AspNetUsers table.
Customize User Registration with adding username and Role
By default for user registration in ASP.NET MVC 5 we can use email and passoword. Here, we will customize the default user registration with adding a username and a ComboBox to display the user roles. User can enter their username and select there user role during registration.
View Part: Firstly, add a TextBox for username and ComboBox for displaying User Role in Register.cshtml
Double click the Register.cshtml and change the html code like the following to add textbox and combobox with caption. Here we can see first we add a textbox and Combobox .We bind the combobox with (SelectList) ViewBag.Name.
@model shanuMVCUserRoles.Models.RegisterViewModel
@{
    ViewBag.Title = "Register";
}

<h2>@ViewBag.Title.</h2>
@using (Html.BeginForm("Register", "Account", FormMethod.Post, new { @class = "form-horizontal", role = "form" }))
{
    @Html.AntiForgeryToken()
    <h4>Create a new account.</h4>
    <hr />
    @Html.ValidationSummary("", new { @class = "text-danger" })
    <div class="form-group">
        @Html.LabelFor(m => m.Email, new { @class = "col-md-2 control-label" })
        <div class="col-md-10">
            @Html.TextBoxFor(m => m.Email, new { @class = "form-control" })
        </div>
    </div>

    <div class="form-group">
        @Html.LabelFor(m => m.UserName, new { @class = "col-md-2 control-label" })
        <div class="col-md-10">
            @Html.TextBoxFor(m => m.UserName, new { @class = "form-control" })
        </div>
    </div>
    <div class="form-group">
        @Html.LabelFor(m => m.Password, new { @class = "col-md-2 control-label" })
        <div class="col-md-10">
            @Html.PasswordFor(m => m.Password, new { @class = "form-control" })
        </div>
    </div>

    <div class="form-group">
        @Html.LabelFor(m => m.ConfirmPassword, new { @class = "col-md-2 control-label" })
        <div class="col-md-10">
            @Html.PasswordFor(m => m.ConfirmPassword, new { @class = "form-control" })
        </div>
    </div>

    <div class="form-group">
        @Html.Label("user Role", new { @class = "col-md-2 control-label" })
        <div class="col-md-10">
            @*@Html.DropDownList("Name")*@
            @Html.DropDownList("UserRoles", (SelectList)ViewBag.Name, " ")
        </div>
    </div>

    <div class="form-group">
        <div class="col-md-offset-2 col-md-10">
            <input type="submit" class="btn btn-default" value="Register" />
        </div>
    </div>
}

@section Scripts {
    @Scripts.Render("~/bundles/jqueryval")
}
Model Part
Next in AccountViewModel.cs check for the RegisterViewModel and add the UserRoles and UserName properties with required for validation.
Double click the AccountViewModel.cs file from Models folder, find the RegisterViewModel class, add UserName and UserRoles properties as in the following.
public class RegisterViewModel
    {
               [Required]
               [Display(Name = "UserRoles")]
               public string UserRoles { get; set; }

               [Required]
               [EmailAddress]
               [Display(Name = "Email")]
               public string Email { get; set; }

               [Required]
               [Display(Name = "UserName")]
               public string UserName { get; set; }

               [Required]
[StringLength(100, ErrorMessage = "The {0} must be at least {2} characters long.", MinimumLength = 6)]
        [DataType(DataType.Password)]
        [Display(Name = "Password")]
        public string Password { get; set; }

        [DataType(DataType.Password)]
        [Display(Name = "Confirm password")]
        [Compare("Password", ErrorMessage = "The password and confirmation password do not match.")]
        public string ConfirmPassword { get; set; }
    }
Controller Part
Next in AccountController.cs first we get all the role names to be bound in ComboBox except Admin role and in register button click we will add the functionality to insert username and set user selected role in ASP.NET identity database.
Firstly, create an object for our ApplicationDBContext. Here, ApplicationDBContext is a class which is used to perform all ASP.NET Identity database functions like create user, roles, etc.
ApplicationDbContext context;
               public AccountController()        {
                      context = new ApplicationDbContext();
               }
Register ActionResult method:
Using the ApplicationDBConterxt object we will get all the roles from database. For user registration we will not display the Admin roles. User can select rest of any role type during registration.
[AllowAnonymous]
public ActionResult Register()
{
ViewBag.Name = new SelectList(context.Roles.Where(u => !u.Name.Contains("Admin"))
.ToList(), "Name", "Name");
return View();
}
Register User
By default the user email will be stored as username in AspNetUsers table. Here we will change to store the user entered name. After user was created successfully we will set the user selected role for the user.
[HttpPost]
[AllowAnonymous]
[ValidateAntiForgeryToken]
public async Task<ActionResult> Register(RegisterViewModel model)
{
if (ModelState.IsValid)
{
var user = new ApplicationUser { UserName = model.UserName, Email = model.Email };
var result = await UserManager.CreateAsync(user, model.Password);
if (result.Succeeded)
{
await SignInManager.SignInAsync(user, isPersistent: false, rememberBrowser: false);
await this.UserManager.AddToRoleAsync(user.Id, model.UserRoles);
return RedirectToAction("Index", "Users");
}
ViewBag.Name = new SelectList(context.Roles.Where(u => !u.Name.Contains("Admin"))
.ToList(), "Name", "Name");
AddErrors(result);
}
return View(model);
}
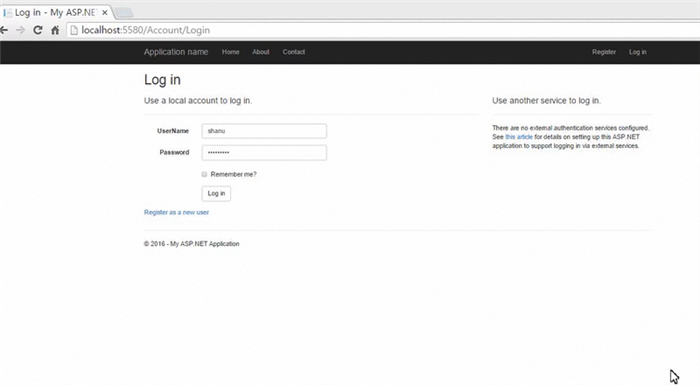
Customize User login
In the same way as user registration we will customize user login to change email as username to enter. By default in ASP.NET MVC 5 for login user needs to enter email and password. Here we will customize for user by entering username and password. In this demo we are not using any other Facebook, Gmail or Twitter login so we will be using UserName instead of Email.
View Part
Here we will change the email with UserName in Login.cshtml. We can find the Login.cshtml file from the folder inside Views/Account/Login.cshtml
@using shanuMVCUserRoles.Models
@model LoginViewModel
@{
    ViewBag.Title = "Log in";
}

<h2>@ViewBag.Title</h2>
<div class="row">
    <div class="col-md-8">
        <section id="loginForm">
            @using (Html.BeginForm("Login", "Account", new { ReturnUrl = ViewBag.ReturnUrl }, FormMethod.Post, new { @class = "form-horizontal", role = "form" }))
            {
                @Html.AntiForgeryToken()
                <h4>Use a local account to log in.</h4>
                <hr />
                @Html.ValidationSummary(true, "", new { @class = "text-danger" })
                <div class="form-group">
                    @Html.LabelFor(m => m.UserName, new { @class = "col-md-2 control-label" })
                    <div class="col-md-10">
                        @Html.TextBoxFor(m => m.UserName, new { @class = "form-control" })
                        @Html.ValidationMessageFor(m => m.UserName, "", new { @class = "text-danger" })
                    </div>
                </div>
                <div class="form-group">
                    @Html.LabelFor(m => m.Password, new { @class = "col-md-2 control-label" })
                    <div class="col-md-10">
                        @Html.PasswordFor(m => m.Password, new { @class = "form-control" })
                        @Html.ValidationMessageFor(m => m.Password, "", new { @class = "text-danger" })
                    </div>
                </div>
                <div class="form-group">
                    <div class="col-md-offset-2 col-md-10">
                        <div class="checkbox">
                            @Html.CheckBoxFor(m => m.RememberMe)
                            @Html.LabelFor(m => m.RememberMe)
                        </div>
                    </div>
                </div>
                <div class="form-group">
                    <div class="col-md-offset-2 col-md-10">
                        <input type="submit" value="Log in" class="btn btn-default" />
                    </div>
                </div>
                <p>
                    @Html.ActionLink("Register as a new user", "Register")
                </p>
         @* Enable this once you have account confirmation enabled for password reset functionality
                    <p>
                        @Html.ActionLink("Forgot your password?", "ForgotPassword")
                    </p>*@
}
        </section>
    </div>
    <div class="col-md-4">
        <section id="socialLoginForm">
            @Html.Partial("_ExternalLoginsListPartial", new ExternalLoginListViewModel { ReturnUrl = ViewBag.ReturnUrl })
        </section>
    </div>
</div>

@section Scripts {
    @Scripts.Render("~/bundles/jqueryval")
}
Model Part
Same as Registration in AccountViewModel we need to find the loginViewModel to change the Email with UserName,
Here in the following code we can see that we have changed the Email property to UserName.
public class LoginViewModel
    {
               [Required]
               [Display(Name = "UserName")]
               public string UserName { get; set; }
               [Required]
        [DataType(DataType.Password)]
        [Display(Name = "Password")]
        public string Password { get; set; }
        [Display(Name = "Remember me?")]
        public bool RememberMe { get; set; }
    }
Controller Part:
In login button click we need to change the email with username to check from database for user Authentication. Here in the following code we can see as we changed the email with username after successful login we will be redirect to the user page. Next we will see how to create a user page and display the text and menu by user role.
[HttpPost]
[AllowAnonymous]
[ValidateAntiForgeryToken]
public async Task<ActionResult> Login(LoginViewModel model, string returnUrl)
{
if (!ModelState.IsValid)
{
return View(model);
}
var result = await SignInManager.PasswordSignInAsync(model.UserName, model.Password, model.RememberMe, shouldLockout: false);
switch (result)
{
case SignInStatus.Success:
return RedirectToLocal(returnUrl);
case SignInStatus.LockedOut:
return View("Lockout");
case SignInStatus.RequiresVerification:
return RedirectToAction("SendCode", new { ReturnUrl = returnUrl, RememberMe = model.RememberMe });
case SignInStatus.Failure:
default:
ModelState.AddModelError("", "Invalid login attempt.");
return View(model);
}
}
[AllowAnonymous]
public async Task<ActionResult> VerifyCode(string provider, string returnUrl, bool rememberMe)
{
if (!await SignInManager.HasBeenVerifiedAsync())
{
return View("Error");
}
return View(new VerifyCodeViewModel { Provider = provider, ReturnUrl = returnUrl, RememberMe = rememberMe });
}
Authenticated and Authorized User page
Here we create a new page for displaying message of Authenticated and Authorized user by their role.
If the logged in user role is Admin, then we will display the welcome message for Admin and display the menu forcreating new roles.
If the logged in users roles are Manager, Employee, Accounts, etc. then we will display a welcome message for them.
Firstly, create a new Empty Controller named “userscontroller.cs”. In this controller first we add the [Authorize] at the top of controller for checking the valid users.
Creating our View: Right click on index ActionResult and create a view .
In view we check for the ViewBag.displayMenu value. If the value is “Yes", then we display the Admin welcome message and a link for creating new Menu. If the ViewBag.displayMenu is “No, then display other users name with welcome message.
@{
    ViewBag.Title = "Index";
}

@if (ViewBag.displayMenu == "Yes")
{
    <h1>Welcome Admin. Now you can create user Role.</h1>
    <h3>
        <li>@Html.ActionLink("Manage Role", "Index", "Role")</li>
    </h3>
}
else
{
    <h2>  Welcome <strong>@ViewBag.Name</strong> :) .We will add user module soon </h2>
}
Controller part:
In controller we will check for the user is logged in to the system or not. If he not logged in then we
Display the message as “Not Logged In” If the user is Athenticated then we check the loggedin users Role. If the Users Role is “Admin then we set ViewBag.displayMenu = "Yes" else we set ViewBag.displayMenu = "No".
public ActionResult Index()
               {
                      if (User.Identity.IsAuthenticated)
                      {
                              var user = User.Identity;
                              ViewBag.Name = user.Name;
                              ViewBag.displayMenu = "No";
                              if (isAdminUser())
                              {
                                     ViewBag.displayMenu = "Yes";
                              }
                              return View();
                      }
                      else
                      {
                              ViewBag.Name = "Not Logged IN";
                      }
                      return View();
               }
For checking the user is logged in we create method and return the Boolean value to our main Index method.
public Boolean isAdminUser()
               {
                      if (User.Identity.IsAuthenticated)
                      {
                              var user = User.Identity;
                              ApplicationDbContext context = new ApplicationDbContext();
  var UserManager = new UserManager<ApplicationUser>(new UserStore<ApplicationUser>(context));
                              var s = UserManager.GetRoles(user.GetUserId());
                              if (s[0].ToString() == "Admin")
                              {
                                     return true;
                              }
                              else
                              {
                                     return false;
                              }
                      }
                      return false;
               }
Admin users can create Roles
We already saw that if the Admin user is logged in then we will display the link for creating new users. For admin login we have already created a default user with UserName as "shanu" and password as "A@Z200711",
For creating user role by admin first we will add a new empty controller and named it RoleController.cs,
In this controller we check that the user role is Admin. If the logged in user role is Admin, then we will get all the role names using ApplicationDbContext object.
public ActionResult Index()
               {
                      if (User.Identity.IsAuthenticated)
                      {
                              if (!isAdminUser())
                              {
                                     return RedirectToAction("Index", "Home");
                              }
                      }
                      else
                      {
                              return RedirectToAction("Index", "Home");
                      }

                      var Roles = context.Roles.ToList();
                      return View(Roles);
               }
In view we bind all the User roles inside html table.
@model IEnumerable<Microsoft.AspNet.Identity.EntityFramework.IdentityRole>
@{
    ViewBag.Title = "Add Role";
}
<table style=" background-color:#FFFFFF; border: dashed 3px #6D7B8D; padding: 5px;width: 99%;table-layout:fixed;" cellpadding="6" cellspacing="6">
    <tr style="height: 30px; background-color:#336699 ; color:#FFFFFF ;border: solid 1px #659EC7;">
        <td align="center" colspan="2">
            <h2> Create User Roles</h2>
        </td>
    </tr>
    <tr>
        <td>
  <table id="tbrole" style="width:100%; border:dotted 1px; background-color:gainsboro; padding-left:10px;">
                @foreach (var item in Model)
                {
                    <tr>
                        <td style="width:100%; border:dotted 1px;">
                            @item.Name
                        </td>
                    </tr>}
            </table>
        </td>
        <td align="right" style="color:#FFFFFF;padding-right:10;">


            <h3>   @Html.ActionLink("Click to Create New Role", "Create", "Role") </h3>

        </td>

    </tr>

</table>
Points of Interest
Firstly, create a sample AttendanceDB Database in your SQL Server. In the Web.Config file change the DefaultConnection connection string with your SQL Server Connections. In Startup.cs file I have created default Admin user with UserName "shanu" and password "A@Z200711." This UserName and password will be used to login as Admin user. You can change this user name and password as you like. For security reasons after logging in as Admin you can change the Admin user password as you like
History
shanuMVCUserRoles.zip - 2016-01-29.


 General
  News
News  Suggestion
  Question
  Bug
Bug  Answer
  Joke
Joke  Praise
  Rant
Rant  Admin
Admin 


