Introduce
In Master Chef Part 1 and Master Chef Part 2, I introduced how to integrate ASP.NET Core (Framework) with Angular JS and Fluent NHibernate. In this article, I’d like create an ASP.NET Core (Net Core) application. You should know NHibernate doesn’t have Net Core version yet, so I switch to Entity Framework Core. On 9/14/2016, Angular 2 Final release was out. Angular 2 is the second major installment of AngularJS and is entirely written in TypeScript. For the developers who are working with Angular 1.x, you might find a big change in Angular 2, as it is entirely component based and an object orientation, is much easier with enhanced DI capability. I’ll show you how to build Angular2 application in Visual Studio 2015 Update 3.
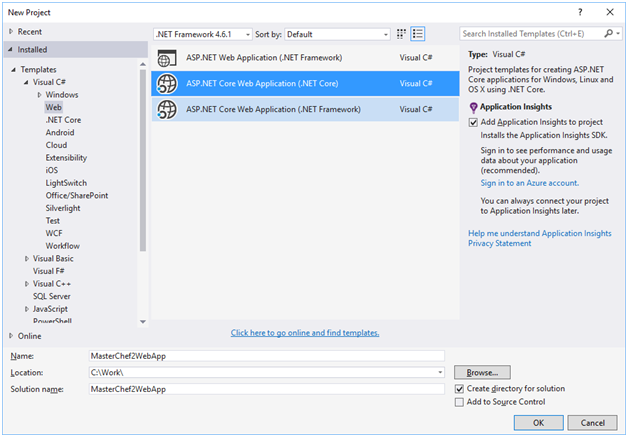
Create MasterChef2 Application in Visual Studio 2015 Update 3
Download and install the latest ASP.NET Web Tools from https://marketplace.visualstudio.com/items?itemName=JacquesEloff.MicrosoftASPNETandWebTools-9689. Then install TypeScript 2 from https://www.microsoft.com/en-us/download/details.aspx?id=48593.
Form Visual C#/Web, select ASP.NET core Web Application (.NET Core).
ASP.NET Core has two kinds of applications.
- ASP.NET Core .NET Framework Application is application running on Windows using .NET Framework.
- ASP.NET Core .NET Core Application is cross-platform application running on Windows, Linux, and OS X using .NET Core.
This time we select web application .NET core.

Select "Empty" template and untick "Host in cloud".
Have a look at ASP.NET Core Web solution structure. It creates "src" folder and the actual project is under "src" folder. Within this src folder is a special folder here - wwwroot, which is a folder that's going to hold all of our live web files.
Update project.json (Nuget Package)
{
  "dependencies": {
    "Microsoft.NETCore.App": {
      "version": "1.0.1",
      "type": "platform"
    },
    "Microsoft.AspNetCore.Diagnostics": "1.0.0",
    "Microsoft.AspNetCore.Server.IISIntegration": "1.0.0",
    "Microsoft.AspNetCore.Server.Kestrel": "1.0.1",
    "Microsoft.Extensions.Logging.Console": "1.0.0",
    "Microsoft.AspNetCore.Mvc": "1.0.1",
    "Microsoft.AspNetCore.StaticFiles": "1.0.0",
    "Microsoft.EntityFrameworkCore.SqlServer" : "1.1.0",
    "Microsoft.EntityFrameworkCore.Tools": {
      "version": "1.1.0-preview4-final",
      "type": "build"
    },
    "Microsoft.EntityFrameworkCore.Design": "1.1.0",
    "Microsoft.EntityFrameworkCore.SqlServer.Design": "1.1.0",
    "Newtonsoft.Json": "9.0.1"
  },

  "tools": {
    "Microsoft.AspNetCore.Server.IISIntegration.Tools": "1.0.0-preview2-final",
    "Microsoft.EntityFrameworkCore.Tools": "1.1.0-preview4-final"
  },

  "frameworks": {
    "netcoreapp1.0": {
      "imports": [
        "dotnet5.6",
        "portable-net45+win8"
      ]
    }
  },

  "buildOptions": {
    "emitEntryPoint": true,
    "preserveCompilationContext": true
  },

  "runtimeOptions": {
    "configProperties": {
      "System.GC.Server": true
    }
  },

  "publishOptions": {
    "include": [
      "wwwroot",
      "web.config"
    ]
  },

  "scripts": {
    "postpublish": [ "dotnet publish-iis --publish-folder %publish:OutputPath% --framework %publish:FullTargetFramework%" ]
  }
}
What’s added? I add Asp.NetCore.MVC, Asp.NetCore.StaticFiles, EntityFrameworkCore and NewtonSoft.Json.
After save project.json, Visual Studio automatically restores the references.
Configure MVC and Static Files
Go to Startup.cs.
Add services.AddMvc() in ConfigureServices(…), and add app.UseMvc in Configure(…).
Add app.UseDefaultFiles() and app.UseStaticFiles() to make index.html under wwwroot serve to client directly.
public void ConfigureServices(IServiceCollection services)
{
services.AddMvc();
}
public void Configure(IApplicationBuilder app, IHostingEnvironment env, ILoggerFactory loggerFactory)
{
loggerFactory.AddConsole();
if (env.IsDevelopment())
{
app.UseDeveloperExceptionPage();
}
app.UseMvc();
app.UseDefaultFiles();
app.UseStaticFiles();
}
Create models from the existing database
We have created MasterChef database already in the previous articles. Now we need create model classes from the existing database. To enable reverse engineering from an existing database we need to install Microsoft.EntityFrameworkCore.Tools, Microsoft.EntityFrameworkCore.Design, and Microsoft.EntityFrameworkCore.SqlServer.Design.
Tools –> NuGet Package Manager –> Package Manager Console
Run the following command to create a model from the existing database. If you receive an error stating the term 'Scaffold-DbContext' is not recognized as the name of a cmdlet, then close and reopen Visual Studio.
Scaffold-DbContext "Server=.\sqlexpress;Database=MasterChef;Trusted_Connection=True;" Microsoft.EntityFrameworkCore.SqlServer -OutputDir Models
After running this command, you can see MasterChefContext.cs, Recipes.cs, RecipeSteps.cs and RecipeItems.cs which is created under the Models folder. I’m not happy with the Model class name with plural ‘s’.
So I renamed Recipes.cs to Recipe.cs, RecipeSteps.cs to RecipeStep.cs, and RecipeItems.cs to RecipeItem.cs.
Then create repository class.
We use repository pattern to separate the logic that retrieves the data and maps it to the entity model from the business logic that acts on the model. The business logic should be agnostic to the type of data that comprises the data source layer.
The repository mediates between the data source layer and the business layers of the application. It queries the data source for the data, maps the data from the data source to a business entity, and persists changes in the business entity to the data source. A repository separates the business logic from the interactions with the underlying data source.
When we get a list of recipe objects, we need to load recipe steps and recipe items as well. How can we do that in Entity Framework Core?
Entity Framework Core allows you to use the navigation properties in your model to load related entities. There are three common O/RM patterns used to load related data.
- Eager loading means that the related data is loaded from the database as part of the initial query.
- Explicit loading means that the related data is explicitly loaded from the database at a later time.
- Lazy loading means that the related data is transparently loaded from the database when the navigation property is accessed. Lazy loading is not yet possible with EF Core.
Here we use the Include method to specify related data to be included in the query results.
public IList<recipe> GetAllRecipes()
{
    try
    {
        var recipes = _dbContext.Recipes.Include(x => x.RecipeSteps).ThenInclude(y => y.RecipeItems).ToList();
        recipes.ForEach(x => x.RecipeSteps = x.RecipeSteps.OrderBy(y => y.StepNo).ToList());
        return recipes;

    }
    catch (Exception ex)
    {
        throw ex;
    }
}
Add Web API Controller
Create the "api" folder, then right click the api folder to add new item. In ASP.NET select Web API Controller Class template. We name our class to RecipesController.cs
In the RecipesController class, for the time being we only set up a GET request here requesting all recipes.
We add _repository member to handle the database stuff.
[Route("api/[controller]")]
public class RecipesController : Controller
{
Repository _repository = Repository.Instance;
[HttpGet]
public IEnumerable<recipe> Get()
{
return _repository.GetAllRecipes();
}
}
Now from browser we test to see if the web API is working or not.
Run from IIS Express, and get the below result.
It looks like working. But if you run a query from the database, you’ll find the result is not quite right. It looks like only gets the first recipe, recipe step and recipe item. What’s happening? Let’s debug. I put the break point in the Repository class. Has a quick watch of the query result.
Entity Framework Core is working properly. Then the problem is happening during the JSON serialization. Finally, I find the reason. The reference loop causes JSON serialization to not work properly.
Have a look our model classes. Recipe has reference collection RecipeSteps, and RecipeStep has a reference item Recipe. They reference each other cause the reference loop. Similarly, RecipeStep has reference collection RecipeItems, and RecipeItem has a reference item RecipeStep. They cause the reference loop too.
The solution is to let JSON ignore Recipe in RecipeStep and RecipeStep in RecipeItem. Thus the reference loop is gone and serialization will be done properly.
RecipeStep class.
using System;
using System.Collections.Generic;
using Newtonsoft.Json;

namespace MasterChef2WebApp.Models
{
    public partial class RecipeStep
    {
        public RecipeStep()
        {
            RecipeItems = new HashSet<recipeitem>();
        }

        public Guid RecipeStepId { get; set; }
        public Guid RecipeId { get; set; }
        public int StepNo { get; set; }
        public string Instructions { get; set; }

        public virtual ICollection<recipeitem> RecipeItems { get; set; }
        [JsonIgnore]
        public virtual Recipe Recipe { get; set; }
    }
}
RecipeItem class.
using System;
using Newtonsoft.Json;

namespace MasterChef2WebApp.Models
{
    public partial class RecipeItem
    {
        public Guid ItemId { get; set; }
        public Guid RecipeStepId { get; set; }
        public string Name { get; set; }
        public decimal Quantity { get; set; }
        public string MeasurementUnit { get; set; }
        [JsonIgnore]
        public virtual RecipeStep RecipeStep { get; set; }
    }
}
Now we run it again to check the web API, and everything is coming this time.
TypeScript
TypeScript is a free and open source programming language developed and maintained by Microsoft. It is a strict superset of JavaScript, and adds optional static typing and class-based object-oriented programming to the language. For a large client-side project, TypeScript will allow us to produce a more robust code, which will be also fully deployable anywhere a plain JavaScript file would run. Since TypeScript is a superset of JavaScript it can be used alongside any JavaScript code without problems. Using TypeScript in Visual Studio also enables a strong intelliSense.
Add the tsconfig.json
First we need to add a type script configuration file. Just right-click on your project to add new item. In client-side select TypeScript JSON Configuration File.
Replace the default setting with the below.
{
  "compileOnSave": false,
  "compilerOptions": {
    "emitDecoratorMetadata": true,
    "experimentalDecorators": true,
    "module": "system",
    "moduleResolution": "node",
    "noImplicitAny": false,
    "noEmitOnError": false,
    "removeComments": false,
    "sourceMap": true,
    "target": "es5"
  },
  "exclude": [
    "node_modules",
    "wwwroot"
  ]
}
The compileOnSave signals the IDE to generate all files for a given tsconfig.json upon saving. compilerOptions configuration will influence how the Intellisense, and our external TypeScript compiler will work. By excluding the folders in the config, we tell the built-in TypeScript compiler provided by Visual Studio 2015 to disable compiling the external TypeScript files within that location. Please note we will use NPM to download typescript packages including Angular2. All these packages will be under the node_modules folder. We don’t want Visual Studio to compile them, that’s why we exclude node_modules folder.
NPM
NPM is originally created for managing packages for the open-source NodeJS framework. The package.json is the file that manages your project's NPM packages.
Right-click in the Project and select Add > New Item. In the dialog select "NPM configuration file".
Modify the "package.json" file by adding the following dependencies.
{
  "version": "1.0.0",
  "name": "asp.net",
  "dependencies": {
    "@angular/common": "2.0.0",
    "@angular/compiler": "2.0.0",
    "@angular/core": "2.0.0",
    "@angular/forms": "2.0.0",
    "@angular/http": "2.0.0",
    "@angular/platform-browser": "2.0.0",
    "@angular/platform-browser-dynamic": "2.0.0",
    "@angular/router": "3.0.0",
    "@angular/upgrade": "2.0.0",
    "core-js": "^2.4.1",
    "reflect-metadata": "^0.1.8",
    "rxjs": "5.0.0-rc.4",
    "systemjs": "^0.19.41",
    "typings": "^1.3.2",
    "zone.js": "^0.7.2",
    "moment": "^2.17.0"
  },
  "devDependencies": {
    "gulp": "^3.9.1",
    "gulp-clean": "^0.3.2",
    "gulp-concat": "^2.6.1",
    "gulp-less": "^3.3.0",
    "gulp-sourcemaps": "^1.9.1",
    "gulp-typescript": "^3.1.3",
    "gulp-uglify": "^2.0.0",
    "typescript": "^2.0.10"
  },
  "scripts": {
    "postinstall": "typings install dt~core-js --global"
  }
}
After save "package.json", Visual Studio restores packages automatically. All packages are installed under node_modules folder. The packages with the @ symbol is part of the new Angular 2 bundle: the other ones are loading libraries, helper tools.
Gulp
Much like Grunt, Gulp is a JavaScript task runner. Gulp, however, prefers code over configuration. Being that your tasks are written in code, Gulp feels more like a build framework, giving you the tools to create tasks that fit your specific needs. We will be using Gulp as the JavaScript Task Runner to automate our client-side scripts.
Add a new file for our Gulp configuration. Right click on the project solution and then select Add > New Item. Under Client-side template, select "Gulp Configuration File"
Then replace the default generated configuration with the following code below:
var gulp = require('gulp'),
gp_clean = require('gulp-clean'),
gp_concat = require('gulp-concat'),
gp_less = require('gulp-less'),
gp_sourcemaps = require('gulp-sourcemaps'),
gp_typescript = require('gulp-typescript'),
gp_uglify = require('gulp-uglify');
var srcPaths = {
app: ['Scripts/app/main.ts', 'Scripts/app/**/*.ts'],
js: [
'Scripts/js/**/*.js',
'node_modules/core-js/client/shim.min.js',
'node_modules/zone.js/dist/zone.js',
'node_modules/reflect-metadata/Reflect.js',
'node_modules/systemjs/dist/system.src.js',
'node_modules/typescript/lib/typescript.js',
'node_modules/ng2-bootstrap/bundles/ng2-bootstrap.min.js',
'node_modules/moment/moment.js'
],
js_angular: [
'node_modules/@angular/**'
],
js_rxjs: [
'node_modules/rxjs/**'
]
};
var destPaths = {
app: 'wwwroot/app/',
js: 'wwwroot/js/',
js_angular: 'wwwroot/js/@angular/',
js_rxjs: 'wwwroot/js/rxjs/'
};
gulp.task('app', ['app_clean'], function () {
return gulp.src(srcPaths.app)
.pipe(gp_sourcemaps.init())
.pipe(gp_typescript(require('./tsconfig.json').compilerOptions))
.pipe(gp_uglify({ mangle: false }))
.pipe(gp_sourcemaps.write('/'))
.pipe(gulp.dest(destPaths.app));
});
gulp.task('app_clean', function () {
return gulp.src(destPaths.app + "*", { read: false })
.pipe(gp_clean({ force: true }));
});
gulp.task('js', function () {
gulp.src(srcPaths.js_angular)
.pipe(gulp.dest(destPaths.js_angular));
gulp.src(srcPaths.js_rxjs)
.pipe(gulp.dest(destPaths.js_rxjs));
return gulp.src(srcPaths.js)
.pipe(gulp.dest(destPaths.js));
});
gulp.task('watch', function () {
gulp.watch([srcPaths.app, srcPaths.js], ['app', 'js']);
});
gulp.task('default', ['app', 'js', 'watch']);
It contains five tasks:
- app_clean - This task deletes the existing files from the destination folders we defined.
- app - This task compiles, uglify and create sourcemaps for all TypeScript files and place them to wwwroot/app folder, together with their js.map files.
- js - This task will copy all JavaScript files from external libraries which is located within the node_modules folder and place them to wwwroot/js folder.
- watch - This task watches files defined in app and js tasks that are changed.
- default - Define the default task so it will launch all other tasks.
Angular2 App
Now it’s time to start client code of our app. A skeleton of Angular 2 consists of:
- An Angular 2 component file
- An Angular 2 Module file
- An Angular 2 bootstrap file
- An HTML file
1) Component File
Angular 2 is entirely component based. Controllers and $scope are no longer used. They have been replaced by components and directives. The Component is the most basic and fundamental concept in Angular 2. Think of it like a class that controls a specific piece of a web page where we can either display some data to each user and/or respond to them. The Angular 2 App will be almost entirely built upon multiple components serving specific purposes: most of them will be reusable; others will be only used once.
Under project, create "scripts" folder. Under "scripts" folder, create "app" folder.
Now add a new TypeScript file by right-clicking on the "app" folder to Add New Item. Under Client-Side option from the left pane of the dialog, select "TypeScript File" as shown in the figure below.
Name the file as "app.component.ts". We just write the very basic Hello World code for now.
import { Component } from "@angular/core";

@Component({
    selector: 'masterchef2',
    template: '

<h1>Master Chef</h1><div>Best recipes from AngularJS 2.</div>'
})
 export class AppComponent { }
The first line of code basically imports the Component function from Angular 2 library, which is @angular/core. The Component function is what we need to define a Component’s metadata for a class. The code block under @Component is the creation of the component. The @Component denotes a TypeScript instruction that tells Angular that this class is an Angular component. Notice the export keyword, which will allow us to import it from other components.
2) Module File
Angular Modules provides a powerful way to organize and bootstrap any Angular2 application: they help developers to consolidate their own set of components, directives and pipes into reusable blocks.
Every Angular2 application must have at least one module, which is conventionally called root module and given the AppModule class name.
Now, create a new TypeScript file and name the file "app.module.ts".
import { NgModule } from "@angular/core";
import { BrowserModule } from "@angular/platform-browser";
import { HttpModule } from "@angular/http";
import "rxjs/Rx";
import { AppComponent } from "./app.component";
@NgModule({
declarations: [
AppComponent
],
imports: [
BrowserModule,
HttpModule
],
providers: [
],
bootstrap: [
AppComponent
]
})
export class AppModule { }
The first line from the config above, adds a reference to the type definitions to ensure our TypeScript compiler will find it. We then import the basic Angular2 modules that we will need for our app. You can add more Angular 2 module reference in this file when needed. We have also imported the rxjs library definition file(s), which will be useful to compile some Angular2 libraries. We then imported our component "AppComponent". Finally, we have declared our root NgModule: as we can see it consists in an array of named arrays, each one containing a set of Angular2 objects that serves a common purpose: directives, components, pipes, modules and providers. The last one of them contains the component(s) we want to bootstrap, which in our case, the AppComponent file.
3) Bootstrap File
Now that we have our main component, let's add another TypeScript file to create a bootstrap to run the app. Right click on the "app" folder and then select TypeScript File. Name the file as "boot.ts".
import { platformBrowserDynamic } from "@angular/platform-browser-dynamic";
import { AppModule } from "./app.module";

platformBrowserDynamic().bootstrapModule(AppModule);
In boot.ts, we reference the new Angular bundle, also reference the new AppModule that we have created previously.
4) Index.html
Now it’s the time to create index.html to be an entry point for the browser so it can load the client-script files and execute the application, and laying out the DOM structure used by Angular 2 to display it. Right-clicking on the "wwwroot" folder and then selecting Add New Item, and select HTML Page from Client Side. Name the file as "index.html".
<html>
<head>
    <title>Master Chef2</title>
    <meta name="viewport" content="width=device-width, initial-scale=1">

    <!-- Step 1. Load libraries -->
    <!-- Polyfill(s) for older browsers -->
    <script src="js/shim.min.js"></script>
    <script src="js/zone.js"></script>
    <script src="js/Reflect.js"></script>
    <script src="js/system.src.js"></script>

    <!-- Angular2 Native Directives -->
    <script src="/js/moment.js"></script>

    <!-- Step 2. Configure SystemJS -->
    <script src="systemjs.config.js"></script>
    <script>
      System.import('app').catch(function(err){ console.error(err); });
    </script>
</head>
<!-- Step 3. Display the application -->
<body>
    <!-- Application PlaceHolder -->
    <masterchef2>Please wait...</masterchef2>
</body>
</html>
5) SystemJs File
SystemJs is configuration API. Once SystemJS has loaded, configuration can be set on SystemJS by using the configuration function SystemJS.config. This is a helper function which normalizes configuration and sets configuration properties on the SystemJS instance.
SystemJS.config({ prop: 'value' }) is mostly equivalent to SystemJS.prop = value except that it will extend configuration objects, and certain properties will be normalized to be stored correctly.
The SystemJS config loads our app modules and components.
Now, let’s add the systemjs configuration file. Right-click on the wwwroot folder and then select Add New Item. Under Client-side templates, select "JavaScript File".
Copy the below code to systemjs.config.js.
(function (global) {
System.config({
paths: {
'npm:': 'js/'
},
map: {
app: 'app',
'@angular/core': 'npm:@angular/core/bundles/core.umd.js',
'@angular/common': 'npm:@angular/common/bundles/common.umd.js',
'@angular/compiler': 'npm:@angular/compiler/bundles/compiler.umd.js',
'@angular/platform-browser': 'npm:@angular/platform-browser/bundles/platform-browser.umd.js',
'@angular/platform-browser-dynamic': 'npm:@angular/platform-browser-dynamic/bundles/platform-browser-dynamic.umd.js',
'@angular/http': 'npm:@angular/http/bundles/http.umd.js',
'@angular/router': 'npm:@angular/router/bundles/router.umd.js',
'@angular/forms': 'npm:@angular/forms/bundles/forms.umd.js',
'@angular/core/testing': 'npm:@angular/core/bundles/core-testing.umd.js',
'@angular/common/testing': 'npm:@angular/common/bundles/common-testing.umd.js',
'@angular/compiler/testing': 'npm:@angular/compiler/bundles/compiler-testing.umd.js',
'@angular/platform-browser/testing': 'npm:@angular/platform-browser/bundles/platform-browser-testing.umd.js',
'@angular/platform-browser-dynamic/testing': 'npm:@angular/platform-browser-dynamic/bundles/platform-browser-dynamic-testing.umd.js',
'@angular/http/testing': 'npm:@angular/http/bundles/http-testing.umd.js',
'@angular/router/testing': 'npm:@angular/router/bundles/router-testing.umd.js',
'@angular/forms/testing': 'npm:@angular/forms/bundles/forms-testing.umd.js',
'rxjs': 'npm:rxjs',
'angular2-in-memory-web-api': 'npm:angular2-in-memory-web-api',
},
packages: {
app: {
main: './boot.js',
defaultExtension: 'js'
},
rxjs: {
defaultExtension: 'js'
},
'angular2-in-memory-web-api': {
defaultExtension: 'js'
}
}
});
})(this);
6) Run Application
Right click "gulpfile.js" and select "Task Runner Explorer". Click "Refresh" button to load task. Then right click "default" task to select "run".
After finished the task, all ts files should be compiled to js files under wwwroot folder. App ts files are compiled to wwwroot\app folder, and all other ts packages go to wwwroot\js folder.
Now just click "IIS Express" to run it.
It’s working. That basically tested our Angular 2 component and module get loaded.
Client ViewModel
A view model represents the data that you want to display on your view/page, whether it be used for static text or for input values (like textboxes and dropdown lists) that can be added to the database (or edited). It is something different than your domain model. It is a model for the view. We are going to use ViewModels as our data transfer objects: sending data from client to server and/or vice-versa.
We use TypeScript to define a set of class for us to work with type definitions. In other words, we will not be dealing with raw JSON data and anonymous objects; instead we will be using typed objects: an actual instance of classes.
Create "viewmodels" folder under "scripts/app". Then right click "viewmodels" to add new type script file. It’s named "recipe", which is recipe view model we use to display on the view.
export class Recipe {
    constructor(
        public Id: string,
        public Name: string,
        public Comments: string
    ) { }
}
Please note in our view model class, you don’t have to include all properties. What you need include is what you need in your type script.
Client-Side Service
Now, we need to setup a client-service to fetch the required data from the Web API: issuing a request to the API Controllers. Communicate via XMLHttpRequest (XHR), which provides client functionality for transferring data between a client and a server by Angular Http client.
Create a "services" folder under "Scripts/app/". Right click "services" to add a new type script file, and name it as "app.service.ts".
import { Injectable } from "@angular/core";
import { Http, Response } from "@angular/http";
import { Recipe } from "../viewmodels/recipe";
import { Observable } from "rxjs/Observable";
@Injectable()
export class AppService {
constructor(private http: Http)
{ }
private recipeUrl = 'api/recipes/';
getAllRecipes() {
return this.http.get(this.recipeUrl)
.map(response => response.json())
.catch(this.handleError);
}
private handleError(error: Response) {
console.error(error);
return Observable.throw(error.json().error || "Server error");
}
}
It’s a very simple class has only one main method, getAllRecipes, which basically call Recipes web controller we built before.
Change App Component
Change App Component to display a list of recipes which retrieved from the server.
import { Component, OnInit } from "@angular/core";
import { Router } from "@angular/router";
import { Recipe } from "./viewmodels/recipe";
import { AppService } from "./services/app.service";
@Component({
selector: 'masterchef2',
templateUrl: '../partials/recipes.html'
})
export class AppComponent implements OnInit {
title: string;
items: Recipe[];
errorMessage: string;
constructor(private appService: AppService) {
}
ngOnInit() {
this.title = "Master Chef Recipes";
var service = this.appService.getAllRecipes();
service.subscribe(
items => this.items = items,
error => this.errorMessage = <any>error
);
}
}
In the top of the file, we have imported the Angular classes that we need: since we’re creating a Component, we need the Component base class by referencing the @angular/core, and we also need to implement the OnInit interface because our component needs to execute something upon its initialization. We have referenced the service that we have created earlier to communicate with our server to get some data. Finally, we have imported the recipe viewmodel for storing the values.
The @component block is where we setup the UI for our Component, including the selector, template and styles. We used templateUrl to make the partial html.
The AppComponent is a class written in TypeScript. This class contains some properties, a constructor which makes use of DI to instantiate the AppService. The ngOnInit() method is where we get the data from the service which fires on initialization of the component.
Add Recipes Template
Under "wwwroot", create a new folder "partials". Right click "partials" to add a new HTML which is named "recipes".
<h2>{{title}}</h2>
<ul>
    <li *ngFor="let recipe of items">
        <p> {{recipe.name}} - {{recipe.comments}}</p>
        <ul>
            <li *ngFor="let step of recipe.recipeSteps">
                <p> step {{step.stepNo}} : {{step.instructions}}</p>
                <ul>
                    <li *ngFor="let item of step.recipeItems">
                        <p> {{item.name}}  {{item.quantity}} {{item.measurementUnit}}</p>
                    </li>
                </ul>
            </li>
        </ul>
    </li>
</ul>
Please note in recipes.html, bind data from AppComponent class, one is {{title}}, the other is {{items}}. These two properties have been defined in AppComponent class, title is a string, and items is an array of recipe view model.
Change App Module
Because we add new client side service, we need change app.module.ts to load it.
import { NgModule } from "@angular/core";
import { BrowserModule } from "@angular/platform-browser";
import { HttpModule } from "@angular/http";
import { RouterModule } from "@angular/router";
import { FormsModule } from "@angular/forms";
import "rxjs/Rx";
import { AppComponent } from "./app.component";
import { AppService } from "./services/app.service";
@NgModule({
declarations: [
AppComponent,
],
imports: [
BrowserModule,
HttpModule,
FormsModule,
RouterModule
],
providers: [
AppService
],
bootstrap: [
AppComponent
]
})
export class AppModule { }
Launch Master Chef2
Right click "gulpfile.js" and select "Task Runner Explorer". Click "Refresh" button to load task. Then right click "default" task to select "run". After finished the task, click "IIS Express" to run the app.
Apply Bootstrap Style to Angular 2 Front UI
1) Install Bootstrap
We use bower package manager to grab our client-side bootstrap files. So the first thing to do is right-click on our project to Add a New Item. On the Client-side to select a Bower Configuration File, "bower.json".
In bower.json, add "bootstrap" in dependencies section.
{
	"name": "asp.net",
	"private": true,
  "dependencies": {
    "bootstrap": "3.3.7"
  }
}
After restoring finish, Visual Studio install bootstrap under wwwroot\lib folder.
2) Add boostrap link style in index.html
Add the below line into index.html.
<link href="lib/bootstrap/dist/css/bootstrap.min.css" rel="stylesheet" media="screen">
3) Apply bootstrap styles in recipes.html
Now we change recipes.html a little bit to apply some bootstrap styles.
<div>
    <h2>{{title}}</h2>

    <div *ngFor="let recipe of items">
        <div class="btn-group">
            <button class="btn-outline-info pull-left"><h5>{{recipe.name}} - {{recipe.comments}}</h5></button>
        </div>

        <div *ngFor="let step of recipe.recipeSteps">
            <div class="row breadcrumb">
                <span>step {{step.stepNo}} : {{step.instructions}}</span>
            </div>
            <ul>
                <li *ngFor="let item of step.recipeItems">
                    <p> {{item.name}}  {{item.quantity}} {{item.measurementUnit}}</p>
                </li>
            </ul>
        </div>
    </div>
</div>
Run our project from IIS Express.
Expand/Collapse DOM Element in Angular 2
In previous master chef articles, I have shown you how to do it in Angular 1. Now I show you Angular 2 way.
First add expand function in App.Component.ts to toggle "show" property.
export class AppComponent implements OnInit {
title: string;
items: Recipe[];
errorMessage: string;
show: boolean;
constructor(private appService: AppService) {
}
ngOnInit() {
this.title = "Master Chef Recipes";
var service = this.appService.getAllRecipes();
service.subscribe(
items => this.items = items,
error => this.errorMessage = <any>error
);
}
public Expand() {
this.show = !this.show;
}
}
In recipes.html, I add click event handler to call expand function.
<div class="btn-group">
            <button class="btn-outline-info pull-left" (click)="Expand()"><h5>{{recipe.name}} - {{recipe.comments}}</h5></button>
</div>
There are two things you need notice.
- The parenthesis indicate that we're expecting an event. Instead of
ng-click="fn()" and ng-mouseover="fn()" we simply use (click)="fn()" and (mouseover)="fn()". - The brackets indicate a property. Rather than
ng-src="ctrl.value" and ng-style="{ 'width': ctrl.value }" we can now easily do [src]="value" and [width]="value".
Then use ng-if to check "show" property to hide or show the child elements.
<div *ngIf="show">
    <div *ngFor="let step of recipe.recipeSteps">
        <div class="row breadcrumb">
            <span>step {{step.stepNo}} : {{step.instructions}}</span>
        </div>
        <ul>
            <li *ngFor="let item of step.recipeItems">
                <p> {{item.name}}  {{item.quantity}} {{item.measurementUnit}}</p>
            </li>
        </ul>
    </div>
</div>
How to use the sample code
Make sure your VS2015 update 3 has installed the latest ASP.NET Web Tools and TypeScript 2. Download the source code. Open MasterChef2WebApp.sln, and rebuild the solution. In Task Runner Explorer, run the default task. After all tasks finish successfully, launch the project by clicking "IIS Express".
Conclusion
In this article, I have shown you how to build a data-driven Angular 2 app from scratch within the context of ASP.NET Core. We have also learned how to create and communicate with Web API in our Angular2 app. In my next Master Chef article, I’ll show you how to build Single Page CRUD Application with Angular 2.
Fred is a senior software developer who lives in Melbourne, Australia. In 1993, he started Programming using Visual C++, Visual Basic, Java, and Oracle Developer Tools. From 2003, He started with .Net using C#, and then expertise .Net development.
Fred is often working with software projects in different business domains based on different Microsoft Technologies like SQL-Server, C#, VC++, ASP.NET, ASP.Net MVC, WCF,WPF, Silverlight, .Net Core and Angular, although he also did some development works on IBM AS400.


 General
  News
News  Suggestion
  Question
  Bug
Bug  Answer
  Joke
Joke  Praise
  Rant
Rant  Admin
Admin 


