If the above link is broken, grab the main source from GitHub here or the part8 branch here.
Introduction
This is part 8 of a series describing how to create a SPA using ASP.Net Core and Angular 2 (now Angular 4).
In previous parts of this series we've looked at how to use of tag helpers to create Angular, HTML and CSS markup dynamically, drawing upon settings from your data model and meta data / attributes on the data model.
Having code create code like this is not a new concept, others have use this before, I've also used this same technique with ASP.Net MVC and Angular 1.x in commercial projects over the last few years.
So wanting to see if ASP.Net Core and Angular 4 version would work for two clients, I set off on this series of articles - not too very far from where I was up to. The technique worked (so far), though it has taken quite a few more commutes than I expected.
Extensions, changes and refactoring are easier, since many of them are just changes to a data model or to a tag helper. These get propagated out either automatically, or without too much pain using NSwag. Code generation is far easier than creating everything by hand, there's much less temptation for developers to cut/paste and create forks in your code, and less chance of typos or bugs.
In the previous part, part 7, I covered publishing using VS 2015. After uncovering many development and deployment issues the article was getting a little lengthy so that VS 2017 publishing was been held over to this part, part 8.
First we'll cover updates to the VS 2017 solution, to bring it in line with the VS 2015 version, upgrading the code from Angular 2 to Angular 4. Then I'll cover publishing, more specifically for VS 2017.
Setting up SSL in IIS Express
To set up our SPA to enforce SSL when in production mode, edit startup.cs to this (complete file shown below). For an in depth explanation see part 7. Here's the new startup.cs code:
using A2SPA.Data;
using A2SPA.Models;
using AspNet.Security.OpenIdConnect.Primitives;
using Microsoft.AspNetCore.Builder;
using Microsoft.AspNetCore.Hosting;
using Microsoft.AspNetCore.Identity.EntityFrameworkCore;
using Microsoft.EntityFrameworkCore;
using Microsoft.Extensions.Configuration;
using Microsoft.Extensions.DependencyInjection;
using Microsoft.Extensions.FileProviders;
using Microsoft.Extensions.Logging;
using NJsonSchema;
using NSwag;
using NSwag.AspNetCore;
using NSwag.SwaggerGeneration.WebApi.Processors.Security;
using System.IO;
using System.Reflection;
namespace A2SPA
{
public class Startup
{
private IHostingEnvironment CurrentEnvironment { get; set; }
public IConfigurationRoot Configuration { get; }
public Startup(IHostingEnvironment env)
{
CurrentEnvironment = env;
var builder = new ConfigurationBuilder()
.SetBasePath(CurrentEnvironment.ContentRootPath)
.AddJsonFile("appsettings.json", optional: true, reloadOnChange: true)
.AddJsonFile($"appsettings.{CurrentEnvironment.EnvironmentName}.json", optional: true)
.AddEnvironmentVariables();
Configuration = builder.Build();
}
public void ConfigureServices(IServiceCollection services)
{
services.AddMvc();
services.AddDbContext<A2spaContext>(options =>
{
options.UseSqlServer(Configuration.GetConnectionString("DefaultConnection"));
options.UseOpenIddict();
});
services.AddIdentity<ApplicationUser, IdentityRole>()
.AddEntityFrameworkStores<A2spaContext>()
.AddDefaultTokenProviders();
services.Configure<IdentityOptions>(options =>
{
options.ClaimsIdentity.UserNameClaimType = OpenIdConnectConstants.Claims.Name;
options.ClaimsIdentity.UserIdClaimType = OpenIdConnectConstants.Claims.Subject;
});
services.AddOpenIddict(options =>
{
options.AddEntityFrameworkCoreStores<A2spaContext>();
options.AddMvcBinders();
options.EnableAuthorizationEndpoint("/connect/authorize")
.EnableLogoutEndpoint("/connect/logout")
.EnableTokenEndpoint("/connect/token")
.EnableUserinfoEndpoint("/api/userinfo");
options.AllowPasswordFlow();
if (CurrentEnvironment.IsDevelopment())
{
options.DisableHttpsRequirement();
}
});
}
public void Configure(IApplicationBuilder app, ILoggerFactory loggerFactory, A2spaContext context)
{
loggerFactory.AddConsole(Configuration.GetSection("Logging"));
loggerFactory.AddDebug();
if (CurrentEnvironment.IsDevelopment())
{
app.UseDeveloperExceptionPage();
}
else
{
app.UseExceptionHandler("/Home/Error");
}
app.UseOAuthValidation();
app.UseOpenIddict();
app.UseDefaultFiles();
app.UseStaticFiles();
app.UseStaticFiles(new StaticFileOptions
{
FileProvider = new PhysicalFileProvider(Path.Combine(CurrentEnvironment.ContentRootPath, "node_modules")),
RequestPath = "/node_modules"
});
app.UseSwaggerUi(typeof(Startup).GetTypeInfo().Assembly, new SwaggerUiOwinSettings()
{
OperationProcessors =
{
new OperationSecurityScopeProcessor("apikey")
},
DocumentProcessors =
{
new SecurityDefinitionAppender("apikey", new SwaggerSecurityScheme
{
Type = SwaggerSecuritySchemeType.ApiKey,
Name = "Authorization",
In = SwaggerSecurityApiKeyLocation.Header
})
},
DefaultPropertyNameHandling = PropertyNameHandling.CamelCase
});
app.UseMvc(routes =>
{
routes.MapRoute(
name: "default",
template: "{controller=Home}/{action=Index}/{id?}");
routes.MapSpaFallbackRoute("spa-fallback", new { controller = "home", action = "index" });
});
{
DbInitializer.Initialize(context);
}
}
}
}
Again, for the more in depth details, please see part 7 here.
Conversion from Angular 2.40 to Angular 4.0
Next, if you haven't already updated package.json, do this now. Following the changes below we'll move across to Angular 4 and pick up a few more recent libraries along the way. Edit your package.json file to the following:
{
  "name": "a2spa",
  "version": "1.0.0",
  "description": "ASP.Net Core and Angular 4 Single Page Applicaiton",
  "keywords": [],
  "author": "",
  "license": "MIT",
  "dependencies": {
    "@angular/animations": "~4.0.0",
    "@angular/common": "~4.0.0",
    "@angular/compiler": "~4.0.0",
    "@angular/core": "~4.0.0",
    "@angular/forms": "~4.0.0",
    "@angular/http": "~4.0.0",
    "@angular/platform-browser": "~4.0.0",
    "@angular/platform-browser-dynamic": "~4.0.0",
    "@angular/router": "~4.0.0",
    "angular-in-memory-web-api": "^0.3.1",
    "core-js": "^2.4.1",
    "ngx-toastr": "5.0.6",
    "rxjs": "^5.3.0",
    "systemjs": "^0.20.11",
    "typescript": "^2.2.2",
    "zone.js": "^0.8.5"
  },
  "devDependencies": {
    "typescript": "^2.2.2",
    "tslint": "^5.0.0"
  },
  "repository": {}
}
Next, so as to prevent losing access to our Angular and other NPM libraries, when we deploy our site, we'll need to edit the shared template in the file /views/shared/_Layout.cshtml and change the links from /node_modules to ~/node_modules - this will create relative links (to the site root) instead of absolute links.
In addition, to ensure that our views load correctly, edit /views/shared/_loginPartial.cshtml to remove the leading / for the routing links. In other words this segment of code:
<li><a class="nav-link" (click)="setTitle('Register - A2SPA')" routerLink="/register">Register</a></li>
<li><a class="nav-link" (click)="setTitle('Login - A2SPA')" routerLink="/login">Login</a></li>
Should be changed to this:
<li><a class="nav-link" (click)="setTitle('Register - A2SPA')" routerLink="register">Register</a></li>
<li><a class="nav-link" (click)="setTitle('Login - A2SPA')" routerLink="login">Login</a></li>
Next update these additional links in /views/partial/AppComponent.cshtml
<ul class="nav navbar-nav">
    <li>
        <a class="nav-link" (click)="setTitle('Home - A2SPA')" routerLink="/home" routerLinkActive="active">Home</a>
    </li>
    <li [hidden]="!isLoggedIn()">
        <a class="nav-link" (click)="setTitle('About - A2SPA')" routerLink="/about">About</a>
    </li>
    <li [hidden]="!isLoggedIn()">
        <a class="nav-link" href="/swagger">NSwag</a>
    </li>
    <li>
        <a class="nav-link" (click)="setTitle('Contact - A2SPA')" routerLink="/contact">Contact</a>
    </li>
</ul>
Remove the leading slash, to become:
<ul class="nav navbar-nav">
    <li>
        <a class="nav-link" (click)="setTitle('Home - A2SPA')" routerLink="home" routerLinkActive="active">Home</a>
    </li>
    <li [hidden]="!isLoggedIn()">
        <a class="nav-link" (click)="setTitle('About - A2SPA')" routerLink="about">About</a>
    </li>
    <li [hidden]="!isLoggedIn()">
        <a class="nav-link" href="swagger">NSwag</a>
    </li>
    <li>
        <a class="nav-link" (click)="setTitle('Contact - A2SPA')" routerLink="contact">Contact</a>
    </li>
</ul>
Next edit /Views/Partial/LoginComponent.ts in the same way, to remove the leading slash here:
<span class="small">Not registered? <a [routerLink]="['/register']"> Click here to Register</a></span>
To
<span class="small">Not registered? <a [routerLink]="['register']"> Click here to Register</a></span>
And final view change the corresponding link in RegisterComponent.cshtml from this:
<span class="small">Already registered? <a [routerLink]="['/login']"> Click here to Login</a></span>
To
<span class="small">Already registered? <a [routerLink]="['login']"> Click here to Login</a></span>
Next we'll make changes to our Angular 4 code, to the Typescript components and services. First go to /wwwroot/app/app.module.ts and change the APP_BASE_HREF from "/" to "/a2spa"
AuthGuard, Title, { provide: APP_BASE_HREF, useValue: '/a2spa' }],
Update our login/security components in /wwwroot/app to use relative paths. First edit login.component.ts and change the line that loads our HTML view from this:
templateUrl: '/partial/loginComponent'
To remove the leading slash, again to prevent loading the path as an absolute link, to this:
templateUrl: 'partial/loginComponent'
Still in the same file, login.component.ts change the form post to remove the leading slash, from this:
this.http.post('/connect/token', body, { headers: this.authService.contentHeaders() })
To this:
this.http.post('connect/token', body, { headers: this.authService.contentHeaders() })
And lastly, in the same file, change the router link from:
this.router.navigate(['/about']);
To
this.router.navigate(['about']);
We need to repeat these changes in register.component.ts changing this
templateUrl: '/partial/registerComponent'
to this:
templateUrl: 'partial/registerComponent'
The the line responsible for the form post, set to an absolute reference changed from:
this.http.post('/Account/Register', JSON.stringify(body), { headers: this.authService.jsonHeaders() })
Becomes this, with a relative link:
this.http.post('Account/Register', JSON.stringify(body), { headers: this.authService.jsonHeaders() })
And this absolute link changed from:
this.router.navigate(['login']);
Becomes this:
this.router.navigate(['login']);
Next update each of the components about.component.ts, app.component.ts, contact.component.ts, index.component.ts, in the same way as above, to make the links to our views relative rather than absolute, for example for about.component.ts this would be:
templateUrl: '/partial/aboutComponent' ---> To: templateUrl: 'partial/aboutComponent'
Finally in /wwwroot/app/security change auth-guard.service.ts from this:
this.router.navigate(['/login']); ----> To this.router.navigate(['login']);
Our app.component.ts has one additional link to change, from this:
this.http.get('/connect/logout', { headers: this.authService.authJsonHeaders() })
To this:
this.http.get('connect/logout', { headers: this.authService.authJsonHeaders() })
Now rebuild and hit ctrl-F5 to test the site:
Next we'll test how our SSL is working under IIS Express.
To get the URL we need, go to the project in your solution, right click, then click properties

Alternately, VS 2015 and VS 2017 users could pick up the URL here, from the file launchSettings.json
If you have enabled SSL (if you haven't, see part 7 for details) then there will be a node in the .json file with the SSL port and HTTPS URL:
"iisSettings": {
  "windowsAuthentication": false,
  "anonymousAuthentication": true,
  "iisExpress": {
    "applicationUrl": "http://localhost:57149/",
    "sslPort": 44312
  }
Note: these URLs will vary from project to project, the port is chosen at random.
If you have cloned the source from the download or from GitHub, then you'll pick up the pre-set URL.
On the other hand, if you have created this project from scratch, or followed step by step, then the port assignment will be random. Similarly if you turn off the SSL option and re-enable it, your port will change again for SSL. Note: you can edit the launchSettings.json file to set it to your own choice of port too (so long as this is valid, available, and doesn't clash with other ports in use).
Either way, copy the the URL into a new tab in your browser, and you should see it running using SSL and the tet certificate courtesy of VS 2017. (As noted earlier in part 7, you will get a warning in most browser that you are not using a 'real' certificate).
Setting up IIS ready for ASP.Net Core
Follow the steps outlined in part 7, in the section entitled "Setting up IIS ready for ASP.Net Core"; those steps for setting up IIS using VS 2015 are identical to what we need here when publishing to IIS from VS 2017.
Note: The examples below will assume a folder was created locally, that it is called c:\publish\a2spa and that is local to the same PC as development is being done. Later in the article we'll cover publishing external servers, as well as to Azure.
Publishing to IIS
Once again, as with VS 2015 in part 7, we'll start using the simpler "File System" method of publishing.
In Visual Studio 2017, right click your project and then select Publish.
Choose a "Create New", click on Folder to select folder-based publishing.
Next you'll be given a chance to choose the folder you wish to publish to.
NOTE: be careful not to point the publish folder back at your source; the bin folder as ni the defualt would be ok, but I recommend a completely differnet folder outside the project scope, we're using c:\publish\a2spa is the folder in these examples.
Once you have selected the correct file folder, click Publish.
The publish will proceed immediately, without any chance (just yet) to alter the settings further. Don't worry we can fix these later, and we'll need to!
First something that is good, well sort of. There is no web.config in the default VS 2017 project:
Yet checking the destination folder, a web.config is created for us and it is populated with reasonably correct information:
Let's see if we can edit the publish settings to correct the connection string. This cannot be correct, as it is.
In the publish window, click "Settings"
the first screen has target location, which is OK, click Next
Expand the File publish options and database option:
check both boxes, and alter the SQL connection string as we did for VS 2015, then click Save.
Now click Publish again.
Note: is your Publish button grayed out?
close the window using the "X" in the top LHS, and simply re-publish. Hopefully the VS team will fix this in a future bug fix / release.
So let's see what we get next.
sadly every typescript file (well probably, I didn't count them) is generating an error saying that the file is outside the normal wwwroot file space. A typical error says:
Error TS6059 File 'C:/temp/A2SPA/VS2017/A2SPA/obj/Release/netcoreapp1.1/PubTmp/Out/wwwroot/app/app.component.ts' is not under 'rootDir' 'C:/temp/A2SPA/VS2017/A2SPA/wwwroot'. 'rootDir' is expected to contain all source files. A2SPA (tsconfig project) 1 Active
As we know very well these files are, but we don't need to worry, we need to clean them up or ignore them somehow. The simplest way is a pre-publish step to remove them.
To fix this issue, right click the project in the solution explorer to the right, then click Properties.
In the Pre-build section add this:
@echo "---------- Cleaning up .ts files from obj folder (start) ---------"
if exist "C:\projects\A2SPA\VS2017\A2SPA\obj\" (
  del C:\projects\A2SPA\VS2017\A2SPA\obj\*.ts /s /q
)
@echo "---------- Cleaning up .ts files from obj folder (end) ---------"
Again, this should be in the top pre-build section
Close this window.
Next, to further clean up our .ts files, and also prevent the issue with IIS blocking updates to a2spa.dll, we'll set up a couple of pre-publish and post-publish commands inside our project file. The safest way to do this is unload the project, and then edit the project file.
Right click the project int he solution explorer, click Unload Project, then click Edit Project.
Recall now we'll be looking at an XML file instead of the previous VS 2015 program.json files. The top of the project file is pretty much stock standard;
<Project Sdk="Microsoft.NET.Sdk.Web">

  <PropertyGroup>
    <TargetFramework>netcoreapp1.1</TargetFramework>
  </PropertyGroup>

  <PropertyGroup>
    <PackageTargetFallback>$(PackageTargetFallback);portable-net45+win8+wp8+wpa81;</PackageTargetFallback>
    <PreBuildEvent>@echo "---------- Cleaning up .ts files from obj folder (start) ---------"
if exist "C:\projects\A2SPA\VS2017\A2SPA\obj\" (
  del C:\projects\A2SPA\VS2017\A2SPA\obj\*.ts /s /q
)
@echo "---------- Cleaning up .ts files from obj folder (end) ---------"</PreBuildEvent>
  </PropertyGroup>

  <PropertyGroup Condition="'$(Configuration)|$(Platform)'=='Debug|AnyCPU'">
    <DocumentationFile>bin\Debug\netcoreapp1.1\A2SPA.xml</DocumentationFile>
  </PropertyGroup>

  <ItemGroup>
    <Content Include="wwwroot\app\about.component.js" />
You'll note how the pre-build commands have been stored in XML. The document XML file we used to have copied across will not be copied without addition of code similar to that shown below. Alter this, if it is required for anything other than debug mode.
Change this top section to the following:
<Project Sdk="Microsoft.NET.Sdk.Web">
<PropertyGroup>
<TargetFramework>netcoreapp1.1</TargetFramework>
<GenerateDocumentationFile>true</GenerateDocumentationFile>
<PreserveCompilationContext>true</PreserveCompilationContext>
<AssemblyName>A2SPA</AssemblyName>
<OutputType>Exe</OutputType>
<PackageId>A2SPA</PackageId>
<RuntimeFrameworkVersion>1.1.1</RuntimeFrameworkVersion>
<PackageTargetFallback>$(PackageTargetFallback);dotnet5.6;portable-net45+win8</PackageTargetFallback>
<PreBuildEvent>@echo "---------- Cleaning up .ts files from obj folder (start) ---------"
if exist "$(SolutionDir)$(SolutionName)\$(BaseIntermediateOutputPath)" (
del $(SolutionDir)$(SolutionName)\$(BaseIntermediateOutputPath)*.ts /s /q
)
@echo "---------- Cleaning up .ts files from obj folder (end) ---------"</PreBuildEvent>
</PropertyGroup>
<ItemGroup>
<None Update="wwwroot\**\*;node_modules\**\*">
<CopyToPublishDirectory>PreserveNewest</CopyToPublishDirectory>
</None>
<Content Include="node_modules\**\*">
<CopyToPublishDirectory>PreserveNewest</CopyToPublishDirectory>
</Content>
</ItemGroup>
<PropertyGroup Condition="'$(Configuration)|$(Platform)'=='Debug|AnyCPU'">
<DocumentationFile>bin\Debug\netcoreapp1.1\A2SPA.xml</DocumentationFile>
</PropertyGroup>
<PropertyGroup Condition="'$(Configuration)|$(Platform)'=='PublishRelease|AnyCPU'">
<DocumentationFile>bin\Debug\netcoreapp1.1\A2SPA.xml</DocumentationFile>
</PropertyGroup>
<ItemGroup>
<Content Include="wwwroot\app\about.component.js" />
.... etc
while editing the file, scroll down to the bottom section, where it has this:
... etc

  <ItemGroup>
    <DotNetCliToolReference Include="Microsoft.VisualStudio.Web.CodeGeneration.Tools" Version="1.0.0" />
  </ItemGroup>

</Project>
and change it to read the following:
 ... etc


<ItemGroup>
    <DotNetCliToolReference Include="Microsoft.VisualStudio.Web.CodeGeneration.Tools" Version="1.0.0" />
  </ItemGroup>
  <ItemGroup>
    <Content Update="web.config">
      <CopyToOutputDirectory>PreserveNewest</CopyToOutputDirectory>
    </Content>
  </ItemGroup>

  <Target Name="CleanupTypescriptFromObjFolder" BeforeTargets="Build">
    <RemoveDir Directories="$(ProjectDir)$(BaseIntermediateOutputPath)" />
  </Target>

  <Target Name="AfterBuild">
    <TransformXml Source="Web.config" Transform="Web.$(Configuration).config" Destination="Web.config" />
  </Target>

  <Target Name="PrepublishScript" BeforeTargets="PrepareForPublish" Condition=" '$(IsCrossTargetingBuild)' != 'true' ">
    <Exec Command="c:\windows\system32\inetsrv\appcmd stop apppool a2spa" />
  </Target>

  <Target Name="PostpublishScript" AfterTargets="Publish" Condition=" '$(IsCrossTargetingBuild)' != 'true' ">
    <Exec Command="c:\windows\system32\inetsrv\appcmd start apppool a2spa" />
  </Target>

</Project>
for clarity I have hard coded the name a2spa here, however key to the latter part of the changes are the commands:
c:\windows\system32\inetsrv\appcmd stop apppool a2spa
and
c:\windows\system32\inetsrv\appcmd start apppool a2spa
which respectively stop and start the application pool. We could have also stopped and started the website itself, however delimiting and quoting the names gets confusing, single names like this are simpler to add and work just as well.
By stopping then starting the website we are able to copy over the files and not get the errors noted in part 7.
Next save the changes, reload the project (right click the solution and reload).
If you get errors, you can either unload and edit the project file, carefully editing again, or undo the changes in GIT and try again. Once reloaded and you're happy the changes have worked, create a web.config file in the root directory of the project . Right click the project, click add new, type in config to do a search, then select "Web Configuration File" which will default to the name web.config as below, then click Add:
change from the default, as below:
="1.0"="utf-8"
<configuration>
</configuration>
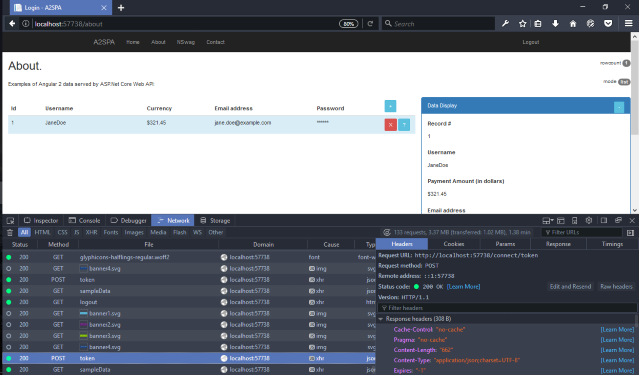
save and try publishing the site, you should be able to log on (assuming you have created the database, as we did in part 7). Login works, as does insert (post) and get and get all methods (as below)
however an edit fails (this happens to be an HTTP PUT operation)
and likewise the delete (using an HTTP Delete) fails as well:
To save you the suspense, the issue here is WebDav. If it is enabled it will interfere with put and delete operations. though it has no noticeable effect upon post or get operations.
To fix this we'll create a web.config transform. Edit the web.config file add the Webdav module and handler sections to make it read as shown below:
="1.0"="utf-8"
<configuration>
<system.webServer>
<modules>
<remove name="WebDAVModule" />
</modules>
<handlers>
<remove name="WebDAV" />
<add name="aspNetCore" path="*" verb="*" modules="AspNetCoreModule" resourceType="Unspecified" />
</handlers>
<aspNetCore processPath="%LAUNCHER_PATH%" arguments="%LAUNCHER_ARGS%" stdoutLogEnabled="false" stdoutLogFile=".\logs\stdout" forwardWindowsAuthToken="false" />
</system.webServer>
</configuration>
(We'll use these webdav section to fix a further issue affecting delete and put commands).
Next expand the properties section as shown, then expand the publish profiles, then finally click "Add Config Transform" as below
once you click Add Config Transform you get a further file created just under web.config:
which contains this default:
="1.0"="utf-8"
<configuration xmlns:xdt="http://schemas.microsoft.com/XML-Document-Transform">
<system.web>
<compilation xdt:Transform="RemoveAttributes(debug)" />
</system.web>
</configuration>
and should be changed to this:
="1.0"="utf-8"
<configuration xmlns:xdt="http://schemas.microsoft.com/XML-Document-Transform">
<system.webServer xdt:Transform="Replace">
<modules>
<remove name="WebDAVModule" />
</modules>
<handlers>
<remove name="WebDAV" />
<add name="aspNetCore" path="*" verb="*" modules="AspNetCoreModule" resourceType="Unspecified" />
</handlers>
<aspNetCore processPath="dotnet" arguments=".\a2spa.dll" stdoutLogEnabled="false" stdoutLogFile=".\logs\stdout" forwardWindowsAuthToken="false" />
</system.webServer>
</configuration>
save the file.
Finally publish again. This time you you should see build started, the clean up of any old .ts files, then the app pool stop and start, and deployment start. Once the published files are completed.
if you right click the lower fie automatically named (in my case) web.FolderProfile.config and then select Preview Transform you will get to see a preview of what the changes would look like:
the left hand side will have the original with processPath="%LAUNCHER_PATH%" and the right hand side have processPath="dotnet" and similary, the left hand side will have arguments="%LAUNCHER_ARGS%" while the right should have arguments=".\a2spa.dll" showing what it would get transformed to.
Publish once again, and test, and this time you should get a working set of CRUD (create//read/update/delete) operations, all 4 - including delete and put (edit) once again, now that WebDav is "fixed".
What could possibly go wrong?
If you have broken your project file XML, grab a copy of part 8 branch from github, or the download from this part. Otherwise, I trust that this should allow you to publish repeatedly to IIS and clean up after yourself so that it is starting to get moderately useful.
An unusual case, between my desktop and laptop I had an unusual situation of 7 sets of .dlls and many other files as each was set to use the same file history backup folder. It seems one backed up and the other thought it was a new file, and this bouncing back and forth affected my Nuget package cache folders as well as many other folders.
This propagated itself into my solution, and then on into my deployments, to the published files.
After turning off file history (I will reset some time using a different file share for each, my desktop PC vs my laptop PC), and then clearing out the NuGet cache, things were back to normal.
History
So far this is part 8, the previous parts in the series have been these:
Part 1 - How to integrate ASP.Net Core and Angular 2
Part 2 - How to use Tag Helpers to display data
Part 3 - How to use Tag Helpers for data input, added SQL backend using EF Core.
Part 4 - Adding token authentication with JWT using OpenIdDict.
Part 5 - Adding async services, server-side validation, a simple Angular 2 datagrid & more tag helpers.
Part 6 - Using NSwag to create Swagger docs and generate Angular 2 / Typescript data models + data services.
Part 7 - publishing to IIS for VS2015 users
this is part 8, publishing to IIS for VS 2017 users.
Part 9 to come will probably be the last, covering, I hope if I can it all in - a final code clean up and optimization, deployment to Azure or a file server / web host, and some general comments on the overall architecture including the pros and cons of WebPack.
Robert works as a full stack developer in the financial services industry. He's passionate about sustainable software development, building solid software and helping to grow teams. He's had 20+ years of development experience across many areas that include scheduling, logistics, telecommunications, manufacturing, health, insurance and government regulatory and licensing sectors. Outside work he also enjoys electronics, IOT and helping a number of non-profit groups.


 General
  News
News  Suggestion
  Question
  Bug
Bug  Answer
  Joke
Joke  Praise
  Rant
Rant  Admin
Admin 


