With this application sample, we can create a new user, show all the users, modify user data & also delete the user through API build with Express from frontend using AngularJS.
Components
- MSSql - SQL database
- Express - NodeJS Framework
- Angular - JavaScript frameworks for Frontend
- Node.js - JavaScript Execution environment (Server)
Dependencies
It’s highly recommended to review those previous posts to follow this post:
Let’s create a database in MSSql server for user data storing which is going to operate by our application. After creating the db, execute the below query by using that db.
CREATE TABLE [dbo].[User](
	[Id] [int] IDENTITY(1,1) NOT NULL,
	[Name] [nvarchar](250) NULL,
	[Email] [nvarchar](250) NULL,
	[Phone] [nvarchar](50) NULL,
 CONSTRAINT [PK_User] PRIMARY KEY CLUSTERED
(
	[Id] ASC
)WITH (PAD_INDEX = OFF, STATISTICS_NORECOMPUTE = OFF, _
       IGNORE_DUP_KEY = OFF, ALLOW_ROW_LOCKS = ON, ALLOW_PAGE_LOCKS = ON) ON [PRIMARY]
) ON [PRIMARY]
GO
This will create a new table named user. After that, we need to create some stored procedure for SQL operation, copy the below script and execute those by pasting it in MSSql query window.
CREATE PROCEDURE [dbo].[GetUsers]
AS
BEGIN
SET NOCOUNT ON;
SELECT * FROM [dbo].[User]
END
GO
CREATE PROCEDURE [dbo].[GetUserById]
@Id Int
AS
BEGIN
SET NOCOUNT ON;
SELECT * FROM [dbo].[User] WHERE Id = @Id
END
GO
CREATE PROCEDURE [dbo].[PutUser]
@Id INT,
@Name NVarchar(250),
@Email NVarchar(250),
@Phone NVarchar(50)
AS
BEGIN
SET NOCOUNT ON;
Update [dbo].[User]
SET [Name] = @Name,[Email] = @Email,[Phone] = @Phone
WHERE [Id] = @Id
END
GO
CREATE PROCEDURE [dbo].[SetUser]
@Name NVarchar(250),
@Email NVarchar(250),
@Phone NVarchar(50)
AS
BEGIN
SET NOCOUNT ON;
INSERT INTO [dbo].[User]([Name],[Email],[Phone])
VALUES(@Name,@Email,@Phone)
END
GO
CREATE PROCEDURE [dbo].[DeleteUser]
@Id Int
AS
BEGIN
SET NOCOUNT ON;
DELETE FROM [dbo].[User]
WHERE [Id] = @Id
END
GO
We are done with the database work. Let’s start with the application development plan. From our previous sample of application, we are going to start.
Download it from GitHub, then open the application using Visual Studio 2017. We need to install two more packages to fulfill our requirements.
mssql - Microsoft SQL Server client for Node.jsbody-parser - Node.js body parsing middleware
Server-Side
Package Installation
Right click on project, Go to > Open Command Prompt here. Run this command for mssql.
npm install mssql
Run this command for body-parser.
npm install body-parser
After completing this installation, we need to add those to our node server. Here, we have added by enabling.
var bodyParser = require("body-parser");
Then, we have to use it to our application.
app.use(bodyParser.json()
app.use(bodyParser.urlencoded({ extended: true }));
In this sample, operations are going to perform through APIs using Express route. Let’s get started with creating API’s process.
APIs
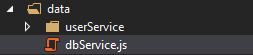
Let’s create data service to perform the operations in database. Add a common dbService.js file to serve the requests like the below image:
Open the newly added js file, then add this line:
var mssql = require('mssql');
This means we are requiring mssql module by require() function to load the source code in a new function.
After that, we are adding the database server connection configuration:
var dbConfig = {
    user: "sa",
    password: "sa@12345",
    server: "DESKTOP-80DEJMQ",
    database: "dbNode",
    pool: {
        max: 10,
        min: 0,
        idleTimeoutMillis: 30000
    }
};
As we can see, the max pool is 10 & min is 0 & timeout in milliseconds before closing an unused connection which is default.
Get more details on Pool: https://github.com/coopernurse/node-pool
var executeQuery = function (sql, res) {
    const conn = new mssql.ConnectionPool(dbConfig);
    conn.connect().then(function () {
        const req = new mssql.Request(conn);
        req.query(sql).then(function (data) {
            res(data);
        }).catch(function (err) {
            res(null, err);
        })
    }).catch(function (err) {
        res(null, err);
    })
}
Connections
const conn = new mssql.ConnectionPool(dbConfig);
We are creating a SQL connection object using connectionpool.
Request
const req = new mssql.Request(conn);
Then we are executing the request using the global connection pool.
Get more details on connection: https://www.npmjs.com/package/mssql#connections-1
Finally, we are exporting the module for another module call.
module.exports = {
    executeQuery
}
Let’s create a specific data service using Express router. Create a new JS file, then add those code snippets below to newly added file.
var express = require('express');
var router = express.Router();
var dbService = require('../dbService');
router.get("/api/user/getAll", function (req, res) {
var query = "GetUsers";
dbService.executeQuery(query, function (data, err) {
if (err) {
throw err;
} else {
res.send(data.recordset);
}
res.end();
});
});
router.get("/api/user/getUser/:id", function (req, res) {
var query = "[GetUserById] " + parseInt(req.params.id) + "";
dbService.executeQuery(query, function (data, err) {
if (err) {
throw err;
} else {
res.send(data.recordset);
}
res.end();
});
});
router.post("/api/user/setUser", function (req, res) {
var query = "[SetUser] '" + req.body.Name + "', '" +
req.body.Email + "', '" + req.body.Phone + "'";
dbService.executeQuery(query, function (data, err) {
if (err) {
throw err;
} else {
res.send(data.recordset);
}
res.end();
});
});
router.put("/api/user/putUser", function (req, res) {
var query = "[PutUser] " + parseInt(req.body.Id) + ", '" +
req.body.Name + "','" + req.body.Email + "', '" + req.body.Phone + "'";
dbService.executeQuery(query, function (data, err) {
if (err) {
throw err;
} else {
res.send(data.recordset);
}
res.end();
});
});
router.delete("/api/user/deleteUser/:id", function (req, res) {
var query = "[DeleteUser] " + parseInt(req.params.id) + "";
dbService.executeQuery(query, function (data, err) {
if (err) {
throw err;
} else {
res.send(data.recordset);
}
res.end();
});
});
module.exports = router;
After finishing all those, we need to enable by app.use() function in the node server as middleware.
app.use('/', require('./data/userService/userDataService'));
Also, we are giving access to other user agent by enabling Cross-Origin Resource Sharing (CORS).
app.use(function (req, res, next) {
res.header("Access-Control-Allow-Origin", "*");
res.header("Access-Control-Allow-Methods", "GET,HEAD,OPTIONS,POST,PUT");
res.header("Access-Control-Allow-Headers",
"Origin, X-Requested-With, contentType,Content-Type, Accept, Authorization");
next();
});
Finally, this is the overview of Node Server:
'use strict';
var bodyParser = require("body-parser");
var path = require('path');
var express = require('express');
var app = express();
var port = process.env.port || 3000;
app.use(bodyParser.json());
app.use(bodyParser.urlencoded({ extended: true }));
app.use(express.static(path.join(__dirname, 'app')));
app.use(express.static(path.join(__dirname, 'public')));
app.use('/', require('./data/userService/userDataService'));
app.use(function (req, res, next) {
res.header("Access-Control-Allow-Origin", "*");
res.header("Access-Control-Allow-Methods", "GET,HEAD,OPTIONS,POST,PUT");
res.header("Access-Control-Allow-Headers", "Origin,
X-Requested-With, contentType,Content-Type, Accept, Authorization");
next();
});
app.get('/*', function (req, res) {
res.sendFile(path.resolve('layout.html'));
});
app.get('/*', function (req, res) {
res.render('error');
});
var server = app.listen(port, function () {
console.log('Node server is running on port..' + port);
});
Client-Side
We need to create user interface to operate data in database. First, we need create folder for specific module like below:

As you can see, we have created an AngularJS controller with HTML page.
Html View
This view is going to render while the routing state is changed.
<div class="container-fluid">
    <div class="row">
        <div class="col-sm-4">
            <h3>Add New User</h3>

            <form name="frmUser" novalidate>
                <input type="hidden" ng-model="userModel.Id" name="uid" />

                <div class="form-group">
                    <label for="uname" class="control-label">User Name</label>
                    <input type="text" class="form-control"
                     ng-model="userModel.Name" name="uname" placeholder="" required />
                    <span class="error" ng-show="(frmUser.$dirty||submitted) &&
                     frmUser.uname.$error.required">Customer name is Required</span>

                </div>
                <div class="form-group">
                    <label for="email" class="control-label">E-mail</label>
                    <input type="email" class="form-control"
                     ng-model="userModel.Email" name="email"
                     placeholder="" required />
                    <span class="error" ng-show="(frmUser.$dirty ||submitted) &&
                     frmUser.email.$error.required">EmailId is Required!</span>
                    <span class="error" ng-show="(frmUser.$dirty ||submitted) &&
                     frmUser.$error.email">Invalid EmailId!</span>

                </div>
                <div class="form-group">
                    <label for="phone" class="control-label">Phone</label>
                    <input type="text" class="form-control"
                     ng-model="userModel.Phone" name="phone" placeholder="" />

                </div>
                <div class="form-group">
                    <button type="submit" class="btn btn-danger"
                     ng-click="reset()">Reset</button>
                    <button type="submit" class="btn btn-primary"
                     ng-click="saveUser()" ng-disabled="frmUser.$invalid"
                            ng-If="userModel.Id == 0">
                        Create
                    </button>
                    <button type="submit" class="btn btn-success"
                     ng-click="updateUser()" ng-disabled="frmUser.$invalid"
                            ng-If="userModel.Id > 0">
                        Update
                    </button>
                </div>
            </form>
            <span class="warning">{{resmessage}}</span>
        </div>
        <div class="col-sm-8">
            <h3>All User</h3>
            <table style="width:100%" class="table table-striped">
                <tr>
                    <th>Sr.</th>
                    <th>Name</th>
                    <th>Email</th>
                    <th>Phone</th>
                    <th>Option</th>
                </tr>
                <tr ng-repeat="item in ListUser">
                    <td>{{ $index+1 }}</td>
                    <td>{{ item.Name }}</td>
                    <td>{{ item.Email }}</td>
                    <td>{{ item.Phone }}</td>
                    <td>
                        <a href="#" ng-click="getUser(item)"
                         title="Edit Record" class="btn btn-primary btn-xs pull-right">
                            Edit
                        </a>
                        <a href="#" ng-click="deleteUser(item)"
                         title="Delete Record" class="btn btn-danger btn-xs pull-right">
                            Delete
                        </a>
                    </td>
                </tr>
            </table>
        </div>
    </div>
</div>
AngularJS Controller
In our AngularJS controller, we have to use $http service to communicate with the APIs. Methods that are used:
$http.get: get data$http.post: post new data$http.put: update existing data$http.delete: delete existing data
More about $http service here.
templatingApp.controller('UserController',
['$scope', '$http', function ($scope, $http) {
$scope.title = "All User";
$scope.ListUser = null;
$scope.userModel = {};
$scope.userModel.Id = 0;
getallData();
function getallData() {
$http({
method: 'GET',
url: '/api/user/getAll/'
}).then(function (response) {
$scope.ListUser = response.data;
}, function (error) {
console.log(error);
});
};
$scope.getUser = function (user) {
$http({
method: 'GET',
url: '/api/user/getUser/' + parseInt(user.Id)
}).then(function (response) {
$scope.userModel = response.data[0];
}, function (error) {
console.log(error);
});
};
$scope.saveUser = function () {
$http({
method: 'POST',
url: '/api/user/setUser/',
data: $scope.userModel
}).then(function (response) {
showNotif("Data Saved")
$scope.reset();
getallData();
}, function (error) {
console.log(error);
});
};
$scope.updateUser = function () {
$http({
method: 'PUT',
url: '/api/user/putUser/',
data: $scope.userModel
}).then(function (response) {
showNotif("Data Updated")
$scope.reset();
getallData();
}, function (error) {
console.log(error);
});
};
$scope.deleteUser = function (user) {
var IsConf = confirm('You are about to delete ' +
user.Name + '. Are you sure?');
if (IsConf) {
$http({
method: 'DELETE',
url: '/api/user/deleteUser/' + parseInt(user.Id)
}).then(function (response) {
showNotif("Data Deleted")
$scope.reset();
getallData();
}, function (error) {
console.log(error);
});
}
};
$scope.reset = function () {
var msg = "Form Cleared";
$scope.userModel = {};
$scope.userModel.Id = 0;
showNotif(msg)
};
}]);
Publishing the App
Let’s go to gulp modification to get publish files finally.
    gulp.task('publish', function () {
    gulp.src('layout.html')
        .pipe(gulp.dest(paths.publish));
    gulp.src('package.json')
        .pipe(gulp.dest(paths.publish));
    gulp.src('server.js')
        .pipe(gulp.dest(paths.publish));

    gulp.src('app/**/*')
        .pipe(gulp.dest(paths.publish + 'app'));
    gulp.src('public/**/*')
        .pipe(gulp.dest(paths.publish + 'public'));
    gulp.src('data/**/*')
        .pipe(gulp.dest(paths.publish + 'data'));
    gulp.src('bin/**/*')
        .pipe(gulp.dest(paths.publish + 'bin'));
});
Go to task explorer in Visual Studio like the below image:
Run the task, this will copy all our application files to the published folder.
Go to Publish folder:
Open command prompt here (Shift + Right Mouse), then type nodemon. We are starting our application using nodemon. If we have any change in our application, nodemon will automatically restart the application.
Now open the browser, type the URL: http://localhost:3000.
Output
Hope this will help. :)
History
- 21st February, 2018: Initial version


 General
  News
News  Suggestion
  Question
  Bug
Bug  Answer
  Joke
Joke  Praise
  Rant
Rant  Admin
Admin 


