Introduction
There are problems we need to solve when we start writing a new Win Forms application. First of all, we want our applications to have a neat look, XP-style, or better, XP-theme aware. You'd like to have a nice splash screen taking the user's attention away while the application loads, especially, when it really takes some time for the application to load. Also, many applications should only run a single instance, and should not permit multiple instances simultaneously. There is also an exception handling problem, which is quite tricky, because not every exception is handled, especially while debugging. In release, however, all the exceptions should be caught, at least providing the application with an ability to crash 'gracefully'.
This article is an attempt to provide a template for solving these most typical tasks of an application creation.
Enabling XP themes
A control is considered to be XP-theme aware when its appearance changes in accordance with the XP-theme that is currently active.
Most of the .NET controls are just wrappers over standard Windows controls. In Windows XP, there are two versions of Windows control set - 6.0, which is XP-theme aware and 5.0, which is not. By default, .NET uses version 5.0. In .NET 1.0, the only way to make it use the 6.0 version was to write an application manifest, which is a separate file stored in the application directory. Somehow, this solution was not elegant enough, and in .NET 1.1 a new method - Application.EnableVisualStyles()was introduced. It should be run in the Main() procedure before Application.Run(). Its use, however, is not always successful. E.g. while putting a toolbar on the main form, the toolbar appears without any icons on the tool buttons. To correct this situation, run Application.DoEvents() immediately after Application.EnableVisualStyles(). This combination has proved to be quite reliable:
[STAThread]
static void Main() {
  Application.EnableVisualStyles();
  Application.DoEvents();
  Application.Run(new MainForm());
}
For some controls to be XP-theme aware you also need to set the FlatStyle property to FlatStyle.System. These controls include ButtonBase inheritors (Button, CheckBox and RadioButton), GroupBox and Label, although for the Label control there is hardly any visual difference.
Ensuring one-instance running
If due to some considerations you don't want your application to have multiple instances running, you can use this simple one instance loader:
[STAThread]
static void Main() {
Application.EnableVisualStyles();
Application.DoEvents();
if(!MainForm.InstanceExists) {
Application.Run(new MainForm());
}
}
static Mutex mutex;
static string AppGuid =
"4B8CB7C2-1BD3-4db4-AFF0-A398466C5EEF";
static bool InstanceExists {
get {
bool notExists;
mutex = new Mutex( false, "Local\\" + AppGuid,
out notExists );
return !notExists;
}
}
The trick is to use one of the kernel named objects, e.g. mutex, to mark the presence of application in the memory. The successive loads of the application should check for this mutex, and run only if it is not found.
You can use GUID to ensure that the mutex name is unique. Also, if your application could be run in terminal services, you should choose your strategy for one-instance application running. If you want your application to be unique in session scope - use the Local\ prefix for the mutex name. If you want it to be unique across sessions - use the Global\ prefix.
To handle unhandled exceptions
Some people recommend catching every exception that you can imagine, thinking that the number of try-catch blocks directly correspond to the robustness of your application. They hunt exceptions like dangerous beasts, considering every exception that escapes unhandled as the worst thing that can ever happen to your application.
Some people like using exceptions as a probe. Like "let's poke it and see if it growls". E.g. let's convert a string to a number and catch the exception if it couldn't.
Both forget one thing that exception is, by its name and nature, exceptional. It is not normal for an application to run into exceptions. Therefore, the presence of too many exception handlers clearly shows the bad design, not robustness. Also, using try-catch to find out things is definitely a bad coding practice. Quite contrary to this, you should do every possible check before making a risky call, to ensure that it would not result in exceptions.
Generally, an exception handling strategy should follow three simple rules:
- preventing is better than handling,
- handle only those exceptions that you know how to handle and leave the rest alone,
- throwing exceptions is not the best way of error reporting, do not overuse it.
And what to do with exceptions that can come out unhandled. On one hand, exceptions should not go away unhandled leading your application to a violent crush, and on the other, there is no sense in handling the exception that you haven't expected, because no one can say if it is safe to continue application execution after it has happened. All we can do is to catch it in a generic way, log it and finalize our application gracefully.
There are three known ways of doing this:
- Putting
Application.Run() in a try-catch block,
- Using
Application.ThreadException event,
- Using
AppDomain.UnhandledException event.
The first is the easiest one, although it is rarely mentioned and least recommended. Its main drawback is that it does not give you the possibility to continue with execution. Otherwise, it works OK, at least I have positive experience with it.
It is important to differentiate the unhandled exception handling for Debug and Release versions. While debugging, it's good to take advantage of the debugger break-in-the-code feature, in the release version you should log all the information about the error to a text file, so that the user could send it to you for analysis. To achieve this, the code should look like this:
[STAThread]
static void Main() {
#if DEBUG
Application.Run(new MainForm());
#else
try {
Application.Run(new MainForm());
}
catch(Exception ex) {
new ExceptionDialog(ex).ShowDialog();
}
#endif
}
The catcher shows an exception handling dialog with 'save to text file' ability:

The Application.ThreadException and AppDomain.UnhandledException events provide you with the ability to handle exceptions in abort-retry-ignore fashion. Unfortunately, I have no experience using them, and can only recommend you some useful articles on the topic:
Showing the splash screen
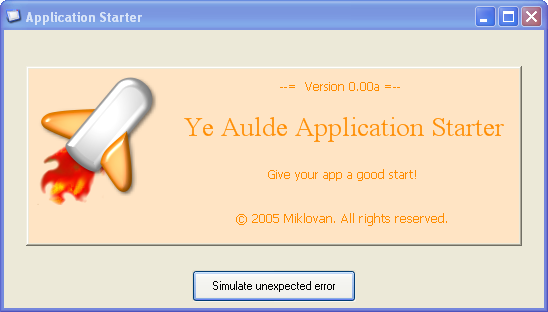
The main purpose of the splash screen is to inform the user that the program has really started, present useful information about the name, version and copyright, and draw attention while the program loads. The main splash screen requirements are:
- start as soon as possible before the main form loads,
- remain at the topmost form of the project,
- when the project fully loads - hide on first user click anywhere on the project.
To start as soon as possible we need to show the splash form in the very beginning of the main form constructor, before any other component loads:
public MainForm() {
Splash.Show(this);
Thread.Sleep(5000);
InitializeComponent();
}
To give the splash screen an appropriate appearance we should set the following properties:
this.FormBorderStyle =
        System.Windows.Forms.FormBorderStyle.FixedDialog;
this.ShowInTaskbar = false;
this.StartPosition =
        System.Windows.Forms.FormStartPosition.CenterScreen;
this.TopMost = true;
in the form designer.
Then we should bind the click event of the form and its controls to the HideFrom handler:
public formSplash() {
  InitializeComponent();
  this.Click += new System.EventHandler(this.HideForm);
  this.Deactivate +=new EventHandler(formSplash_Deactivate);
  foreach(Control c in GetChildControls(this)) {
    c.Click += new EventHandler(this.HideForm);
  }
}

private ArrayList GetChildControls(Control control) {
  ArrayList a = new ArrayList();
  foreach(Control c in control.Controls) {
    a.Add(c);
    foreach(Control cc in GetChildControls(c)) {
      a.Add(cc);
    }
  }
  return a;
}

public int Started = 0;

public void HideForm(object sender, System.EventArgs e) {
  if(Started>=1) {
    this.Close();
  }
}

private void formSplash_Deactivate(object sender, EventArgs e) {
  this.Started ++;
}
The Deactivate event is necessary to handle the case of the user clicking anywhere else on the application after it fully loads. The Started counter is used to ensure correct behavior during maximized or normal main form load, because different number of deactivation events occurs in each case. The Splash static class is used to simplify splash screen handling and taking most of the necessary code away from the main form.
This ensures form paint at the start:
public static void Show(Form mainform) {
  mainform.Activated+=new EventHandler(mainform_Activated);
  splashForm = new formSplash();
  splashForm.Show();
  splashForm.Update();
}
And deals with the closing of splash screen by deactivation (clicking outside of it):
private static void mainform_Activated(object sender, EventArgs e) {
  int count;
  if((sender as Form).WindowState==FormWindowState.Normal)
    count = 2;
  else
    count = 3;
  if(splashForm.Started < count)
    splashForm.Activate();
  else
    splashForm.Close();
}
The result is consistent and pleasant behavior of the splash form. All the complexity of its behavior is taken to the Splash class and the formSplash code. All you need to do in the main form is to call:
Splash.Show(this);
in the first line of the constructor.
Summary
What we have finally acquired is a convenient template of a general purpose Win Forms project, implementing all the basic requirements of an up-to-date application.
This article uses the ideas and concepts described in my previous publications:
Acknowledgements
- Jörgen Sigvardsson - for very useful ideas on mutex naming.
History
- 3rd December, 2005 - Article submitted.
This member has not yet provided a Biography. Assume it's interesting and varied, and probably something to do with programming.


 General
  News
News  Suggestion
  Question
  Bug
Bug  Answer
  Joke
Joke  Praise
  Rant
Rant  Admin
Admin 


