
Introduction
Clipboard is used by many applications like word formatters and word processors as a temporary repository for data. The most obvious examples are Cut, Copy and Paste. It is also useful for transferring data from one application to another, because the Clipboard is common across applications(processes). When data is added to the Clipboard, the data format can be specified so that other applications can recognize the format and decide whether to process it or not.
In .NET the functionalities for playing with Windows system clipboard has been clubbed into the class Clipboard. To add data to Clipboard SetDataObject method of Clipboard class can be used. You can pass any object to this method, but to add data in multiple formats, you must first add the data to a DataObject which is generic, even though there are specific data objects for specific formats.
Background
This application was basically developed for my personal use. I notice I am frequently interrupted when I cut a block of code to be pasted somewhere else (I need to attend to someone, etc.). By the time I return, I forget that I was holding something important on the clipboard and then use the clipboard space for something else.
As a remedial measure, I decided to develop an application that can hold all the entries that visit my Clipboard, so that I can retrieve them anytime later in the day.
Using the code
Retrieving text data from clipboard
Clipboard class has a method, GetDataObject(), which retrieves the data that is currently in the system clipboard. In fact, GetDataObject() returns an object that implements the IDataObject interface, which has 3 dominant methods (GetDataPresent, GetData and GetFormats).
GetDataPresent - Determines if the current data in Clipboard can be converted to the format we specify. GetData - Retrieves the data associated with the format we specify from Windows Clipboard.
Note: DataFormats class has predefined Clipboard data format names, which can be provided to the above two methods as parameter to verify the data format.
if (Clipboard.GetDataObject().GetDataPresent(DataFormats.Text))
{
    string s = Clipboard.GetDataObject().GetData(DataFormats.Text)
        .ToString();
}
In the above piece of code, GetData method is used to retrieve data from the system Clipboard. The format of the data to be retrieved is provided as a parameter. Because the system Clipboard is shared by multiple applications, before retrieving data we must ensure that the format of current clipboard data is the same that our application expects. So we make a check for the data format of the data to be retrieved, with a call to GetDataPresent method. GetDataPresent method returns a boolean value which determines whether the current data on the Clipboard can be converted to the data format we specify. To specify the data format, it is advisable to use the DataFormats class which contains static fields representing system Clipboard formats. DataFormats.Text is provided for string data. An alternative to using the DataFormats class is to provide the name of the format as string.
Setting text data to Clipboard
Clipboard class has a method, SetDataObject(). This method places the specified data on the Clipboard. This method has 3 interesting overloaded clones.
SetDataObject(object data) - Places data on the system Clipboard.
Note: The data placed on Clipboard by this method is non-persistent, ie., the data is not retained on Clipboard once the application exits. SetDataObject(object data, bool copy) - Places data on the system Clipboard and specifies whether the data should remain on the Clipboard after the application exits. SetDataObject(object data, bool copy, int RetryTimes, int RetryDelay) - Attempts to place data on the system Clipboard the specified number of times and with the specified delay between attempts.
Clipboard.SetDataObject("C# is the best", true);
In the above piece of code, SetDataObject method sets string "C# is the best" on the System Clipboard. The text remains on the clipboard until it is replaced by any application. And the string remains there even after our application exits, because the second parameter of the method is set to true, which indicates the data to be persistent.
Retrieving image from Clipboard
This is exactly the same as retrieving text data, except that the data format given is DataFormats.Bitmap instead of DataFormats.Text
if (Clipboard.GetDataObject().GetDataPresent(DataFormats.Bitmap))
{
    Bitmap bmp = (Bitmap)Clipboard.GetData(DataFormats.Bitmap);
}
GetDataPresent method verifies if an image(bitmap) object is present on clipboard and GetData method retrieves the image as a bitmap object.
An alternative for this in .NET 2.0 is
if (Clipboard.GetDataObject().GetDataPresent(DataFormats.Bitmap))
{
    Bitmap bmp = (Bitmap)Clipboard.GetImage();
}
The GetImage method returns an Image object which can be directly assigned to Image objects or controls.
Setting Image to Clipboard
This is also similar to setting text to clipboard.
Clipboard.SetDataObject((Bitmap)lstBoxCpyItms.SelectedItem, true);
The overloaded versions of SetDataObject has been explained earlier, in this article.
Until now our discussion has been about the basic usage of the Clipboard class. Now we shall get into the ClipboardRing application.
Clipboard Ring Application
This is the method which retrieves text/image from the system Clipboard and makes an entry into a ListBox, where it resides until the application exits. The current data on the clipboard is retrieved and added to the ListBox Items collection. By default only objects with Text format is retrieved from Clipboard and added to the ListBox. To store images, right click on the notify icon on system tray and select the "Process Image" option. Then the boolean variable processImage is set to true.
Duplicate entries are restricted to the Listbox. When a new string entry is made to the Listbox items collection, it is stored in a variable strClipCurrent. Next time, it is compared with the current string on Clipboard and, only if it is different is it added to the Listbox. Also, if the string is already an entry in the Listbox it is not added again. For images this checking is also made, but the logic applied is a bit different. I believe the comments in the code make things very clear. The image comparison logic has been taken from markrouse's article. Thanks to markrouse. If I couldn't find this solution I would have discarded the image storing functionality from the application, because all other options I reached, for comparing images were crude and not presentable.
The basic logic behind the image comparison is that the hash of 2 identical objects are equal and different for non-identical objects. The comparison is done by passing an array of bytes and comparing their hash values. This is a really fast method.
private void AddToBoard()
{
bool addImg = true;
if (Clipboard.GetDataObject().GetDataPresent(DataFormats.Text))
{
string s = Clipboard.GetDataObject().GetData
(DataFormats.Text).ToString();
if (s != strClipCurrent)
{
if (!lstBoxCpyItms.Items.Contains(s))
{
lstBoxCpyItms.Items.Add(s);
strClipCurrent = s;
}
}
}
if (processImage)
{
if (Clipboard.GetDataObject().GetDataPresent(DataFormats.Bitmap))
{
Bitmap bmp = (Bitmap)Clipboard.GetImage();
if (bmpClipCurrent != null)
{
foreach (object obj in lstBoxCpyItms.Items)
{
if (obj.GetType().ToString() == "System.Drawing.Bitmap")
{
if (CompareBitmaps(bmp, (Bitmap)obj))
{
addImg = false;
}
}
}
if (addImg)
{
lstBoxCpyItms.Items.Add(bmp);
bmpClipCurrent = bmp;
}
}
else
{
lstBoxCpyItms.Items.Add(bmp);
bmpClipCurrent = bmp;
}
}
}
}
The following method acts as an event handler for the double click event of the ListBox. The type of the selected Listitem object is compared and handled accordingly. Here a Listbox entry is made as the first entry to the list when the application starts.
private void lstBoxCpyItms_DoubleClick(object sender, EventArgs e)
{
if (lstBoxCpyItms.SelectedItems.Count > 0)
{
if (lstBoxCpyItms.SelectedItem.GetType().ToString() ==
"System.String")
{
string strSelItm = lstBoxCpyItms.SelectedItem.ToString();
if (strSelItm != strClipCurrent)
{
strClipCurrent = strSelItm;
Clipboard.SetDataObject
(lstBoxCpyItms.SelectedItem.ToString());
if (!lstBoxCpyItms.Items.Contains(strClipCurrent))
{
lstBoxCpyItms.Items.Add(strClipCurrent);
}
}
}
if (lstBoxCpyItms.SelectedItem.GetType().ToString() ==
"System.Drawing.Bitmap")
{
Bitmap bmpSelItm = (Bitmap)lstBoxCpyItms.SelectedItem;
bmpClipCurrent = bmpSelItm;
Clipboard.SetDataObject((Bitmap)
lstBoxCpyItms.SelectedItem, true);
}
this.Hide();
}
lstBoxCpyItms.SelectedIndex = -1;
}
Yahoo Messenger style alert
I always wanted to create a Yahoo Messenger like alert pop-up. So I thought this was the right application for me to try. The easiest solution I conceived was to use timer component. I know that it needs optimization but this solution works fine. I am happy for the time being :-).
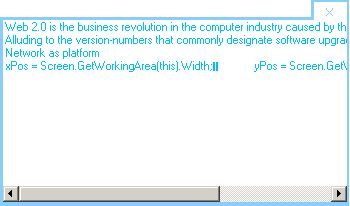
Below is a quick snap of its implementation.
In the form load event two variables xPos, yPos are set. xPos will have the desktop area width and yPos will have the desktop area's height.
GetWorkingArea method of the Screen(System.Windows.Forms.Screen) class retrieves the working area(desktop area in case if our form - working area is dependent on the container of the control) excluding the taskbar and any other docked toolbars.
xPos = Screen.GetWorkingArea(this).Width;
yPos = Screen.GetWorkingArea(this).Height;
Basically I have used two timer components for this functionality: tmr1 and tmr2. Each has an tick interval of 1 millisecond.
tmr1 is enabled when the notify icon in the system tray is clicked, and each time it ticks the Y location of the form is decreased so that the form raises from the bottom boundary of the screen.
private void tmr1_Tick(object sender, EventArgs e)
{
    int curPos = this.Location.Y;
    if (curPos > yPos - this.Height)
    {
        this.Location = new Point(xPos - this.Width, curPos - 20);
    }
    else
    {
        tmr1.Stop();
        tmr1.Enabled = false;
    }
}
tmr2 is enabled when the close button is clicked, and each time it ticks the Y location of the form is increased to take the form below the visible screen space and, ultimately, remove it from the user's sight. At this point this timer is disabled.
private void tmr2_Tick(object sender, EventArgs e)
{
    int curPos = this.Location.Y;

    if (curPos < (yPos + 30))
    {
        this.Location = new Point(xPos - this.Width, curPos + 20);
    }
    else
    {
        tmr2.Stop();
        tmr2.Enabled = false;
    }
}
The logic is quite simple and you can easily understand it by looking at it. You can change the timer interval and timing to get variations of the animation effect.
Handling Images in Listview
In the attached application, the clipboard ring is implemented in two forms. The first one, (Form1.cs), is a Listbox implementation and the second one, (ClipboardWithImage.cs), is a Listview implementation.
In the listview implementation, an image thumbnail is shown towards the left of each image entry. The implementation of this is quiet simple. An ImageList control is set to the SmallImageList property of the ListView control. The dimension of images displayed in the ListView is set by having the ImageSize property of ImageList control set. The ImageSize property is of type size, so its Height and Width properties can be set individually. Anyway, thats not an issue because it can be set in the design view.
Each time a new picture entry is to be made into the Listview, the image is added to the ImageList control and the corresponding index of the image in the ImageList is set to the ListView items imageindex parameter.
Remember ...
- Please install .NET Framework 2.0 to run the application. The current attached code has been generated using Visual Studio 2005 and complied for .NET Framework 2.0. The implementation in Framework 1.1 is very similar except for one functionality mentioned above. (
GetImage method) - To test images, you can use MsPaint. Both Copy and Paste options can be tested using the same.
Mohammed Habeeb works as a software developer for an IT company in Dubai. He holds a bachelors in Computer Science Engineering from MES College, Calicut University. He is also a Microsoft Certified Application Developer (MCAD) in .NET Framework. He has a strong inclination towards Microsoft technologies especially the .NET Platform. He has been an active member of Cochin and Bangalore Microsoft user groups.
He has a strong passion for science and technology. His interests span through travelling, driving, photography, stamps and coin collection.
You can find more about him @ http://www.habeebonline.com


 General
  News
News  Suggestion
  Question
  Bug
Bug  Answer
  Joke
Joke  Praise
  Rant
Rant  Admin
Admin 


