Introduction
The idea of drawing duplicate-controls on a form came to me after I did a few commercial projects. I found that making several forms with 30+ controls can be a pretty tiresome task. That is especially true when you are making a form with lots of text fields. You have to make several TextBoxes, and each of them must be accompanied by a Label. More than that, every Label must have the same distance to the TextBox so your forms would look neat. In the worst case scenario, you have to assign each label with some nice name, because there can always be a situation where some label changes its text when you type some information on the text box and you don't want to end up with names like 'labelXXX'.
In VC#.NET, we have a mechanism to build multi-control components, and it's called the UserControl class. This is basically a container where you can put other controls from the toolbox. However, this mechanism has disadvantages. If you make labels and textboxes and you want to align all the textboxes, you will have big problems, you cannot use leads anymore:
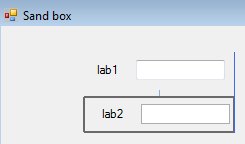
When using my technique, I can still use leads, despite the fact that I have a multi-control component:

Of course, there is a catch, and that is layouts... but since I'm not a big fan of layouts, I can live with that.
Background
If you ever wrote something in Delphi, you must have noticed that the VCL (Visual Component Library) has a control which is called LabeledEdit. In this article, we will try to make the same thing in C# .NET. However, instead of using the designer and inheriting from UserControl, we will use only code and inherit directly from TextBox.
The Solution
When you want to draw another control in your component, there are three methods you have to override and customize:
void OnParentChanged(EventArgs e)void OnLocationChanged(EventArgs e)void Dispose(bool disposing)
You can read in MSDN or other documentation sites about these, but what you need to know is that on OnParentChanged(EventArgs e), you want to place the creation and drawing code of your control. For example:
protected override void OnParentChanged(EventArgs e)
{
if (this.Parent != null)
{
_control = new SomeControl();
this.Parent.Controls.Add(_control);
setCoordsAndOtherStuff();
}
base.OnParentChanged(e);
}
The second one, OnLocationChanged(EventArgs e), is pretty obvious. When the location changes, you want to re-position your controls:
protected override void OnLocationChanged(EventArgs e)
{
setCoordsAndOtherStuff();
base.OnLocationChanged(e);
}
The third one is not really mandatory because your component will work without this, but as soon as you delete it from the designer, the other components will not be deleted. The problem is, you cannot select them because from the designer point of view, they do not exist :-). The Dispose code is in the *.designer.cs file, but I always like to move it to my main *.cs file.
protected override void Dispose(bool disposing)
{
if (_control != null)
_control.Dispose();
if (disposing && (components != null))
{
components.Dispose();
}
base.Dispose(disposing);
}
And that's it. Next, we're going to do a real component, a labeled textbox. :)
TextBox with Label on Right Side - LabeledTextBox
Here is the complete source of the component:
public partial class LabeledTextBox : TextBox
{
public LabeledTextBox()
{
InitializeComponent();
}
protected Label _label = null;
protected string _LabelText = "";
protected int _offset = 5;
public int offset
{
get { return _offset; }
set
{
_offset = value;
setControlsPosition();
}
}
public string LabelText
{
get { return _LabelText; }
set
{
_LabelText = value;
setControlsPosition();
}
}
protected virtual void setControlsPosition()
{
if (_label != null)
{
_label.Text = _LabelText;
_label.AutoSize = true;
_label.Left = this.Left - _label.Width - _offset;
_label.Top = this.Top + 3;
}
}
protected override void OnParentChanged(EventArgs e)
{
if (this.Parent != null)
{
_label = new Label();
this.Parent.Controls.Add(_label);
setControlsPosition();
}
base.OnParentChanged(e);
}
protected override void OnLocationChanged(EventArgs e)
{
setControlsPosition();
base.OnLocationChanged(e);
}
protected override void Dispose(bool disposing)
{
if (_label != null)
_label.Dispose();
if (disposing && (components != null))
{
components.Dispose();
}
base.Dispose(disposing);
}
}
I think the most important thing to remember is when you do the set section, "reload" the component's position, so every time you change the property, the label will re-position to fit nicely. Of course, you have to override some events like Enable, Visible to make it look more deluxe, but this is pretty much basic to get you started. Now, we are going to move to the next class, which is a LabeledText with a button.
LabeledTextBox with Button: Inherited from the Component We Just Made
This is a little more complicated because we have to make an event that will respond to the button click. We cannot do it directly because the designer only sees our TextBox, for it, the Label and Button do not exist. So, we have to do a little trick...
One of the nice things in C# is the fact that we can add events to a component, simply by using the operator +=. Of course, we have to make some method which will do work that must be done.
protected virtual void OnButtonClick(object sender, EventArgs e)
{
MessageBox.Show("You have just clicked you button");
}
...
_button.Click += new EventHandler(OnButtonClick);
So now, we have a method that will fire when a button is clicked, but since we want to transfer this event to our component, we have to make a delegate and an event.
public delegate void ButtonClickDelegate(object sender, EventArgs e);
public event ButtonClickDelegate LabeledButtonClick;
And, our modified OnButtonClick:
protected virtual void OnButtonClick(object sender, EventArgs e)
{
MessageBox.Show("You have just clicked you button");
LabeledButtonClick(sender, e);
}
So remember, if you try to transfer events from one control to another:
- Make a method with the same parameters as the event.
- Add an event handler with this method to the control you are transferring from.
- Make a delegate and an event for the component you are transferring to.
- Fire an event in the method created in step 1.
If we build this now, we will see this in the event section:
And, whatever you implement in that function, it will be fired as you press the button. Here is the complete class:
public partial class LabButtonEdit : LabeledTextBox
{
public delegate void ButtonClickDelegate(object sender, EventArgs e);
public event ButtonClickDelegate LabeledButtonClick;
public LabButtonEdit()
{
InitializeComponent();
}
protected Button _button;
protected bool _drawButton = false;
protected string _buttonText = "";
public bool drawButton
{
get { return _drawButton; }
set
{
_drawButton = value;
setControlsPosition();
}
}
public string buttonText
{
get { return _buttonText; }
set
{
_buttonText = value;
setControlsPosition();
}
}
protected override void OnParentChanged(EventArgs e)
{
if (this.Parent != null)
{
_button = new Button();
this.Parent.Controls.Add(_button);
_button.Click += new EventHandler(OnButtonClick);
setControlsPosition();
}
base.OnParentChanged(e);
}
protected override void OnLocationChanged(EventArgs e)
{
setControlsPosition();
base.OnLocationChanged(e);
}
protected override void setControlsPosition()
{
base.setControlsPosition();
if (_button != null)
{
_button.Text = _buttonText;
_button.Left = this.Left + this.Width + _offset;
_button.Top = this.Top;
_button.Height = this.Height;
Graphics g = this.CreateGraphics();
_button.Width = (int)(g.MeasureString
(_buttonText, _button.Font)).Width + 15; nicely
g.Dispose();
if (!_drawButton)
{
_button.Visible = false;
}
else
{
_button.Visible = true;
}
}
}
protected virtual void OnButtonClick(object sender, EventArgs e)
{
MessageBox.Show("You have just clicked you button");
LabeledButtonClick(sender, e);
}
protected override void Dispose(bool disposing)
{
if (_button != null)
_button.Dispose();
if (disposing && (components != null))
{
components.Dispose();
}
base.Dispose(disposing);
}
}
How To Use It
- Unpack the zip to some directory.
- Make a new Windows Forms project and save it.
- Follow the steps in these pictures...
- Enjoy!
Points of Interest
I am using these kinds of components in my every day work. Labeled ComboBoxes, DateTimePickers, all kinds of stuff. As for me... it really saves a lot of time. I'd love to hear what you guys (or girls) think about this. Feedback is always appreciated.
Thanks
Greetz goes to Ralf Jansen - for providing the right event for adding the control.
History
- 24.X.2008 - v1.0
- 27.X.2008 - v1.1 - Fixed bug where event is added every time position method is fired, now event is added after creation of button
I specialize at C#, developing Enterprise solutions. I have some knowledge of ASP.NET MVC - looking forward to use it together with Typescript.


 General
  News
News  Suggestion
  Question
  Bug
Bug  Answer
  Joke
Joke  Praise
  Rant
Rant  Admin
Admin 


