Introduction
In this article, I will show you how to enable resizing of a custom/transparent WPF window. This article is a follow up to a previous article, Resizing a Custom Window, where I described how to resize a custom window by handling a rectangle object’s mouse events.
For those unfamiliar with creating custom WPF windows, Kirupa Chinnathambi has written a wonderful article on his blog that you can access here.
Background
In this article, I take a different approach to solving the resizing issue by making use of a Thumb control. The thumb control is the most suitable control for resizing other control objects. By using the thumb control, the coding becomes far simpler than the one employed in my first article.
For resizing purposes, I will cater specifically to the DragDelta event of the thumb control. The DragDelta event is raised multiple times while the thumb control has focus and mouse capture. The thumb control receives focus and mouse capture when the user presses the left mouse button.
Step 1
We shall start off by designing our custom window and placing the necessary controls:
- Start Expression Blend and create a new WPF project named “Custom Win Resize”. Ensure that the Language is set to Visual Basic.
- Select the Window element in Objects and Timeline. In the Layout section of the Properties panel, set the width to 400 and the height to 300.
- Check the
AllowsTransparency check box in the Appearance section. - In the Brushes section, set the
Background property to No Brush. The Window element should now appear empty.
- Click on the ‘Show advanced properties’
 button in the Layout panel and set
 MinWidth to 200 and MinHeight to 100. - Double click on the Rectangle tool in the toolbox. This places a rectangle in the
LayoutRoot. - Right click the rectangle in Objects and Timeline and select AutoSize > Fill.
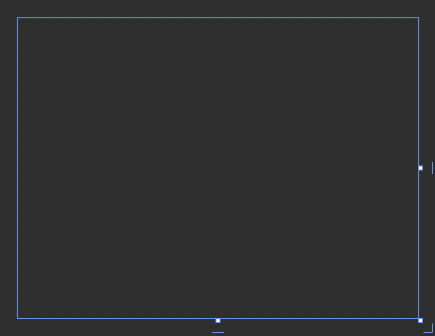
- Click on the selection tool in the toolbox to show the rectangle’s resize handles. Using the corner resize handles give the rectangle rounded corners.
- In the Appearance section of the Properties panel, set the
StrokeThickness to 2. Ensure that the Stroke is a black solid brush. - In the search box of the Assets panel, type in the word ‘thumb’. As you start typing, you’re presented with several tool options. Select the thumb tool.
- Draw out a thumb object at the top of the
LayoutRoot.
- Ensure that its
VerticalAlignment is set to Top and the Left and Right margins are set to 14. The Top margin should be zero.
- Rename the thumb object as ‘TopThumb’ and in the
CommonProperties section, set its cursor to SizeNS. - With
TopThumb still selected, copy-paste a new thumb object. Set the new thumb object’s VerticalAlignment to Bottom. - Rename the new thumb object as ‘
BtmThumb’. - Draw another thumb object onto the right edge of the
LayoutRoot.
- Ensure that the
HorizontalAlignment is set to Right, the Right margin is zero and that the top and Bottom margins are set to 14.
- Rename the thumb object as ‘
RgtThumb’ and set its cursor to SizeWE. - With
RgtThumb selected, copy-paste a new thumb control. Set its HorizontalAlignment to Left and rename it as ‘LftThumb’. Save your work.
Step 2
Let’s provide the necessary coding to enable the resizing of the custom window. The coding shall be done in Blend’s code editor.
- Select
TopThumb and in the Properties panel, click on the Events button
.
- Type ‘
Top_DragDelta’ in the DragDelta event textbox and press enter.
- In Blend’s code editor, type in the following code in
TopThumb’s DragDelta event handler:
If Me.Height > Me.MinHeight Then
   Me.Height -= e.VerticalChange
   Me.Top += e.VerticalChange
Else
   Me.Height = Me.MinHeight + 4
   TopThumb.ReleaseMouseCapture()
End If
- Switch back to the designer window and select
BtmThumb. In the DragDelta event textbox, type in ‘Btm_DragDelta’ and press enter. Type in the following code in the event handler:
If Me.Height > Me.MinHeight Then
  Me.Height += e.VerticalChange
Else
  Me.Height = Me.MinHeight + 4
  BtmThumb.ReleaseMouseCapture()
End If
- Switch back to the designer window and select
RgtThumb. Type ‘Rgt_DragDelta’ in the DragDelta event textbox and press enter. Type in the following code:
If Me.Width > Me.MinWidth Then
  Me.Width += e.HorizontalChange
Else
  Me.Width = Me.MinWidth + 4
  RgtThumb.ReleaseMouseCapture()
End If
- Switch back to the designer window and select
LftThumb. Type ‘Lft_DragDelta’ in the DragDelta event textbox and press enter. Type in the following code in LftThumb’s DragDelta event handler:
If Me.Width > Me.MinWidth Then
  Me.Width -= e.HorizontalChange
  Me.Left += e.HorizontalChange
Else
  Me.Width = Me.MinWidth + 4
  LftThumb.ReleaseMouseCapture()
End If
- Switch back to the designer window and set the opacity of all the thumb objects to zero. You can do a multiple selection in Objects and Timeline and change the opacity of all the thumb controls at once.
Select the Window element and in the Common Properties section of the Properties panel, set the WindowStartupLocation to CenterScreen. Run the project. Try resizing the top, bottom, left and right edges of the custom window.
Notice that when resizing the top and left edges of the custom window, there is flickering. This occurs because the application can’t resize the client area as fast as the raising of the mouse event. The flickering is also common in some standard windows. Press ALT+F4 to close the app.
In Conclusion
I hope the article was helpful. If you haven’t gone through my first article on resizing a custom window, please do so to get an idea of a different solution to this issue.


 General
  News
News  Suggestion
  Question
  Bug
Bug  Answer
  Joke
Joke  Praise
  Rant
Rant  Admin
Admin 


