Introduction
Puzzles Solver is an application that I've uploaded to the Android Market some time ago. The idea for the application came from an old CodeProject article. In that article, I have presented a collection of some well known puzzles along with a mechanism for computer solving them. The puzzles were implemented as Java Applets, so it was easy to port them to Android platform. The application provides the following games:
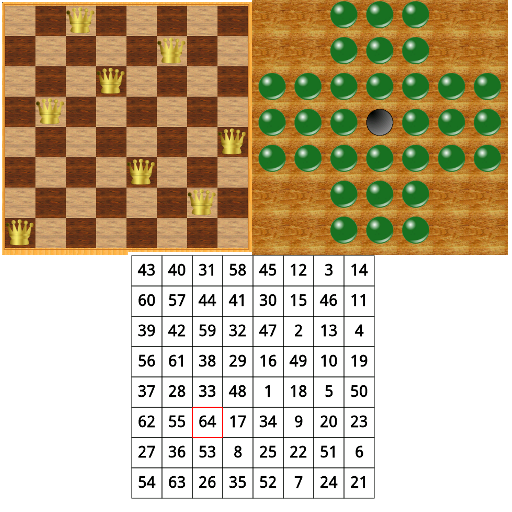
- 8 Queens: The player needs to place 8 queens in a chess board, so that no one attacks another.
- Knight Tour: Guide a knight through all the squares of a chess board and return to the beginning.
- Solo: Jump over pegs to remove them. Remove all but the last peg.
The application provides variations for all the games. It can also solve the puzzle for you. No pre-stored solutions are used. Instead the application tries to compute a solution on the fly, by applying a simple brutal-search algorithm.
In this article, I want to present all the design decisions I've made and the patterns I've followed, while developing the application. I hope that readers of the article will find them useful and perhaps re-use them on their own applications.
UI Diagram
The following diagram depicts the wireframes of the application's activities. When starting to design a new application, it is a good idea to try to sketch out, how the application will look. This will help you identify User Interface challenges early enough. It will also help on the mapping of visual components to Java classes.

In the context of this article, the wireframes help in presenting some important User Interface patterns. The application can launch pretty quick, so there is no need for a splash screen. The application starts immediately with the main screen, which just presents a row of buttons. This screen provides visual cues of what functionality the applications offers (start a puzzle, see the scores, get help) and allows the user to access it with one or two touches. Of course, you can style the first screen to be something more interesting than a row of buttons, but there will be very few exceptions to the rule that every mobile application should make all important functionality easily accessible from the first screen. The first screen also offers a menu, but this isn't necessary. The menu offers the same functionality as the menus. Only the about box is hidden in it. You can hide such functionality in the menu, in order to save screen estate and not to distract the user.
The transition from the main screen to the puzzles and to the scores (each puzzle has a different scores screen) is done through a list. When the button is pressed, a list with the available puzzles appear. Another solution would be to use a separate screen (implemented by a new activity) to present all the choices. This would be ideal, if there were many game choices to be made (e.g. online game, timed and non-timed mode, level selection).
Game Engine
The game engine is based on an article I wrote here on CodeProject as late back as in 2004. The idea of supporting more than one puzzle in the same application is to create an abstract class that implements all common functionality. For each individual puzzle, there is a concrete implementation of the abstract class. This is an excerpt from the solve method, as this is implemented in the abstract class (slightly modified for demonstration purposes):
while(!searched_all && movesMade() != movesTableSize) {
    if (!findNextMove()) {
        searched_all = !goBack();
        while(!searched_all &&
              movesMade() == 0) {
            searched_all = !goBack();
        }
    }
}
This while loop is the heart of the solver algorithm. The individual puzzles implement the methods called in it, namely movesMade(), goBack() and findNextMove(). This is actually a form of the template method design pattern.
The abstract Puzzle class is also used to provide an Interface for callers of the individual Puzzle classes. The concrete implementations appear only when a puzzle is initialized. The following class diagram depicts the main classes of the application, namely PuzzleActivity, PuzzleView and Puzzle.
In onCreate method of the PuzzleActivity, a PuzzleView instance is initialized. Also a Puzzle object is created and is injected into the PuzzleView.
@Override
public void onCreate(Bundle savedInstanceState) {
    super.onCreate(savedInstanceState);

    Intent intent = getIntent();
    Bundle bundle = intent.getExtras();
    gameType = bundle.getInt("GameType", 0);

    switch(gameType) {
    case 0:
        puzzle = new Q8Puzzle(this);
        break;
    case 1:
        puzzle = new NumberSquarePuzzle(this);
        break;
    case 2:
        puzzle = new SoloPuzzle(this);
        break;
    }

    timeCounter = new TimeCounter();

    puzzle.init();
    puzzleView = new PuzzleView(this);
    puzzleView.setPuzzle(puzzle);
    puzzleView.setTimeCounter(timeCounter);

    setContentView(puzzleView);

    timerHandler = new Handler();
    replayHandler = new Handler();

    scoresManager = ScoresManagerFactory.getScoresManager(getApplicationContext());
}
This is the only place, where concrete implementations of a Puzzle appear. The PuzzleView, which is responsible for servicing the User Interface, performs the job by calling the Puzzle.draw and Puzzle.onTouchEvent methods. If a new puzzle were to be added, the only thing that will be needed is a new puzzle case statement.
In the second version of the article, I've added support for creating custom boards in Solo puzzle. This led to some special handling added:
case R.id.custom_boards:
    if (puzzle instanceof SoloPuzzle) {
        if (soloPuzzleRepository != null &&
                soloPuzzleRepository.getCustomBoardsCount() > 0) {
            Intent editIntent  = new Intent
        ("gr.sullenart.games.puzzles.SOLO_EDIT_BOARDS");
            startActivity(editIntent);
        }
        else {
            SoloCustomBoardActivity.showDirections = true;
            Intent addIntent  = new Intent
        ("gr.sullenart.games.puzzles.SOLO_ADD_BOARD");
            startActivity(addIntent);
        }
    }
However the base class could also be extended in order to support custom boards. After all, adding custom boards is a common feature of many puzzles. This way, the special handling would go away.
Supporting Multiple Screens
As Android runs on a variety of devices, it is important for an application to be able to support different screen sizes and densities. The official documentation provides a thorough guidance of the screens support process. This is a constantly evolving document, as with every new version of the SDK new screen sizes and densities are being added.
On top of the practices described there, I will present here a technique of using tiles to draw the User Interface. The tiles are small rectangular images (for example 80x80 or 100x100 pixels). The User Interface is constructed by repeating these images horizontally and vertically. This technique takes advantage of the fact that in Android you can easily resize an image dynamically. Thus a single set of tiles can support a variety of screen sizes, as well as both portrait and landscape orientations. I should note however that this technique is appropriate for puzzle-like games or other applications, where there are only slow changes on the User Interface. It may not be efficient to use it for fast changing User Interfaces. This technique also provides a way of supporting theming in an application.
Let's start from using a tile for creating a background in a layout. This is as easy as defining a drawable XML:
="1.0"="utf-8"
<bitmap xmlns:android="http://schemas.android.com/apk/res/android"
android:src="AndroidPuzzlesSolver/@drawable/bg_tile"
android:tileMode="repeat"
android:dither="true" />
And then in the layout XML:
<RelativeLayout xmlns:android="http://schemas.android.com/apk/res/android"
                android:layout_width="fill_parent"
                android:layout_height="fill_parent"
                android:orientation="vertical"

                android:background="@drawable/background">
This solves the problem, when you create the User Interface from a layout. For puzzles and simple games however, it is very common to draw everything on the onDraw method of a View. The following method will draw the background on a canvas, when called at the beginning of the onDraw:
private void drawBackgroundRepeat(Canvas canvas, Bitmap bgTile) {
    float left = 0, top = 0;
    float bgTileWidth = bgTile.getWidth();
    float bgTileHeight = bgTile.getWidth();

    while (left < screenWidth) {
        while (top < screenHeight) {
            canvas.drawBitmap(bgTile, left, top, null);
            top += bgTileHeight;
        }
        left += bgTileWidth;
        top = 0;
    }
}
In order to use images as tiles to draw the User Interface in multiple screen sizes, some resizing is needed. The following diagram depicts the organization of the screen. The dashed lines show the background tiles. Since this is just a repetition of the same image and there is no need for showing full images at the edges, no resizing is necessary. The solid lines show where the game tiles must be placed in order to form the game board.
As an example, the Solo puzzle screen is drawn with the following tiles. All images were generated using Gimp.
| Type | Wood Theme | Marble Theme |
|---|
| board tile | | |
| hole tile | | |
| peg on a hole | | |
| selected peg | | |
| selected hole | | |
First let's look at the ImageResizer class.
public class ImageResizer {

    private Matrix matrix;

    public void init(int oldWidth, int oldHeight, float newWidth, float newHeight) {
        float scaleWidth = newWidth / oldWidth;
        float scaleHeight = newHeight / oldHeight;
        matrix = new Matrix();
        matrix.postScale(scaleWidth, scaleHeight);
    }

    public Bitmap resize(Bitmap bitmap) {
        if (matrix == null) {
            return bitmap;
        }

        int width = bitmap.getWidth();
        int height = bitmap.getHeight();

        Bitmap resizedBitmap = Bitmap.createBitmap(bitmap, 0, 0,
                                    width, height, matrix, true);
        return resizedBitmap;
    }
}
This is a utility class that provides a method for dynamically resizing a bitmap. An instance of this class needs to be initialized by providing the dimensions of the original and resized bitmaps. This class is utilized in the onSizeChanged method of the puzzle View. The onSizeChanged method is called whenever the dimensions of the screen change (e.g. when an orientation change happens or the screen is first displayed). At this method, the tile images are loaded from the application's resources. Depending on the theme, different images are loaded. The loaded bitmaps are then resized to fit into the existing screen and kept in memory. The images are drawn on the canvas at the draw method of every puzzle.
public void onSizeChanged(int w, int h) {
    super.onSizeChanged(w, h);

    int boardSize = (boardRows > boardColumns) ? boardRows : boardColumns;

    if (w < h) {
        tileSize = (w - 10) / boardSize;
    }
    else {
        tileSize = (h - 10) / boardSize;
    }
    offsetX = (screenWidth - tileSize*boardColumns)/2;
    offsetY = (screenHeight - tileSize*boardRows)/2;

    imageResizer = new ImageResizer();

    if (theme.equals("marble")) {
        emptyImage = BitmapFactory.decodeResource(context.getResources(),
                        R.drawable.marble_tile);
        tileImage = BitmapFactory.decodeResource(context.getResources(),
                        R.drawable.wood_sphere);
        tileSelectedImage = BitmapFactory.decodeResource(context.getResources(),
                        R.drawable.golden_sphere);
    }
    else {
        emptyImage = BitmapFactory.decodeResource(context.getResources(),
                R.drawable.wood_tile);
        tileImage = BitmapFactory.decodeResource(context.getResources(),
                        R.drawable.glass);
        tileSelectedImage = BitmapFactory.decodeResource(context.getResources(),
                        R.drawable.glass_selected);
    }

    freePosImage = BitmapFactory.decodeResource(context.getResources(),
            R.drawable.hole);
    freePosAllowedMoveImage  = BitmapFactory.decodeResource(context.getResources(),
            R.drawable.hole_move);

    imageResizer.init(emptyImage.getWidth(), emptyImage.getHeight(),
            tileSize, tileSize);
    emptyImage = imageResizer.resize(emptyImage);
    freePosImage = imageResizer.resize(freePosImage);
    tileImage = imageResizer.resize(tileImage);
    tileSelectedImage = imageResizer.resize(tileSelectedImage);
    freePosAllowedMoveImage = imageResizer.resize(freePosAllowedMoveImage);
}
Popup Window
In the third revision of the article, I've replaced the simple list puzzle selector with a much nicer Popup Window. You can compare the difference of these two selectors in the following figure:
The new Popup Window is aesthetically more appealing. It also makes the puzzle selection quicker, as it appears closer to the point, where the user first touched and it doesn't grey out the whole screen. It can also be easy animated. In order to create a Popup Window, you start from a layout XML file, as you would have done for a Dialog or a View. It is important to define a background for your layout, because the Android PopupWindow doesn't provide one by default. In Java code, you make the PopupWindow appear with the following code:
private void showGameSelectPopup(View parentView) {
LayoutInflater inflater = (LayoutInflater)
getSystemService(Context.LAYOUT_INFLATER_SERVICE);
View layout = inflater.inflate(R.layout.puzzle_select, null, false);
gameSelectPopupWindow = new PopupWindow(this);
gameSelectPopupWindow.setTouchInterceptor(new OnTouchListener() {
@Override
public boolean onTouch(View v, MotionEvent event) {
if (event.getAction() == MotionEvent.ACTION_OUTSIDE) {
gameSelectPopupWindow.dismiss();
gameSelectPopupWindow = null;
return true;
}
return false;
}
});
gameSelectPopupWindow.setWidth(WindowManager.LayoutParams.WRAP_CONTENT);
gameSelectPopupWindow.setHeight(WindowManager.LayoutParams.WRAP_CONTENT);
gameSelectPopupWindow.setTouchable(true);
gameSelectPopupWindow.setFocusable(true);
gameSelectPopupWindow.setOutsideTouchable(true);
gameSelectPopupWindow.setContentView(layout);
int [] location = new int [] {0, 0};
parentView.getLocationInWindow(location);
int width = parentView.getWidth()/2;
int x = location[0] - width/2;
int y = location[1] + parentView.getHeight();
gameSelectPopupWindow.setAnimationStyle(R.style.AnimationPopup);
gameSelectPopupWindow.showAtLocation(layout, Gravity.NO_GRAVITY, x, y);
}
@Override
public void onStop() {
if (gameSelectPopupWindow != null) {
gameSelectPopupWindow.dismiss();
}
super.onStop();
}
The show method accepts as parameter a view, which is the Button or other item that initiated the action. This allows to position the PopupWindow relative to the point the user first clicked. Initially, we create the View for the PopupWindow by inflating the layout. Then we create the PopupWindow object and configure it appropriately. We use the getLocationInWindow(), getWidth() and getHeight() methods of the parent View to position the Popup properly. Finally, we set the animation style and show the Popup Window. If the user clicks outside of the window, this will be dismissed. In order not to leak a window, we need to check if the popup is visible, when the activity is stopped and dismiss it ourselves. This can happen for instance, if the orientation is changed, while the Popup is visible.
Another tricky point is the animation style. This must be defined in a styles.xml file in the values folder and have the below form:
<resources>
    <style name="AnimationPopup">
        <item name="@android:windowEnterAnimation">@anim/popup_show</item>
        <item name="@android:windowExitAnimation">@anim/popup_hide</item>
    </style>
</resources>
Keeping Scores
In order to store the user's scores, you need a persistence mechanism. Persistence options for the Android platform are described in the documentation. From these options, the most appropriate for storing scores is the SQLite database. The following statement presents the schema of the table I have used:
private static final String DATABASE_CREATE =
        "create table Scores (_id integer primary key autoincrement, " +
        "game text not null, category text not null,
        player text not null, date text, " +
        "score integer not null);";
In order to abstract the database from the rest of the code, I have created a ScoresManager class, which provides methods for accessing the scores.
public class ScoresManager {
    public boolean addScore(String game, String group, String player, int score);
    public boolean isHighScore(String game, int score);
    public List<Score> getScores(String game);
    public List<Score> getScoresByGroup(String group);
}
I should point out that there are many open source score libraries for Android. You can find well tested libraries that provide a wealth of features, including integration with Web score systems. If not for the point of learning to interact with an SQLite database, it would be better to use one of these for your scoring needs.
Settings
Another persistence need is to store user's selections. Since each puzzle comes in many variations, it would be good if the application remembered, which version of the game the user last played. You can easily achieve this in Android using SharedPreferences.
The SharedPreferences are defined in a separate XML file for every puzzle. The Puzzle abstract class defines the configure method. The concrete classes implement this method in order to read the user's settings.
public boolean configure(SharedPreferences preferences)
Android provides the PreferenceActivity, which you can very easily extend in order to create a simple User Interface for editing the settings.
public class PuzzleOptionsActivity extends PreferenceActivity {
    @Override
    protected void onCreate(Bundle savedInstanceState) {
            super.onCreate(savedInstanceState);

            Intent intent = getIntent();
            Bundle bundle = intent.getExtras();
            int gameResources = bundle.getInt("GameResources", 0);
               addPreferencesFromResource(gameResources);
    }
}
Of course, this is not the only way for exploiting SharedPreferences. You can create a fancy User Interface and read and write to SharedPreferences using Java code. In Puzzles Solver, I am using a PreferencesScreen without actually displaying anything, in order to store the user's name. When the user achieves a high score, the congratulations screen that asks her to enter her name is prefilled with the name previously used.
Localization
The application is localized in English, German and Greek. The localized elements are the text of the application (stored in strings.xml files at values, values-de and values-el folders), the logo of the application (stored in drawable, drawable-de, drawable-el folders) and the application's help page, which is stored as an HTML page in the assets folder (more details for this later).
Help
It is very important to provide instructions on the use of the application. Of course, the application should be easy to use and the interface intuitive, so that a user can start using the application, without reading a single line of a help file. That is not a reason for not having a good help page. Some users may not be familiar with the concept of your game or application and will need some guidance. Also, you may be able to provide some tips and tricks in your help page that even advanced users will find helpful.
I believe that using a WebView to display an HTML file is an ideal solution for implementing the help page in an Android Application. The amount of Java code required is minimal and then you only need one or more HTML files in the assets folder. It is very easy to author an HTML help page. Styling the text and adding images is trivial. You may also be able to re-use an existing page describing your application. Using HTML for the help page is so easy that it makes me wonder why so many applications still prefer to use other help systems, like displaying all information on a dialog.
If you want to support more than one language, then you will need different versions of the HTML page. Place all the pages in the assets folder. Then in the strings.xml, define the name of the page for every language:
<string name="help_file_name">index.html</string>
When loading the page in the WebView, read the name from the resources:
webview.loadUrl("file:///android_asset/" +
        getResources().getString(R.string.help_file_name));
Unobtrusive Ads
It is very common for mobile applications, especially for these given away for free, to display some sort of ads. These ads can generate revenue for the developer, while still allowing her to freely distribute the application. There are many Ad frameworks available to chose from. For PuzzleSolver, I have chosen AdMob. Whatever framework you chose, you need to make sure that the ads do not distract the user. In games, ads should only be displayed in auxiliary screens (game selection, scores, help) and not in the game screen. Ads should not distract the user for playing the game.
In order to be able to display ads in more than one Activity, without repeating the same code, I have created a utility class called AdsManager. AdsManager implements AdListener and provides addAdsView method, which sets the publisher id, the test devices' ids and adds the request to the view.
public class AdsManager implements AdListener {
    private String publisherId = "your publisher id here";

    public void addAdsView(Activity activity, LinearLayout layout) {
        AdView adView;
        int screenLayout = activity.getResources().getConfiguration().screenLayout;
        if ((screenLayout & Configuration.SCREENLAYOUT_SIZE_MASK) >= 3) {
        	adView = new AdView(activity, AdSize.IAB_LEADERBOARD, publisherId);
        }
        else {
        	adView = new AdView(activity, AdSize.BANNER, publisherId);
        }
        layout.addView(adView);
        AdRequest request = new AdRequest();
        request.addTestDevice(AdRequest.TEST_EMULATOR);
        request.addTestDevice("Your test device id here - Find the id in Log Cat");
        adView.loadAd(request);
   }
Notice that there is a differentation for different screen sizes. For small and normal screens (values 1 and 2) a Banner is displayed. For large and extra large screens (values 3 and 4) a Leaderboard is displayed.
This method is called in the onCreate method of every activity that displays ads:
LinearLayout layout = (LinearLayout)findViewById(R.id.banner_layout);
(new AdsManager()).addAdsView(this, layout);
History
- October 2012:
- Added support for triangular boards and diagonal moves in Solo.
- On board buttons (Undo, Restart, Solve).
- A message appears when there are no more moves left.
- July 2012: Fixed bugs. New icon. Use latest version of Android tools. Admob jar included in the libs folder.
- April 2012: New scores screen. Better support for large screens, including changes for AdMob. One new Solo theme. Option for displaying connecting lines in Knight's tour. Eliminated most of Lint warnings.
- January 2012: Added new Popup Window for puzzle selection
- January 2012: Added support for creating custom boards in Solo. Bug fixing
- First version of the article
This member has not yet provided a Biography. Assume it's interesting and varied, and probably something to do with programming.


 General
  News
News  Suggestion
  Question
  Bug
Bug  Answer
  Joke
Joke  Praise
  Rant
Rant  Admin
Admin 


