Introduction
This article is step 6 in the TipCalc tutorial for MvvmCross v3 - Hot Tuna!
The Story So Far...
We started with the goal of creating an app to help calculate what tip to leave in a restaurant.
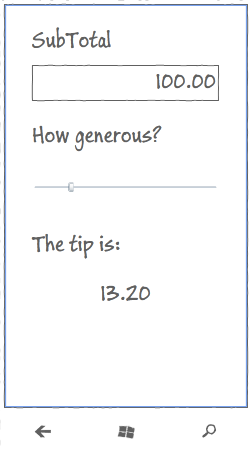
We had a plan to produce a UI based on this concept:
To satisfy this, we built a 'Core' Portable Class Library project which contained:
- our 'business logic' -
ICalculation - our
ViewModel - TipViewModel - our App which contains the application wiring, including the start instructions
We've then three User Interfaces - for Xamarin.Android, Xamarin.iOS and WindowsPhone:

For our next project, let's shift to Windows Desktop - via WPF - Windows Presentation Framework.
Here, we'll build up a new project 'from empty', just as we did for the Core, Android, iOS, WindowsPhone and WindowsStore projects.
Obviously, to work with WPF, you will need to be working on the PC with Visual Studio.
Create a New WPF Project
Add a new project to your solution - a 'WPF Application' with name TipCalc.UI.Wpf.
Important - Make sure this is at least .NET 4.5 - as this is the version required for PCL Profile104 - goodbye, XP!
Within this, you'll find the normal WPF application constructs:
- the 'Properties' folder with the 'AssemblyInfo' file, some resources and a settings file
- the 'App.Config' configuration file
- the App.Xaml 'application' object
- the MainWindow.Xaml and MainWindows.Xaml.cs files that define the default Window for this app
Keep MainWindow.xaml
We do actually want a MainWindow for this app. ![Smile | <img src=]() " align="top" src="http://www.codeproject.com/script/Forums/Images/smiley_smile.gif" />
" align="top" src="http://www.codeproject.com/script/Forums/Images/smiley_smile.gif" />
Add References
Add references to CoreCross and MvvmCross - PCL versions
Add references to the new project for the portable libraries:
- Cirrious.CrossCore.dll
- core interfaces and concepts including Trace, IoC and Plugin management
- Cirrious.MvvmCross.dll
- Mvvm classes - including base classes for your views and viewmodels
Normally, these will be found in a folder path like {SolutionRoot}/Libs/Mvx/Portable/.
Add a reference to MvvmCross - WPF specific version
Add a reference to the new project for the WPF specific library:
- Cirrious.MvvmCross.Wpf.dll
This extends the functionality of its PCL counterpart with WPF specific additions.
Normally, this will be found in a folder path like {SolutionRoot}/Libs/Mvx/Wpf/.
Note: MvvmCross uses simple behaviors from System.Windows.Interactivity - so in order to build MvvmCross Wpf apps, you will need Expression Blend installed.
Add a reference to TipCalc.Core.csproj
Add a reference to your TipCalc.Core project - the project we created in the last step which included:
- your
Calculation service - your
TipViewModel - your App wiring
Add a Setup Class
Just as we said during the Android, iOS, WP and WindowsStore construction, Every MvvmCross UI project requires a Setup class.
This class sits in the root namespace (folder) of our UI project and performs the initialisation of the MvvmCross framework and your application, including:
- the Inversion of Control (IoC) system
- the
MvvmCross data-binding - your App and its collection of
ViewModels - your UI project and its collection of
Views
Most of this functionality is provided for you automatically. Within your WPF UI project, all you have to supply is:
- your App - your link to the business logic and
ViewModel content
For TipCalc, here's all that is needed in Setup.cs:
using System.Windows.Threading;
using Cirrious.MvvmCross.ViewModels;
using Cirrious.MvvmCross.Wpf.Platform;
using Cirrious.MvvmCross.Wpf.Views;

namespace TipCalc.UI.Wpf
{
    public class Setup : MvxWpfSetup
    {
        public Setup(Dispatcher uiThreadDispatcher,
        IMvxWpfViewPresenter presenter) : base(uiThreadDispatcher, presenter)
        {
        }

        protected override IMvxApplication CreateApp()
        {
            return new Core.App();
        }
    }
}
Modify the App.xaml.cs to Use Setup
There are other lifecycles and display techniques that you can use to write WPF apps.
However, here we will just use a 'one window with one view' approach.
To achieve this, add some lines to the WPF App class that:
provide a private flag to determine if setup has already been done:
private bool _setupComplete = false;
perform the setup - using a Simple presenter based on MainWindow:
private void DoSetup()
{
    var presenter = new MvxSimpleWpfViewPresenter(MainWindow);

    var setup = new Setup(Dispatcher, presenter);
    setup.Initialize();

    var start = Mvx.Resolve<IMvxAppStart>();
    start.Start();

    _setupComplete = true;
}
override the OnActivated event to perform this startup:
protected override void OnActivated(System.EventArgs e)
{
    if (!_setupComplete)
        DoSetup();

    base.OnActivated(e);
}
After you've done this, your App.xaml.cs might look like:
using System.Windows;
using Cirrious.CrossCore.IoC;
using Cirrious.MvvmCross.ViewModels;
using Cirrious.MvvmCross.Wpf.Views;

namespace TipCalc.UI.Wpf
{
    public partial class App : Application
    {
        private bool _setupComplete = false;

        private void DoSetup()
        {
            var presenter = new MvxSimpleWpfViewPresenter(MainWindow);

            var setup = new Setup(Dispatcher, presenter);
            setup.Initialize();

            var start = Mvx.Resolve<IMvxAppStart>();
            start.Start();

            _setupComplete = true;
        }

        protected override void OnActivated(System.EventArgs e)
        {
            if (!_setupComplete)
                DoSetup();

            base.OnActivated(e);
        }
    }
}
Add your View
Create the UserControl
Create a Views folder.
Within this folder, add a new 'User Control (WPF)' and call it TipView.xaml.
The page will generate:
- TipView.xaml
- TipView.xaml.cs
Turn TipView into the MvvmCross View for TipViewModel
Open the TipView.cs file.
Change the class to inherit from MvxWpfView.
public partial class TipView : MvxWpfView
To link TipView to TipViewModel, create a public new TipViewModel ViewModel property - exactly as you did in Xamarin.Android, Xamarin.iOS, WindowsPhone and WindowsStore:
public new TipViewModel ViewModel
{
    get { return (TipViewModel) base.ViewModel; }
    set { base.ViewModel = value; }
}
Altogether, this looks like:
using Cirrious.MvvmCross.Wpf.Views;
using TipCalc.Core.ViewModels;

namespace TipCalc.UI.Wpf.Views
{
    public partial class TipView : MvxWpfView
    {
        public new TipViewModel ViewModel
        {
            get { return (TipViewModel)base.ViewModel; }
            set { base.ViewModel = value; }
        }

        public TipView()
        {
            InitializeComponent();
        }
    }
}
Edit the XAML layout
Double click on the XAML file
This will open the XAML editor within Visual Studio.
Just as with the WindowsPhone and WindowsStore, I won't go into much depth at all here about how to use the XAML or do the Windows data-binding. I'm assuming most readers are already coming from at least a little XAML background.
Change the root node from:
<UserControl
         ...
</UserControl>
to:
<views:MvxWpfView
         xmlns:views="clr-namespace:Cirrious.MvvmCross.Wpf.Views;assembly=Cirrious.MvvmCross.Wpf"
         ...
</views:MvxWpfView>
To add the XAML user interface for our tip calculator, we will add exactly the same XAML as we added inside the ContentPanel grid for the WindowsStore example. This includes:
- a
StackPanel container, into which we add:
- some
TextBlock static text - a bound
TextBox for the SubTotal - a bound
Slider for the Generosity - a bound
TextBlock for the Tip
This will produce finished XAML like:
<views:MvxWpfView
         xmlns:views="clr-namespace:Cirrious.MvvmCross.Wpf.Views;assembly=Cirrious.MvvmCross.Wpf"
         xmlns="http://schemas.microsoft.com/winfx/2006/xaml/presentation"
         xmlns:x="http://schemas.microsoft.com/winfx/2006/xaml"
         x:Class="TipCalc.UI.Wpf.Views.TipView">
    <StackPanel>
        <TextBlock
                    Text="SubTotal"
                    />
        <TextBox
                    Text="{Binding SubTotal, Mode=TwoWay}"
                    />

        <TextBlock
                    Text="Generosity"
                    />
        <Slider
                    Value="{Binding Generosity, Mode=TwoWay}"
                    SmallChange="1"
                    LargeChange="10"
                    Minimum="0"
                    Maximum="100" />

        <TextBlock
                    Text="Tip"
                    />
        <TextBlock
                    Text="{Binding Tip}"
                    />
    </StackPanel>
</views:MvxWpfView>
Note that in XAML, OneWay binding is generally the default.
To provide TwoWay binding, we explicitly add Mode to our binding expressions: e.g. Value="{Binding Generosity,Mode=TwoWay}".
In the designer, this will look like:
The Wpf UI is Complete!
At this point, you should be able to run your application.
When it starts... you should see:
This seems to work perfectly, although you may notice that if you edit the value in the SubTotal TextBox, then the rest of the display does not correctly update.
This is a View concern - it is a UI problem. So we can fix it just in the WPF UI code - just as we did in the WindowsPhone and WindowsStore examples.
Moving On...
There's more we could do to make this User Interface nicer and to make the app richer... but for this first application, we will leave it here for now.
And actually... that's the end of our journey through this first app.
One day soon, there will be more steps - a step for Mac desktop, a step for XBox, a step for TV, etc - but for now, this is the end.
The Articles
History
- 22nd March, 2013 - First submission


 General
  News
News  Suggestion
  Question
  Bug
Bug  Answer
  Joke
Joke  Praise
  Rant
Rant  Admin
Admin 


