In my last article, I dissected the folder structure of default Flutter app and understood how to manage the various resources needed for developing a cross platform app using Flutter. In this final part of getting started series, we will dissect the code of default flutter app and understand the basic concepts of developing cross platform mobile application using Flutter.
When we create a new flutter application in any IDE, we get the following code:
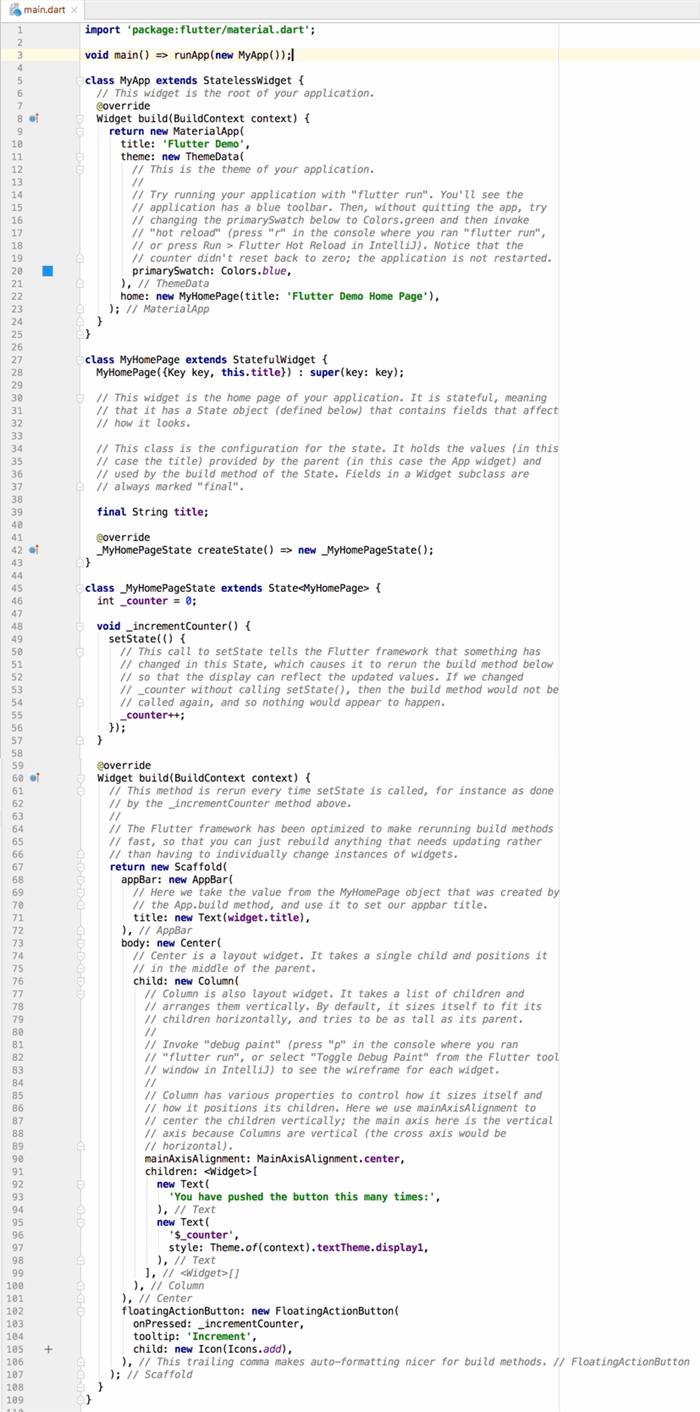
In this article, we will focus on understanding this code along with some core concepts of Flutter Development.
As you can see from the above code, most of the things are explained pretty well via the comments (to me, it even looks like comments overboard  ), I will try to explain the things which are not mentioned in comments and needed for understanding the code.
Some Basic Concepts
- Dart Language
Dart is an Object Oriented language which is used to develop Flutter application. The syntax of Dart is very similar to that of C#,Java or C++ so those of you who have worked on any one of these language will be easily able to understand the code.
- Widgets
The complete Flutter mobile application development is based on Widgets which as per wikipedia is a small control element in any GUI, similarly in Flutter too all the controls are called Widgets.The complete list of Flutter Widgets is given at this official documentation link, however these widgets are of primarily two types:
- Stateless Widget: These widgets are used to create the type of user interface which does not depend on anything other than the configuration information in the object itself like application theme which is dependent on only some properties nothing else.
- Stateful Widget: These widgets are used to create the regular user interface of the application where the UI is dynamic and based on the various inputs or actions done by the user.
Explaining Code
import ‘package:flutter/material.dart’;
The very first line of code is quite self explanatory, it’s being used to import the library Material.dart. This library is used to design the UI which follows Google’s Material Design Guideline. If you want to use controls which are based on iOS controls, you will have to import cupertino.dart package.
void main() => runApp(new MyApp());
This is the main entry point or starting point of the app. When executed, the compiler will create an instance of MyApp class and pass it to the runApp function which will execute the application.
class MyApp extends StatelessWidget
This is the main root of the application. It is extended from StatelessWidget and used to initialize the Material App and to set the Theme, color and home screen of the application. Here, MyApp is just the name given to default root class, if you want, you can change the name of the class as per your requirements.
class MyHomePage extends StatefulWidget
This class contains the code for Homepage/Screen of the application which is invoked in the MyApp class. This class is extended from StatefulWidget widget class because the elements of the HomePage will change on the actions performed by the user. The Last line of the code ( _MyHomePageState createState() => new _MyHomePageState(); ) of this class is used to create the state of the screen.
class _MyHomePageState extends State<myhomepage>
This is the class which is responsible for changing the state of the Home screen on the basis of user input. This class is Extended from State class by passing MyHomePage as type.
This was a brief explanation of the default Flutter app code, we will get more used to this as we work further on Flutter development. Let me know if I have missed anything or you want to know about anything in particular related to Flutter development. I will be coming up with more such articles in the near future.
Happy coding!
Hi There, I am an IT professional with 14 years of experience in architecting, designing and building IT solutions for complex business needs in form of mobile & web applications using Microsoft technologies. Currently working in an multinational company in India as Solutions Architect. The articles here are sourced from my blog : http://techierathore.com/


