
How to Install VSCMDShell in Visual Studio 2005
This article describes how to install VSCMDShell from the source files
Introduction
In my ambition to use this tool, I wanted to share the necessary steps I took to install the Visual Studio 2005 command line tool add-in created by Josh Ledgard from Microsoft. This tool is one of many that helps developers do their job from one workspace, namely Visual Studio. The download comes with both 2003 and 2005 command-line projects, but this article addresses only 2005. Hopefully your install goes well with the steps I offer in my article.
Getting the Download
-
Download the source code zip file from here. The file should be something like VSCMDShell_V0_8_Source.zip. The version may change if any updates are made.
-
Extract the file anywhere on your local machine. I chose to extract it in C:\VSCMDShell.
-
Next, navigate to the solution file for Visual Studio 2005. In this case, it is C:\VSCMDShell\MergedCmdShell\VSCmdShell2005.sln.
-
Double-click on this file or you can launch Visual Studio 2005 and open the solution file through the IDE.
Building the VSCmdShell Project
-
Go to the Project menu and select Project->VSCmdShell2005 Properties... and under the "Debug" tab, select "Start External Program".
-
Click the three ellipse button and navigate to the devenv.exe program you are using. It will most likely be found in this directory: C:\Program Files\Microsoft Visual Studio 8\Common7\IDE\devenv.exe.
- Now build the solution like you would any other project. From the Build menu, select Build -> Build Solution.
- The build should succeed and the DLL files will be produced. Validate that the DLLs are located in the following MergedCmdShell\bin directory. Again, in my case, it is located in: C:\VSCmdShell\MergedCmdShell\bin\VSCmdShell.dll.
-
Run the solution by hitting the Debug green arrow button, or select Debug->Start debugging or hit 'F5'. A new session of Visual Studio should launch.
Checking the Addin File
-
Now, add a MyAddin1 folder in the MergedCmdShell directory, which would be your project's root directory, like so: C:\VSCmdShell\MergedCmdShell\MyAddin1.
-
Go back under the project root and find the MyAddin1.addin file. Open it in the IDE or with Notepad and verify that the following XML element tag inner text values are like these:
<HostApplication>
<Name>Microsoft Visual Studio</Name>
<Version>8.0</Version>
</HostApplication> . . .
   <Assembly>
   C:\VSCmdShell\MergedCmdShell\bin\VSCmdShell.dll
   </Assembly>
Where the
<Assembly>tag points to your newly built project DLL assembly wherever you extracted it to on your local machine. -
COPY this MyAddin1.addin file to your newly created MyAddin1 directory.
Running the Set-up Project
-
Next, you'll need to open the Set-up project. To do so, from the IDE, navigate to the 2005Setup folder. In my case, it is located in C:\VSCmdShell\MergedCmdShell\2005Setup\Setup1.vdproj.
-
Go to the 'File System (Setup1)' tab inside the Visual Studio 2005 IDE. In the Name column in the right hand pane, only delete the output folder that says "(unable to determine name)" with Type "Output", BUT KEEP the 'MyAddin1.adding' Name and the "File" Type. Ignore the warning : 'File MyAddin1.AddIn should not be installed into a User's Profile folder because it may not be available to all users.
-
Now select Build->Build Solution, and you should see the following output:
------ Starting pre-build validation for project 'VSCmdShellSetup' ------
WARNING: File 'MyAddin1.AddIn' should not be installed into a User's Profile
folder because it may not be available to all users.
------ Pre-build validation for project 'VSCmdShellSetup' completed ------
------ Build started: Project: VSCmdShellSetup, Configuration: Debug ------
Building file 'C:\VSCmdShell\MergedCmdShell\2005Setup\Debug\Setup1.msi'...
Packaging file 'MyAddin1.AddIn'...
========== Build: 1 succeeded or up-to-date, 0 failed, 0 skipped ==========
Notice how the build will create a Setup1.msi file that will be the installer for the addin.
After the build, navigate to the C:\VSCmdShell\MergedCmdShell\2005Setup\Debug\Setup1.msi, double-click the Setup1.msi file. Go through the installation Wizard and finish the installation.
Using the Command Tool in Visual Studio 2005
Exit the Visual Studio 2005 IDE and re-launch it. From the Tools menu, you should see the VSCMDShell option.
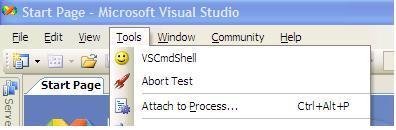
Select it and you should see the application appear. You're all set to start using it! Have Fun!!!!

History
- 13th April, 2006: Initial post