
Easily Create AJAX Enabled Applications with Swan
4.20/5 (4 votes)
Swan makes building rich web applications easy.
Introduction
This paper demonstrates how easy it is to create AJAX-based rich web interfaces using Swan. With Swan, there is no need to learn complex JavaScript libraries in order to integrate AJAX into your web pages. You simply select the components you want to have AJAX enabled and provide the controller class to handle the data and events for your enriched web page. In this tutorial, we’ll present one of the wizards available within Swan to quickly build an AJAX-enabled application.
About Swan
Swan combines an AJAX framework and best practices in software development with easy-to-use development tools that accelerate web application development and enforce consistency. Swan's architecture enables a more natural integration between web pages and server side components.

Above: Swan Application Architecture
JavaScript Swan Engine
The JavaScript Swan Engine takes care of all AJAX functionality, transparently integrating it with your web form components and all other Swan-based widgets. Swan is also responsible for the distribution of events handled by either the server or the browser. Swan uses JSON as the means to transport data across.
Server Side SDK
The Server Side SDK provides the framework to build your custom application components that will serve as the model/controller of your web pages. It also provides access to a representation of the UI widgets on the server side, which enable you to easily push data back to the front end, as well as fulfill other requests such as opening a dialog or displaying a message.
Swan Control Bindings
Swan uses an XML descriptor file in order to glue the UI with the Page Model. Here is where the magic happens. You do not need to worry about creating this file. Swan provides the necessary tools to make the creation of this file transparent to you.
Swan Wizards
Swan’s toolkit includes a set of wizards for creating sample applications based on commonly used templates. These wizards are useful, especially if you are new to Swan. In this tutorial, we’ll show the creation of a listing web application with typical CRUD functionality. Now you’ll learn how Swan-based applications are composed. You will see how easy it is to build rich web applications with Swan, even if you don’t know AJAX.
Prerequisite
For this tutorial, you must have Eclipse for J2EE Development and Tomcat 5.5 set up.
Install Swan Plug-in
Download Swan (a ZIP file) and unzip the contents within the plug-in folder of your Eclipse installation. Start or re-start your Eclipse environment in order to activate Swan's plug-in.
Creating Your First Swan Project
The steps for creating a Swan project are as simple as 1-2-3.
- Create a Dynamic Web Project
- Add Swan's Nature to the new project
- Create the Swan application
1 - Create a Dynamic Web Project
The current version of Swan’s toolkit is based on the Eclipse Web Tools Platform. In order to create a Swan Project, you must first create a Dynamic Web Project.
Select New > Dynamic Web Project.
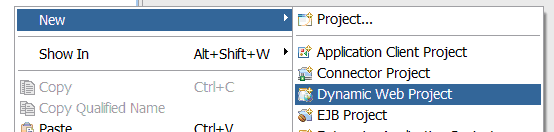
Figure 1 - New Dynamic Web Project
For this tutorial, create a project named ListingApp.
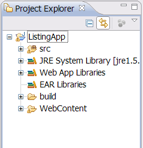
Figure 2 - New ListingApp Project
2 - Add Swan's Nature
When creating a Swan-based application, we need to prepare the new project with all the required libraries used by Swan. To do this, we just need to add Swan's Nature to the project. This will automatically add the necessary JavaScript libraries and Java libraries to enable the Swan SDK within your project.
Select the ListingApp project and right mouse click to bring the pop-up menu. Now select Add Swan Nature.

Figure 3 - Add Swan Nature
Adding all required libraries may take a few seconds. Once completed, you should see the updated directory structure as illustrated here.
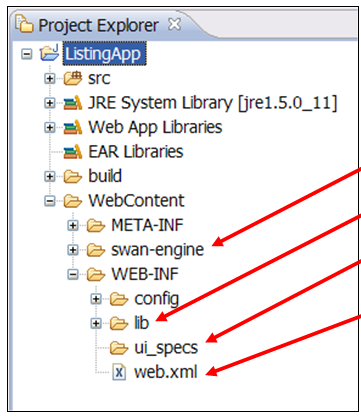
Figure 4 - ListingApp with Swan Nature Folders
This task should have done the following:
- Added the Swan-engine folder, including Swan's JavaScript libraries
- Added the required Java libraries to the lib folder under the WEB-INF folder
- Added the ui_specs folder under the WEB-INF folder to store Swan's binding files
- Registered Swan's Servlets within the web.xml file
3 - Create the Swan Application
To create the Listing application, we'll use one of the Swan wizards. To open the wizard, select the ListingApp project and then select HTML Page Wizard as illustrated in figure 5.
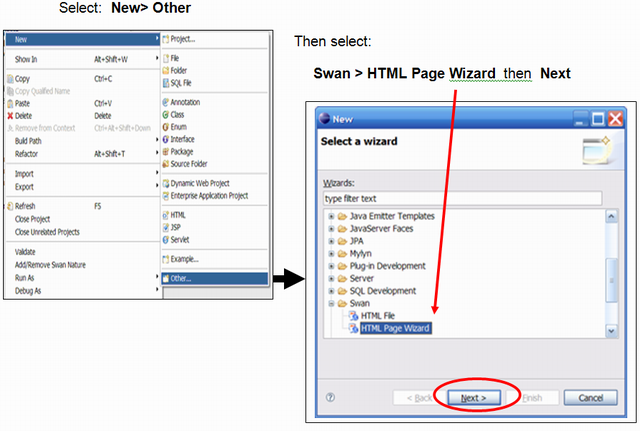
Figure 5 – Open New HTML Page Wizard
Swan's HTML Page Wizard
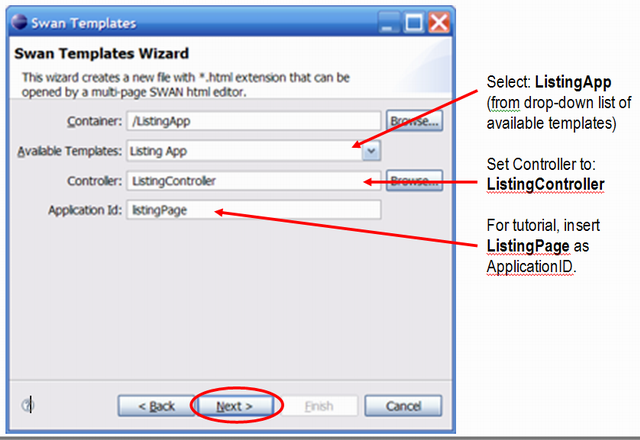
Figure 6 - Listing App Wizard Settings
Click Next to add the fields for the Listing application.
Adding Fields to Page

Figure 7 - Adding Fields to Listing App
To add fields, click on the Add button -- as illustrated in Figure 7 -- to open the Component Definition Dialog. Select the type of component needed for each field, its label and ID. For this tutorial, add the following fields:
| Component | Label | ID |
TextField |
First Name | firstName |
TextField |
Last Name | lastName |
DateField |
Date of Hire | dateOfHire |
Once done, just click Finish. The wizard will generate the necessary HTML page, bindings and Java Controller class, as illustrated in Figure 8.
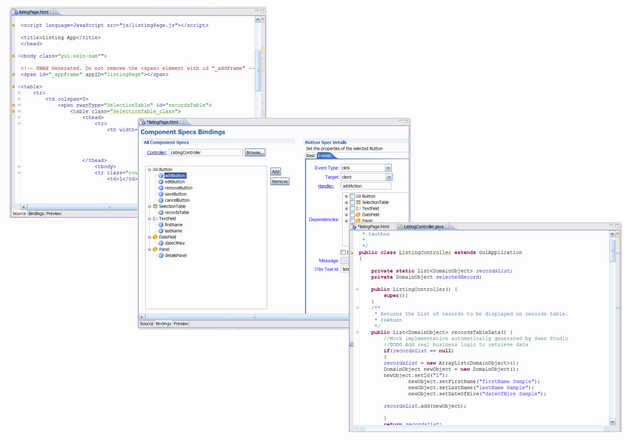
Figure 8 - Listing App Generated Code
The generated Listing application has the functionality to add, edit and remove records in memory.
Is it really that easy? TEST IT.
To test the application, first create an index.html file as illustrated in Figure 9.
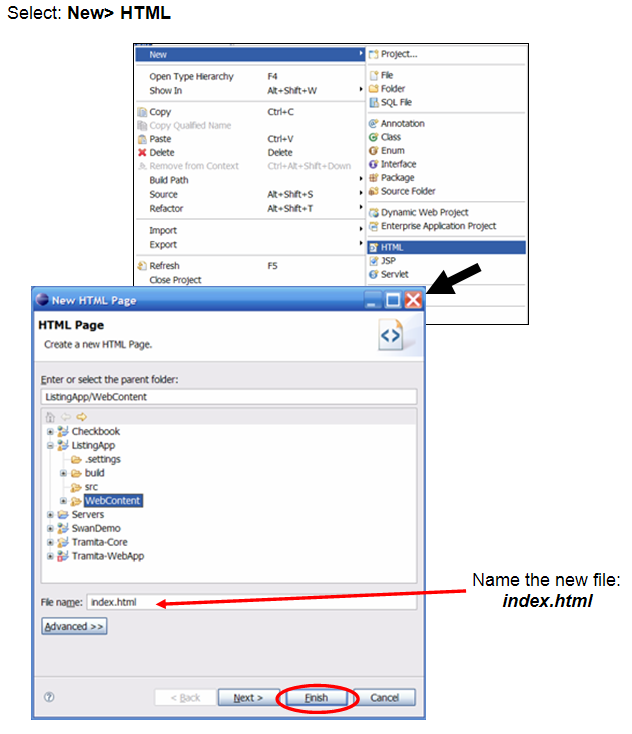
Figure 9 - New index.html File
Once the file index.html is created, add the following code within the body:
<H1>Swan Demo Application</H1>
<a href="SwanApplication?_open=listingPage">Listing Application</a>
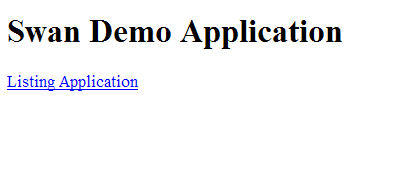
The HTML page should look something like this:
You must have Tomcat installed to proceed.
Select index.html. Right click and select Run As > Run on Server.
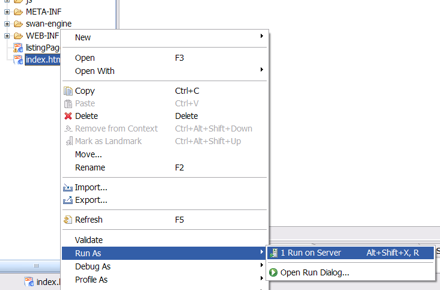
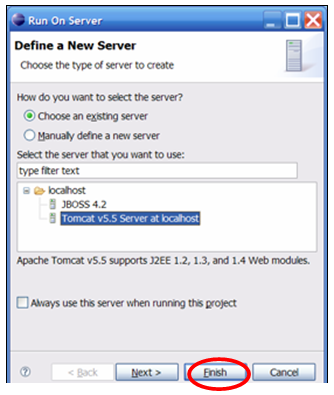
Select the Tomcat server and click Finish.
Once the index.html page is displayed, click on the Listing App tab. The browser should display the Listing application, as illustrated here.
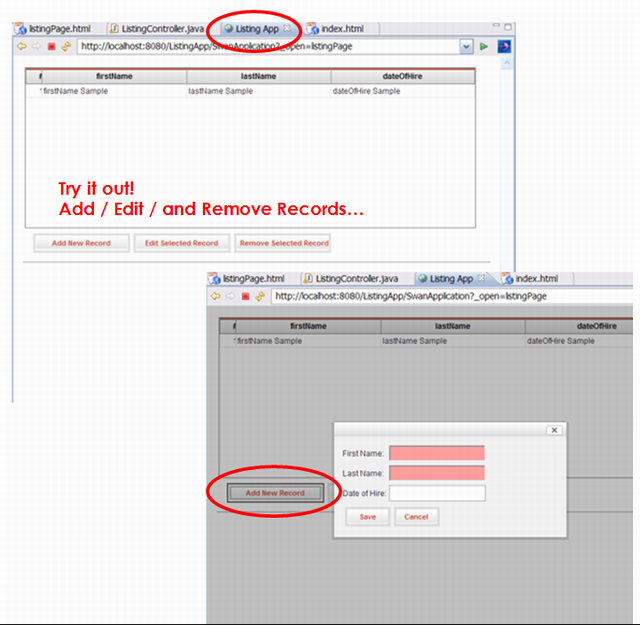
To make this a fully functional application, you’ll need to customize it. Once finished with this tutorial, go ahead and explore the code generated, so that you become familiar with Swan’s API.
Summary
Swan makes building rich web applications easy. During this tutorial, you learned about the Swan framework and how quickly you can create a template application. By exploring the code, you will also learn how easy it is to integrate the web interface with the server side controller.