
HTML5 Game of Multi Life
4.56/5 (10 votes)
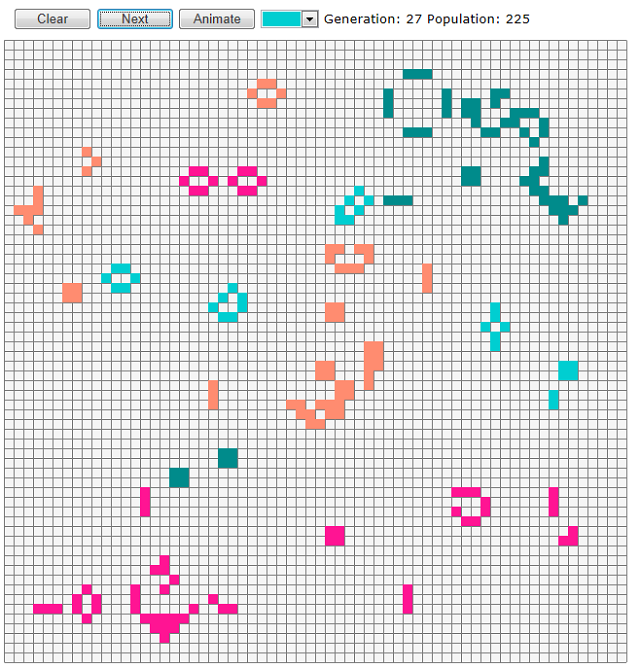
A HTML5 version of Conway's game of life but with multiple life forms!
Introduction
This article describes an HTML5 version of Conway's game of life using the new Canvas element. I have actually previously done an article describing a WPF/XBAP version of Life which can be seen here. My intention was not to display a singular lack of imagination but rather contrast the two different coding styles. The take home message I have is that for small applications, HTML5/JavaScript is probably twice as easy to code up and has the advantage of being truly multi-platform. Performance on the top five browsers I tried was also excellent.
Background
Please refer to my previous WPF article for more details or just Google "Conways game of life" but in essense, Life, models simple automota that live on a grid and live or die according to simple rules based on the number of neighbours they have. You need exactly three neighbours to be born and either two or three to stay alive. To avoid edge effects, the grid is usually modelled in one of two ways, either as an infinite grid or as a torus where each edge is in contact with its opposite edge.
In this version of Life, I have tried to make it as similar to the WPF version as was convenient but one big change I decided to make was to do a multiple life form version. In this game, there are four possible life forms - each displayed as a different colour. Each life form follows the normal rules and they don't interact with the other life forms except that if a cell is occupied by one type, it can't be filled by another type. Also when one type is born, I used the simple rule that it's the first one in fixed order that has three neighbours that are born. I was actually tempted to try developing rules for some sort of predator/prey version of Life, but thought it best to stick with the basics with the one aforementioned variation.
Using the Code
The code consists of just one file and the file size is just 8KB! The core piece of code is the torus or grid which I have implemented in a JavaScript class called LifeTorus seen below:
function LifeTorus(size) {
    this.size = size;
    var count = size * size;
    this.torus = new Array(count);

    this.clear = function () {
        for (var i = 0; i < count; i++)
            this.torus[i] = 0;// 0 means empty for convenience and speed
    };

    // returns count of the number of neighbours of each kind
    this.getNeighbours = function (x, y) {
        var count = [0, 0, 0, 0, 0];
        // prev row
        count[this.get(x - 1, y - 1)]++;
        count[this.get(x, y - 1)]++;
        count[this.get(x + 1, y - 1)]++;

        // this row
        count[this.get(x - 1, y)]++;
        count[this.get(x + 1, y)]++;

        // next row
        count[this.get(x - 1, y + 1)]++;
        count[this.get(x, y + 1)]++;
        count[this.get(x + 1, y + 1)]++;

        return count;
    };

    this.get = function (x, y) {
        return this.torus[this.getIndex(x, y)];
    };

    this.set = function (x, y, value) {
        this.torus[this.getIndex(x, y)] = value;
    };

    // Treats the two dimensional array as a torus, i.e.
    // the top and bottom edges of the array are adjacent and the left and right edges
    // are adjacent.
    this.getIndex = function (x, y) {
        if (x < -1 || y < -1 || x > size || y > size)
            throw "Index out of bounds";
        if (x == -1)
            x = size - 1;
        else if (x == size)
            x = 0;
        if (y == -1)
            y = size - 1;
        else if (y == size)
            y = 0;
        return x + y * this.size;
    };

    this.clear();
}
The class implements an NxN array but stored internally as a one dimensional array, hence to get to element (i, j), you access index=i * N + j. This is basically what the getIndex() function does, but with a slight twist to implement the torus. So the row at -1 is mapped to the row at N-1 and row N is mapped to row 0 - similarly for the columns. The getIndex function is in turn used by a simple set value and get value function and these are in turn used by the main function called getNeighbours() which returns an array of length 5 where the first element is not used and the other four elements are the counts of each type of life form. The reason the first element is not used is to simplify the code because the life forms are stored as integers in the grid, e.g. a cell value of 0 corresponds to empty, a value of 1 corresponds to life form type 1. The only other function is a clear() which sets all values to 0 (empty).
The LifeTorus class implements my model and it was relatively easy to write. Rendering this into a Canvas wasn't that hard either but I did have a problem converting the global mouse co-ordinates you get with any mouse functions like mousedown or mousemove, into co-ordinates relative to my Canvas element. After some searching, I found an elegant solution on www.stackoverflow.com from Ryan Artecona as follows:
function relMouseCoords(event) {
    var totalOffsetX = 0;
    var totalOffsetY = 0;
    var canvasX = 0;
    var canvasY = 0;
    var currentElement = this;

    do {
        totalOffsetX += currentElement.offsetLeft;
        totalOffsetY += currentElement.offsetTop;
    }
    while (currentElement = currentElement.offsetParent)

    canvasX = event.pageX - totalOffsetX;
    canvasY = event.pageY - totalOffsetY;

    return { x: canvasX, y: canvasY }
}
HTMLCanvasElement.prototype.relMouseCoords = relMouseCoords;
The code above works on the browsers I tested and takes into account any page scrolling. In simple terms, it sums up the offsets of all its parents and subtracts that from the co-ordinates provided.
Just a side note: to make things more interesting and performant, I used two Canvas elements one on top of the other rather than a single Canvas. The Canvas at the bottom of the Z-order (display order) is the first and I use it to draw the grid and background colour, the second Canvas is used only to render the life forms. The HTML used to accomplish this is shown below:
<div style="position:relative">
<canvas id='canvas2' width='641' height='641' on></canvas>
<!-- Lowest in Z-order - provides background -->
<canvas id='canvas1' width='641' height='641' on>
Canvas is not supported by this browser.</canvas>
</div>
I positioned the two Canvas elements using CSS. The key point is that they need to be placed in a <div> that has position: relative and the embedded style sheet for Canvas is set to position: absolute and top and bottom set to 0.
The bulk of the remaining code is shown below:
function advance() {
	// torus1 contains the current model, process into torus2 then swap the
	// references so torus1 refers to the next generation
	var _population = 0;
	for (var x = 0; x < _size; x++)
		for (var y = 0; y < _size; y++) {
			var neighbours = _torus1.getNeighbours(x, y);// dim 5 array
			var alive = 0;
			var kind = _torus1.get(x, y);
			if (kind > 0) {
				// it's alive - it will stay alive if it has
				// 2 or 3 neighbours
				var count = neighbours[kind];
				alive = (count == 2 || count == 3) ? kind : 0;
			}
			else {
				// It's dead but will be born
				// if any "kind" has exactly 3 neighbours
				// This isn't "fair" but we use the
				// first kind that has three neighbours
				for (kind = 1; kind <= 4 && alive == 0; kind++) {
					if (neighbours[kind] == 3)
						alive = kind;
				}
			}
			_torus2.set(x, y, alive);
			if (alive)
				_population++;
		}

	var temp = _torus1; // arrays are only references!
	_torus1 = _torus2;
	_torus2 = temp;
	render();
	generation.textContent = "Generation: " + String(++_generation);
	population.textContent = "Population: " + String(_population);
	if (_animate)
		setTimeout("advance()", 50);
}

function renderCanvas(canvas, size, torus) {
	// read from LifeTorus and write to canvas
	var context = canvas.getContext('2d');
	context.fillStyle = '#ff7f50';
	context.clearRect(0, 0, size * _cellSize, size * _cellSize);
	for (var x = 0; x < size; x++)
		for (var y = 0; y < size; y++) {
			var kind = _torus1.get(x, y) - 1;
			if (kind >= 0) {
				context.fillStyle = color_menu0.options[kind].value;
				context.fillRect(x * _cellSize, y * _cellSize,
					_cellSize, _cellSize);
			}
		}
}

function render() {
	renderCanvas(canvas1, _size, _torus1);
}

function drawGrid() {
	// Only ever called once!
	var context = canvas2.getContext('2d'); // canvas2 is the background canvas
	context.strokeStyle = '#808080';
	context.beginPath();
	for (var i = 0; i <= _size; i++) {
		// Draw vertical lines
		context.moveTo(i * _cellSize + 0.5, 0.5);
		context.lineTo(i * _cellSize + 0.5, _size * _cellSize);
		// Draw horizontal lines
		context.moveTo(0.5, i * _cellSize + 0.5);
		context.lineTo(_size * _cellSize, i * _cellSize + 0.5);
	}
	context.stroke();
}
The main functions of interest are the advance(), render() and drawGrid() shown above. The advance() function simply cycles through each cell getting the type of the current life form (0 if empty) and how many neighbours of each type it has. It then follows the rules I mentioned earlier to set that cell to empty or alive with the appropriate type. At the end of the function, it checks if the animate flag is true - if so, it calls setTimeout to call itself (i.e. advance) with a 50ms delay - this is similar to what I used in the WPF version.
The render() function cycles through the cells and if alive, fills the cell's rectangle with the appropriate colour for that type. We have actually taken a bit of a shortcut here by using the type less one to index the array of options attached to the colour selector color_menu0.
Finally, the drawGrid() function draws a series of vertical and horizontal lines to delineate the cell boundaries. The only thing worth mentioning here is that it is drawn once only and to canvas1 - remember canvas2 is above canvas1 and canvas2 is used to draw the life forms. One other slight point here is that to get non blurry lines you need to draw with an offset of 0.5 otherwise with a 0.0 offset, a line of thickness 1 will appear half in each line of cells either side of a line (this is the same as in WPF).
Points of Interest
I didn't attempt to make my buttons look the same as the WPF buttons. I learned that it's possible to use CSS3 to make some very nice looking buttons but if you just wanted a simple button with image and text, then getting the text and image to both be vertically centred is difficult. But that's a minor point because overall development was relatively simple, in fact since all modern browsers seem to have developer tools built in, you don't even strictly need an IDE like VS2010. BTW Firefox has a nice developer addon called Firebug.
History
As well as considering different game rules, I also considered having some sort of list of well known patterns and allowing the user to drag and drop them on to the canvas. This is certainly possible using say a third canvas overlayed on the other two and the list. In the end, I decided not to clutter up what was intended to be a comparison of HTML5 and WPF. Incidentally, I can't include Silverlight in the comparison since it has no equivalent to a Canvas element.