
WPF - Working with XML file using Linq to XML
3.89/5 (10 votes)
Building WPF ListView application to read XML file using Linq to XML
Introduction
I have being working with the Lawson M3 ERP software (formerly known as Intentia Movex) and I enjoy exploring new technologies that are available to the developer.
The M3 software has one of the best database model designs and is available on a stable platform from IBM system AS/400 (iSeries or System i). I am working with Microsoft.Net 2.0 or later to develop custom integration solutions with Lawson M3 database and API to satisfy business requirements.
Recently, I had attended a code camp at Raleigh (Nov 15th 2008) and was very impressed by the opening speech by Karl Shifflett (http://karlshifflett.wordpress.com/). This inspired me to start writing and share my knowledge and experience with the developer community. Karl gave two sessions on the WPF topic using the Microsoft Visual Studio 2008 with .NET 3.5. I decided to explore and learn WPF (Windows Presentation Foundation) and to apply with Lawson M3 to satisfy business requirements.
Background
In this article, we will learn to build a user interface (UI) in WPF using the M3 database table OCUSMA (version 12.4); a customer master table with 226 fields. The data layer is developed separately from the UI layer and can be replaced that is suitable for the requirement with available option.
The data source can be replaced with following different options:
- ADO.NET with OLE DB, ODBC to connect to AS/400
- M3 API that is available from M3
- Web service
- XML file
For this demonstration, I will be using a demo XML file OCUSMA.xml as a data source. M3 does provide a standard UI interface in their software, but lot of business users requires custom UI that allow them to pick fields that suits their business needs.
The XML file screenshot as shown below has a top element “row” for record and sub-elements indicating fields and values for the data. We will be using three fields to show in a list view for the demonstration in WPF.
OKCUNO- Customer NoOKCUNM- Customer NameOKPHNO- Telephone

Using the Code
Requirements:
- Microsoft Windows XP, Vista or Window 2008
- Microsoft Visual Studio 2008 with SP1
- XML file OCUSMA.xml
I am using Window 2008 with VS2008 SP1.
Step 1
Start VS 2008 and create a new WPF project under the Project type Visual C#.
Name the project Wpf_Customer.
Click OK button to continue.

Visual Studio will create a WPF application project shell that we can use to create our application.

Step 2
In the Solution explorer, right click on the Window1.xaml file and select Delete from the context menu to delete the file. We will add a new Window (WPF) file and set it as a Startup window.
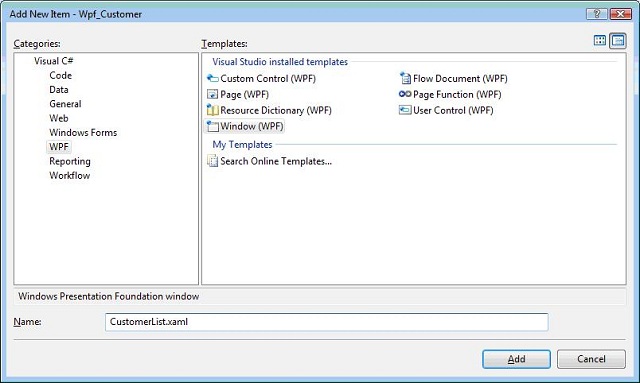
Right click and select Add->New Item…
Select WPF in the Categories and Windows (WPF).
Change the value in the Name field to: CustomerList.xaml and click Add button.

Step 3
Open the App.xaml file from the Solution explorer.

Replace the value for the StartupUri from “Window1.xaml” to “CustomerList.xaml” to set the startup window as CustomerList.xaml.

Step 4
Press Ctrl + F5 to run the application to check that there are no errors. You should get a blank window with no data.

Click on X icon on top right of the window to close the application.
Step 5
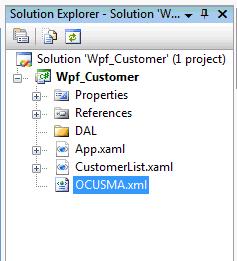
Add a new folder DAL to the project by right click on the project and select “New folder”.
We will add all the data access layer code in the DAL folder, to read information from the OCUSMA.xml file.
Add the OCUSMA.xml to the project by doing right click on the project and select “Existing item..” (The file is include in the download zip file.)
Right click on the OCUSMA.xml and select the Properties from the context menu.
Change the “Build Action” value to Content.
Change the “Copy to Output Directory” value to Copy always.

This will assure the file is copied to the output directory and available for the WPF program to access it.
Step 6
Create a class Customer to be used in the data access layer and WPF UI layer to hold the customer information.
Add a new class file in the DAL folder of the project by right clicking on the DAL folder and select “New Item...”
Select Code under the Categories and Class from the Template.

Change the value in the Name field to cCustomer.cs and click Add. This will add a cCustomer.cs file to the DAL folder.
Add the following code to the class file:
using System;
using System.Collections.Generic;
using System.Linq;
using System.Text;
using System.Xml.Linq;
namespace Wpf_Customer.DAL
{
class cCustomer
{
public string OKCUNO { get; set; }
public string OKCUNM { get; set; }
public string OKPHNO { get; set; }
}
// The DAL will read the information from the XML file and load into a List
class DAL_OCUSMA
{
public static List<cCustomer> LoadOCUSMA()
{
List<cCustomer> ListCustomerRecords = new List<cCustomer>();
// Execute the query using the LINQ to XML
var custs = from c in XElement.Load(@"OCUSMA.xml").Elements("row") select c ;
foreach (var customer in custs)
{
cCustomer lCustomer = new cCustomer
{
OKCUNO = customer.Element("OKCUNO").Value,
OKCUNM = customer.Element("OKCUNM").Value,
OKPHNO = customer.Element("OKPHNO").Value
};
ListCustomerRecords.Add(lCustomer);
}
return ListCustomerRecords;
}
}
}
The properties OKCUNO, OKCUNM, OKPHNO from class “cCustomer” are mapped to the field in the OCUSMA table.
The class DAL_OCUSMA provides a static method “LoadOCUSMA” that will return a list of all customer records. The code uses the LINQ to XML to read the OCUSMA.xml file and add the records to the List.
Step 7
Now it’s time to design a UI. Open the CustomerList.xaml file from the Solution explorer by double clicking on the file.
Change the width of the main window from 300 to 500.
Delete the lines with <Grid> </Grid>. This will remove the Grid Panel from the Window container.
Add the lines <StackPanel> </StackPanel>. This will add a stack panel to the Window container. Any controls or components we add now will be stacked vertically.
Add a button control with the following code in between the stackpanel.
<Button Height="25” Width="50” Click="Button_Click">Load</Button>
Add the following code to add a listview control.
<ListView Name="listView1" HorizontalAlignment="Left"
	VerticalAlignment="Top" ItemsSource="{Binding}">
<ListView.View>
<GridView >
<GridView.Columns>
<GridViewColumn Width="75" Header="Customer"
	DisplayMemberBinding="{Binding Path=OKCUNO}" />
<GridViewColumn Width="250" Header="Name"
	DisplayMemberBinding="{Binding Path=OKCUNM}" />
<GridViewColumn Width="125" Header="Telephone"
	DisplayMemberBinding="{Binding Path=OKPHNO}" />
</GridView.Columns>
</GridView>
</ListView.View>
</ListView>
The view of the ListView will have three GridView columns. Each GridView column is mapped to field name as specified in the class cCustomer properties OKCUNO, OKCUNM, OKPHNO with data binding.
The CustomerList.xaml should look as shown below:

Press Ctrl+F5 to run the application. This will display the button and ListView with no data.

Click on X icon on top right of the window to close the application.
Step 8
Open the code behind file “CustomerList.xaml.cs” file from the Solution explorer by double clicking on the file.
Add the line...
using Wpf_Customer.DAL
...to the code before the namespace line.
Add the following lines in the method of the Button_Click:
“private void Button_Click(object sender, RoutedEventArgs e)”
List<cCustomer> customerList = new List<cCustomer>();
customerList = DAL_OCUSMA.LoadOCUSMA();
listView1.DataContext = customerList;
We will create a List named customerList and add the customer records by calling the static method LoadOCUSMA from the DAL_OCUSMA. The list will be bound to the ListView Control listView1.

Press Ctrl + F5 to run the application.
Click on the load button. The list will be populated with the records from the OCUSMA.xml.

Summary
We have seen how to create a WPF application that will read an XML file and load the records in a ListView control.
References
- My blog: http://shivakamathblog.blogspot.com/
- WPF: http://msdn.microsoft.com/en-us/library/ms752299.aspx
- Linq to XML: http://msdn.microsoft.com/en-us/library/bb308960.aspx
- Lawson M3: http://www.lawson.com/
- Karl Shifflett blog: (http://karlshifflett.wordpress.com/)
History
- 30th November, 2008: Initial post