
Holiday Calendar Control Webpart
3.80/5 (6 votes)
An easy way to create a Calendar control webpart with ListView connection
Introduction
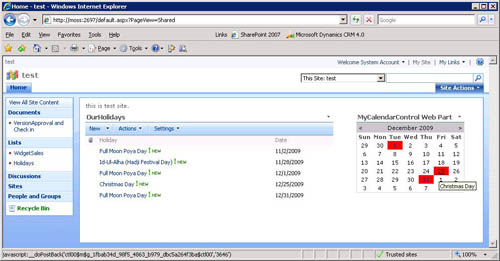
In this example, we are going to build a calendar control webpart that displays summarized holidays which are defined by standard ListView webpart on the same web page.
Background
For developing a webpart for SharePoint server (in our case VS2008), we need VS extension for SharePoint.
Using the Code
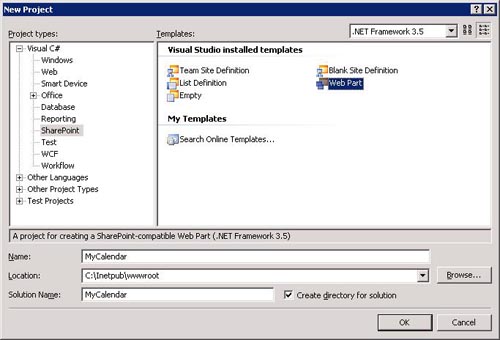
Step 1: Create a new project named “MyCalendar”. Select Trust Level to Full trust (Deploy to GAC).
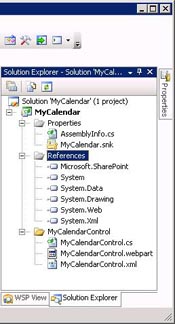
Delete Default created Webpart1 folder in your solution.
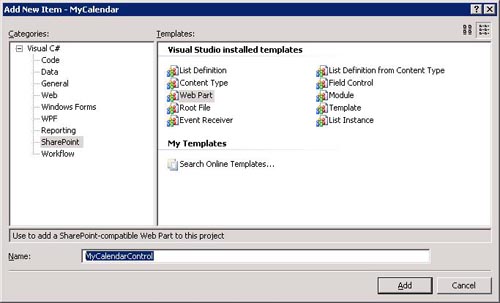
Add a new web part control to your mycalender project and named it as MyCalendarControl.
Add System.Data and System.Drawing references to your project (under .NET Tab). After that, you will get the following kind of file structure on your solution explorer:
The following fields are responsible for creating a connection to a list web part:
private IWebPartTable _provider;
private ICollection _tableData;
[ConnectionConsumer("Holiday List")] attribute is necessary for Web Parts to consume data from Web Parts.
Now we are going to invoke DayRenderEventhandler so we need to add:
CusCalender.DayRender += new DayRenderEventHandler(CusCalender_DayRender);
To populate calender days color according to the list value, we have to go through _tableData collection:
if (_tableData != null) {

foreach (DataRowView rowView in _tableData) {
string widgetCode = rowView.Row[1].ToString();
DateTime dateSold = Convert.ToDateTime(rowView.Row[2].ToString());
if (dateSold.Date == e.Day.Date.Date) {
e.Cell.BackColor = Color.Red;
e.Cell.ToolTip = widgetCode;
String url = e.SelectUrl;
e.Cell.Controls.Clear();
HyperLink link = new HyperLink();
link.Text = e.Day.Date.Day.ToString();
link.ToolTip = widgetCode;
link.NavigateUrl = url;
e.Cell.Controls.Add(link);
}
}
}
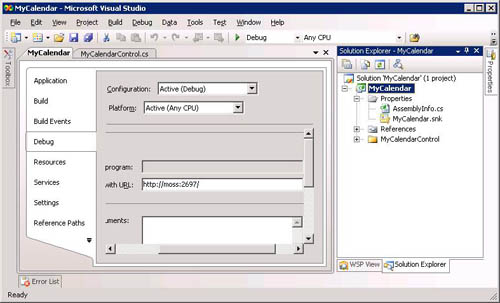
Now our development part is over. We have to set the part for deployment. To do that, go to project property by write clicking over your project and set the MOSS site part you want to test. In my case, it is http://moss:2397/:
Now build the project and deploy it. After successful deployment, you can see your webpart in the webpart gallery.
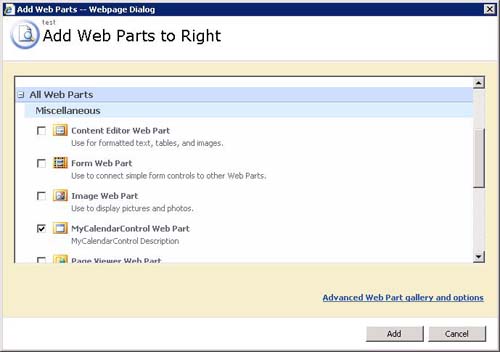
Now add that web part to your page. For that, go to Site Action-> Edit Page -> Add Web Part:
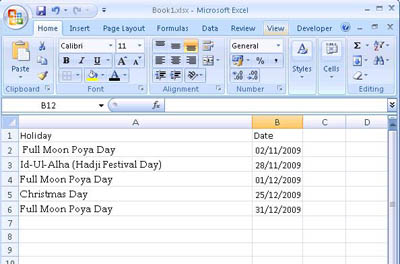
The next step is to create a list containing Holidays and dates.
Create an Excel file and enter the holidays in a worksheet.
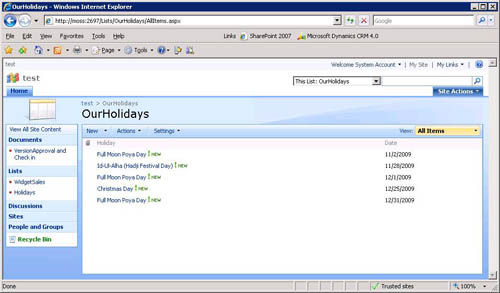
For that, go to Site action->Create->Custom List-> Import from spread sheet, name it OurHolidays and select range of sheet or you can create it manually rather than by importing the spread sheet.
Then, you will get the following kind of list:
Now go to the Home page and add that list to your page.
After adding that, you will get a page similar to the one shown below:

Now create a connection to List:
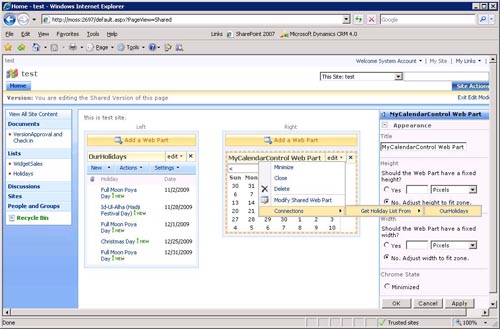
That's it.
History
- 05-Oct-2009: Initial update