
Tasks managing app using MVVM and NHibernate
Full sample on how to develop a MVVM desktop app with NHibernate (SQLite) backend
Introduction
This article tries to be a reference for a complete sample on how to develop a WPF application following the MVVM pattern with a database backend. I've tried to "abstract" the database layer using NHibernate. The database choosen for this project is SQLite.
The app is as small utility for task managing. User can add/edit/remove tasks using a calendar selector and also generate a simple report. I haven't done a great effort on the graphical side but this is something that can be easily improved thanks to the MVVM/WPF design that abstracts the model from the representation.

Background
The model
I'm facing the problem to solve using a domain driven approach, that is, i don't care to much about the database that's NHibernate's job.
The domain, on this case, are the tasks and the operations to do with them.
So...let's define our model:
We are going to split the model in three classes
Project(1)---------(n)Task(n)---------(1)Activity
First of all we have a Task class. A Task has an ID, a number of work hours, a related user and a related project and activity. All the properties are declared as virtual to help NHibernate to inject the proxies when using Lazy-loading.
namespace Model
{
    public class Task
    {
        public virtual long TaskID { get; set; }
        public virtual int UserID { get; set; }
        public virtual DateTime CreateDT { get; set; }
        public virtual Project TaskProject { get; set; }
        public virtual Activity TaskActivity { get; set; }
        public virtual float TaskHours { get; set; }

        public virtual bool IsProjectValid()
        {
            if (TaskProject != null)
                if (TaskProject.ProjectID != 0)
                    return true;
            return false;
        }

        public virtual bool IsActivityValid()
        {
            if (TaskActivity != null)
                if (TaskActivity.ActivityID != 0)
                    return true;
            return false;
        }

        public virtual bool IsHoursValid()
        {
            if (TaskHours > 0.0 && TaskHours < 24.0)
                return true;
            else
                return false;
        }

        public virtual bool IsTaskValid()
        {
            return IsProjectValid() && IsActivityValid() && IsHoursValid();
        }
    }
}
The Project class models one project with its ID, code, description...
namespace Model
{
    public class Project
    {
        public virtual long ProjectID { get; set; }
        public virtual string Code { get; set; }
        public virtual string Description { get; set; }
    }
}
Finally, the Activity class defines the concept of what have you been doing during the period of the related tasks (programming, documentation, tests...)
namespace Model
{
    public class Activity
    {
        public virtual long ActivityID { get; set; }
        public virtual string Name { get; set; }
        public virtual string Description { get; set; }
    }
}
As you see we're only defining one side of the relation. A Task "knows" it's related Project and Activity. The opposite it's not true.
The model itself is a solution's sub-project as you can see here:

The data layer
Once we have our model defined we have to create the infrastructure that handles the persistence. This is going to be another sub-project of the solution. Let's have a look:


The final reason for all this is stuff is to be able obtain at some point of the code an interface ITaskManagerDataContext or an IActivityData / IProjectData. This interfaces define the available persistance operations.
We're going to use NHibernate to implement those interfaces with the help of the factory classes.
We have to tell NHibernate how to persist the model inside the DB. I've chosen to define the mappings by code with the help of the NHibernate ClassMapping<T> class.
Let's see the mappings:
namespace Persistance.Mappings
{
    public class TaskMapping : ClassMapping<Task>
    {
        public TaskMapping()
        {
            Id(x => x.TaskID, m => m.Generator(Generators.Native));
            Property(x => x.UserID);
            Property(x => x.CreateDT);
            Property(x => x.TaskHours);
            ManyToOne(x => x.TaskActivity, m =>
                {
                    m.Cascade(Cascade.Persist);
                });
            ManyToOne(x => x.TaskProject, m =>
            {
                m.Cascade(Cascade.Persist);
            });
        }
    }
}
namespace Persistance.Mappings
{
public class ProjectMapping : ClassMapping<Project>
{
public ProjectMapping()
{
Id(x => x.ProjectID, m => m.Generator(Generators.Native));
Property(x => x.Code);
Property(x => x.Description);
}
}
} namespace Persistance.Mappings
{
public class ActivityMapping:ClassMapping<Activity>
{
public ActivityMapping()
{
Id(x => x.ActivityID, m => m.Generator(Generators.Native));
Property(x => x.Name);
Property(x => x.Description);
}
}
} Now that we have the mappings we have to be able to get an ISessionFactory interface. Using this interface we will be able to obtain sessions (ISession interface) that expose the final functionality we're looking for save/edit/delete objects from the DB.
namespace Persistance
{
    public class LocalDbSessionFactory:ILocalDbSessionFactory
    {
        ISessionFactory _sessionFactory = null;

        public ISessionFactory SessionFactory
        {
            get
            {
                if (_sessionFactory == null)
                {
                    var mapper = new ModelMapper();
                    mapper.AddMappings(Assembly.GetExecutingAssembly().GetExportedTypes());
                    var mapping = mapper.CompileMappingForAllExplicitlyAddedEntities();

                    var cfg = new Configuration();
                    cfg.Configure();
                    cfg.AddMapping(mapping);

                    _sessionFactory = cfg.BuildSessionFactory();
                    //new SchemaExport(cfg).Create(true, true);
                }
                return _sessionFactory;
            }
        }
    }
}
Finally we define a ITaskManagerDataContext implemented using the NHibernate ISession. This is the class that handles the real job of persisting and querying the DB.
namespace Persistance
{
    public class TaskManagerDataContext:ITaskManagerDataContext
    {
        public ISession _contextSession;

        public TaskManagerDataContext(ISession contextSession)
        {
            _contextSession = contextSession;
        }

        public Task GetTaskById(long taskId)
        {
            return _contextSession.Get<Task>(taskId);
        }

        public Project GetProjectById(long projectID)
        {
            return _contextSession.Get<Project>(projectID);
        }

        public Activity GetActivityById(long activityID)
        {
            return _contextSession.Get<Activity>(activityID);
        }

        public void SaveTask(Task theTask)
        {
            ITransaction t = _contextSession.BeginTransaction();
            try
            {
                _contextSession.SaveOrUpdate(theTask);
                t.Commit();
            }
            catch(Exception e)
            {
                t.Rollback();
                throw e;
            }
            finally
            {
                t.Dispose();
            }
        }

        public void DeleteTask(Task theTask)
        {
            ITransaction t = _contextSession.BeginTransaction();
            try
            {
                _contextSession.Delete(theTask);
                t.Commit();
            }
            catch (Exception e)
            {
                t.Rollback();
                throw e;
            }
            finally
            {
                t.Dispose();
            }
        }

        public void Dispose()
        {
            _contextSession.Close();
            _contextSession.Dispose();
        }

        public ICollection<Task> GetTasksOfDay(DateTime day)
        {
            DateTime start,end;

            start = new DateTime(day.Year,day.Month,day.Day,0,0,0);
            end = new DateTime(day.Year,day.Month,day.Day,23,59,59);

            var list = _contextSession.Query<Task>().Where(t => t.CreateDT >= start && t.CreateDT <= end);
            return list.ToArray();
        }
    }
}
The application
The main goal when i decided to write this app was to put in practice some techniques that i wanted to test:
- NHibernate
- WPF
- MVVM pattern / loose coupling design
- Dependency injection using Unity

Our desktop app is going to have three areas or screens.
- Taskmanager view
- Project picker view
- Activity picker view
There's also a main area that is going to contain the others which is called MainWindow.
For each view we have the corresponding viewmodel. All viewmodels come from a common base class that defines the basic infrastructure we're going to need in every case.
We want to able to communicate the viewmodels between them, for example, handle selections, navigation between screens and so. We also want to this in a decoupled way. The viewmodels mustn't care too much about their partners.
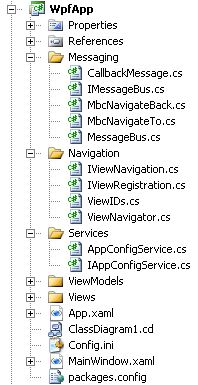
We achieve this using the MessageBus component. We're going to inject an IMessageBus interface inside every viewmodel. Using this interface each viewmodel will be able to emit and to receive messages in a decoupled way.
In top of the MessageBus we put the ViewNavigation component. This component receives requests for changing the active screen to another as messages. The component will change the active screen and will remember how to get back to last one.
Bootstrapping
The last thing i want to review is the bootstrapping sequence.
As i mentioned before the app uses the concept of interface programming and dependency injection. The concrete implementation on this case uses Microsoft Unity component. Let's see how it's done:
private void BootStrap()
{
 unityContainer = new UnityContainer();
 unityContainer.RegisterInstance<IAppConfigService>(new AppConfigService("config.ini"),                                                    new ContainerControlledLifetimeManager());

 unityContainer.RegisterType<IMessageBus, MessageBus>(new ContainerControlledLifetimeManager());
 unityContainer.RegisterType<ViewNavigator>(new ContainerControlledLifetimeManager());
 unityContainer.RegisterType<IViewNavigation, ViewNavigator>();
 unityContainer.RegisterType<IViewRegistration, ViewNavigator>();

 unityContainer.RegisterType<LocalDbSessionFactory>(new ContainerControlledLifetimeManager());
 unityContainer.RegisterType<ILocalDbSessionFactory, LocalDbSessionFactory>();
 unityContainer.RegisterType<IProjectData, ProjectData>();
 unityContainer.RegisterType<IActivityData, ActivityData>();
 unityContainer.RegisterType<ITaskManagerDataContextFactory, TaskManagerDataContextFactory>();

 RegisterMainWindowView(unityContainer.Resolve<IViewRegistration>());
 RegisterTaskManagerView(unityContainer.Resolve<IViewRegistration>());
 RegisterProjectPickerView(unityContainer.Resolve<IViewRegistration>());
 RegisterActivityPickerView(unityContainer.Resolve<IViewRegistration>());
 RegisterReportView(unityContainer.Resolve<IViewRegistration>());
}
We register our components based on their dependencies. The components that doesn't depend on others are registered first and so on...
We register first the "services" and then the viewmodels. Let's have a look at the TaskManager view registration:
private void RegisterTaskManagerView(IViewRegistration viewRegistration)
{
  TaskManagerView view = new TaskManagerView();
  view.DataContext = unityContainer.Resolve<TaskManagerViewModel>();
  unityContainer.RegisterInstance<TaskManagerView>(ViewIDs.TaskManager.ToString(),view);
  viewRegistration.AddView(ViewIDs.TaskManager,view);
}
We start creating the view. Then we request unity to create the correspondent viewmodel and we join the view and the viewmodel through the DataContext property. Unity will take care of injecting all the dependencies the viwemodel may need.
Finally we register the view in the navigation system.
Points of Interest
It's really nice to see how the different concepts, patterns fit together when you apply them to solve a concrete problem.
I've lately added a new screen to generate reports and it's really easy once you have the infrastructure created and working.
I hope this article will serve as a real complete sample of a NHibernate-MVVM desktop app for beginners that are trying to find a formal way to develop their desktops apps.
I'm looking forward for your comments, corrections, suggestions... and everything you can consider of interest.
Best wishes, Alberto.
History
19-07-2012: First publication.