
Building Your First Analysis Services Cube...
3.96/5 (6 votes)
How to build you first analysis service cube
Introduction
You can get a feel for what it takes to use SQL Server Analysis Services by building a cube based on the Adventure Works data warehouse.
Creating an SSAS Project in BIDS
Building your cube will require several steps: You’ll need to build a data source, a data source view, some dimensions, and some measures before your cube can be realized.
Start a New Project
To build an SSAS cube, you must first start a project by following these steps:
All Programs -> Microsoft SQL Server -> SQL Server BIDS
Create an Analysis Services project.
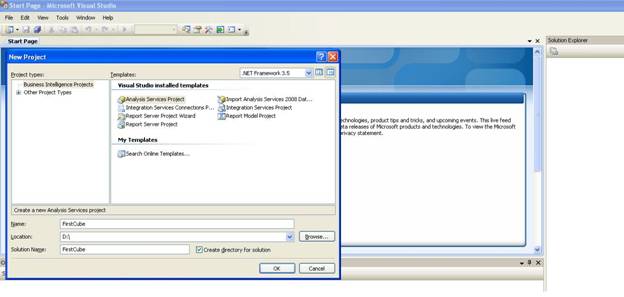
Name your project FirstCube and click OK.
You’re now presented with an empty window, which seems like a rare beginning to a project with a template; really, you have nothing to start with, so it’s time to start creating. The first component you’ll need is somewhere to retrieve data from: a data source.
Building a Data Source
To create the data source you’ll use for your first cube, follow these steps:
Navigate to the Solution Explorer pane on the right, right-click Data Sources, and click New Data Source. This will bring up the Data Source Wizard, which will walk you through the creation process.
The next component you’ll create is the data source view.
Meanwhile, go ahead and click Next to continue creating your data source. In this next screen, it’s time to set up a connection string.
If your AdventureWorksDW database is visible as a selection already, go ahead and choose it; if not, click New.
For your server name, enter (local), and then drop down the box labeled Select or Enter a Database Name and choose AdventureWorksDW.
Click OK to return to the wizard and then click Next.
You can now enter the user you want SSAS to impersonate when it connects to this data source. Select Use the Service Account and click Next. Using the service account (the account that runs the SQL Server Analysis Server service) is fairly common even in production, but make sure that service account has privileges to read your data source.
For your data source name, type AdventureWorksDW and then click Finish.
Building a Data Source View
Follow the below steps:
Right-click Data Source Views and choose New Data Source View. Predictably, up comes the Data Source View Wizard to walk you through the process. Click Next.
Make sure the AdventureWorksDW data source is selected and then click Next.
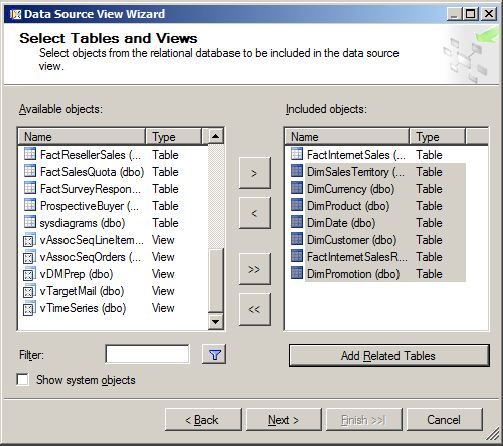
On the Select Tables and Views screen, choose FactInternetSales under Available objects and then click the right arrow to move it into the Included Objects column on the right.
To add its related dimensions, click the Add Related Tables button as shown in Figure 18-3 and then click Next. Note that one of the related tables is a fact, not a dimension. There’s no distinction made at this level. Later, you will be able to select and edit dimensions individually.
On the last screen, name your data source view according to its contents: Internet Sales.
Click Finish to create the Internet Sales data source view.

Creating an Analysis Services Cube
Right-click Cubes in the Solution Explorer and select New Cube to bring up the Cube Wizard. This will walk you through choosing measure groups, the measures within them, and your dimensions for this cube, click Next.
On the Select Creation Method screen, make sure Use Existing Tables is selected, and click Next.
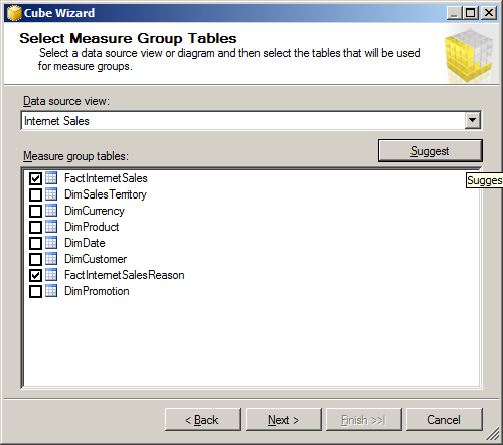
The wizard will now want you to tell it where to find measure groups. You could help it out by telling it those are in your fact tables and then click Next.
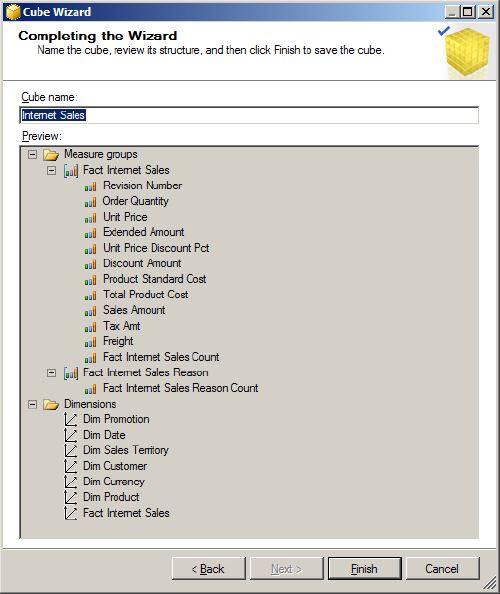
Now the wizard would like to know which measures from your measure groups (fact tables) you’d like to store in the cube. By default, it’s got them all selected; go ahead and accept this by clicking Next.
At this point, you have measures, but you still need some dimensions; the wizard will select the dimension tables from your data source view to create as new dimensions. Again, by default they’re all selected, and you can click Next.
The wizard is now ready to complete. Verify everything is done as per above steps. If everything appears to be in order, click Finish.
“Congratulations, half of the job is done! Don’t be shocked”. The next part is to make your cube user friendly. After all, you’ve built up the connection, designated the measures and dimensions, and defined your cube, so it would be unfair if you could just start browsing it, but you’re not quite there yet.
First, you’ll want to make some of your dimensions a little more friendly; they’re currently just defined by their keys because SSAS doesn’t know which fields in your dimension tables to use as labels. Once you’ve settled that, you’ll need to deploy and process your cube for the first time before it’s ready to use. To do so, follow these steps:
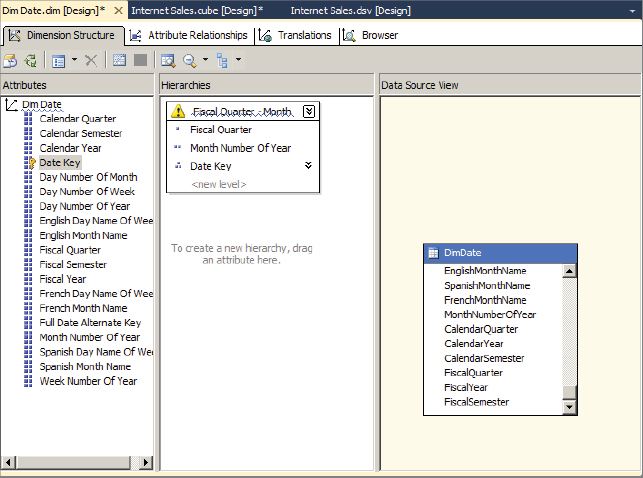
In the Solution Explorer under Dimensions, double-click DimDate. The Dimension Editor will come up, allowing you to make this dimension a bit more useable.
To make the date attributes available, highlight all of them and drag them to the attribute list.
Date is a dimension that can be defined as a hierarchy. Drag Fiscal Quarter from the Attributes pane to the Hierarchies pane to start creating a hierarchy.
Drag Month Number of Year to the tag under Fiscal Quarter, and DateKey similarly below that.
Finally, rename the hierarchy (right-click it and choose Rename) to Fiscal Quarter - Month. The result should look something like the below figure.
Save the DimDate dimension and close the dimension editor. You will be prompted to save changes to your cube along with the new dimension changes; do so.
Deploying the Cube
Deploying process can be started by following these steps.
Select Deploy First Cube on the Build menu. You’ll see a series of status messages as the cube is built, deployed, and processed for the first time. You’ll receive a few warnings when you deploy FirstCube, and if they’re warnings and not errors, you can safely ignore them for now.
When it’s done and you see Deployment Completed Successfully in the lower right, your first cube is ready to browse.
How It Works
What you’ve done is to build your first cube, and under BIDS. This cube isn’t fully complete- you’d probably want to add some aggregations, attribute relationships, and playing with MDX query to retrieve cube data just like T-SQL.
Summary
Anyways, once you had your project merge together, you had a few components to create on the way to browsing your cube. Let’s check it out.
- Data source: Your data source is a connection to an individual place where data for your MSBI reporting can be found. While this one was a SQL Server data source, you can use any number of providers, both included and third-party.
- Data source views: A data source view is a much more interesting species. Using a data source, the data source view contains a set of tables or views, and defines the relationships among them.
- Cubes: Building analysis services cubes involves building measure groups and dimensions for you. The cube isn’t a pass-through directly to your source data. To update the data in the cube, you must process the cube; you can do this through a regularly scheduled job with SQL Agent or, of course, manually.
Enjoy!