
Authoring/Integrating API Help for VS2008 and VS2010
4.73/5 (11 votes)
Create context-sensitive help files for your own APIs
Introduction
From time to time, I have had to develop APIs that are used by other developers inside and outside of my organization. It has always been my thought to be able to package it up with nice documentation and professional looking help files. Through some freely available tools, it is fairly easy to generate professional looking help files, but I always seemed to get stuck on integrating it with the VS IDE. In this article, I will show how I solved the problem for both VS2008 and the new Help3.x format for VS2010.
The Tools You Will Need
- GhostDoc
- Sandcastle
- Sandcastle GUI
- MSHC Migrate Utility
- Visual Studio SDK (VS2010)
- Visual Studio SDK (VS2008)
And, of course, you will need either or both of Visual Studio 2008/2010.
Sample API
public class API
{
	public API()
	{
	}

	public string Foo( string s )
	{
		return "Foo got " + s;
	}
}
GhostDoc
The GhostDoc project is a free VS plug-in that greatly simplifies generating the XMLDoc comments in your API source code. As you define and implement your classes, it is pretty trivial to create these comments within VS by simply typing three '/'s, giving you:
/// <summary>
///
/// </summary>
public class API
{
	/// <summary>
	///
	/// </summary>
	public API()
	{
	}

	/// <summary>
	///
	/// </summary>
	/// <param name="s"></param>
	/// <returns></returns>
	public string Foo( string s )
	{
		return "Foo got " + s;
	}
}
This is very helpful, but there can be a lot of hand-editing that would be required in filling in all of these values. Then there's always the problem of trying to remember the formats for type references inside of the comment blocks, etc.
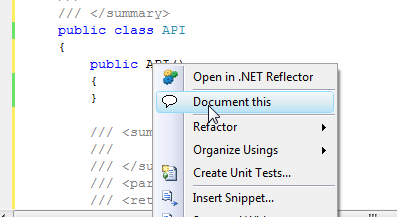
GhostDoc helps this by providing a "Document this" context-menu inside of VS:
The result is a much more friendly:
/// <summary>
/// Initializes a new instance of the <see cref="API"/> class.
/// </summary>
public API()
{
}
The embedded <see.../> tag will generate live link references to other parts of the documentation once it is generated (rather than just the text). Another nice feature of GhostDoc is that it will intelligently pull the docs from a base class or interface if there is one there to use:
/// <summary>
/// Returns a <see cref="System.String"/> that represents this instance.
/// </summary>
/// <returns>
/// A <see cref="System.String"/> that represents this instance.
/// </returns>
public override string ToString()
{
	return base.ToString();
}
Sandcastle
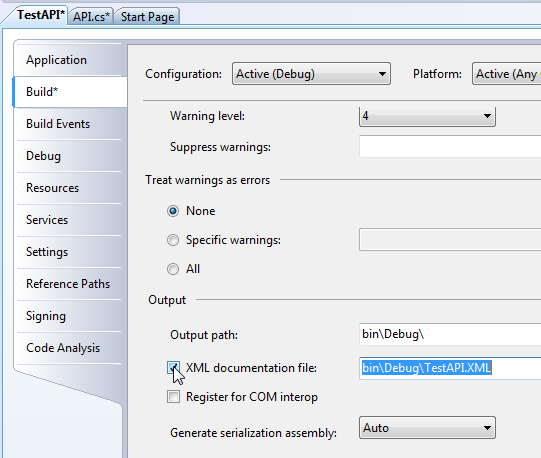
The Sandcastle project will aid in taking those doc comments and turn them into API documentation. First, in order to generate the documentation, you need to generate the XML documentation file in the project's Build Output options:
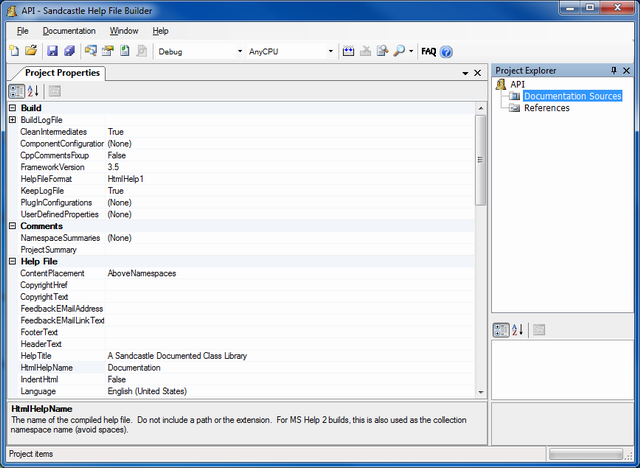
This generated file (along with the actual DLL file) is the input that Sandcastle needs to do its magic. Open the Sandcastle Help File Builder GUI and create a new project:
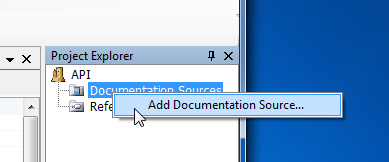
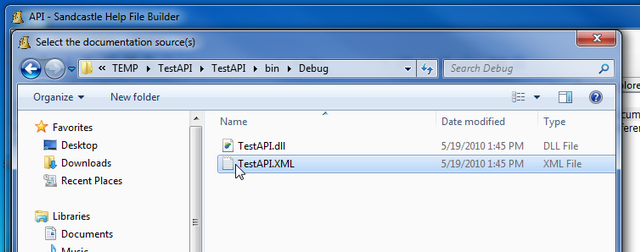
Now we add our generated XML file from Visual Studio to the project:
As shown here:
To generate help files for VS2010, select HelpFileFormat "MSHelpViewer":
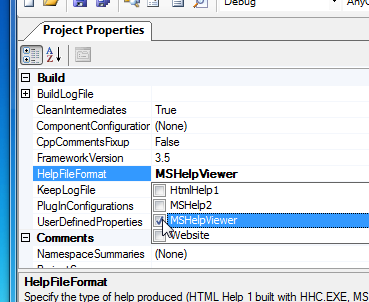
This will cause Sandcastle to generate a file (by default: Documentation.mshc).
To generate help files for VS2008, select "MSHelp2". This will cause Sandcastle to generate a series of files (*.HxS, *.HxC, etc.).
These are our raw help files that we now need to integrate into the IDEs.
While we are at this point, I want to point out that you can also select "HtmlHelp1" to generate the venerable *.chm (compiled HTML) help file. However, this cannot be integrated into either IDE, but it useful for distributing with your code inside an MSI, accessible from a Start menu entry, for example. The fourth option is to generate HTML documentation. If you want to host your documentation on a web server or zip it up to distribute with your API, this is another option from Sandcastle.
MSHC Migrate Utility
This is a commercial utility from Helpware that will allow you to migrate to the new VS2010's Help3.x format from several other formats. It is not free. I include it here, simply for completeness.
All we really need to integrate our generated *.mshc file into VS2010 is a help manifest file (*.msha) as shown:
<html xmlns="http://www.w3.org/1999/xhtml">
<head>
  <title>My API's Manifest</title>
</head>
<body class="vendor-book">
  <div class="details">
    <span class="vendor">Me</span>
    <span class="locale">en-us</span>
    <span class="product">My API</span>
    <span class="name">My API</span>
  </div>
  <div class="package-list">
    <div class="package">
      <span class="name">TestAPI</span>
      <a class="current-link" href="Documentation.mshc">Documentation.mshc</a>
    </div>
  </div>
</body>
</html>
The important entries here are making sure the Package-list section points to your generated documentation file (*.mshc), and that the <span ...>TestAPI</span> value points to the outermost namespace of your API. Save this file in the same directory as your *.mshc file and name it "helpcontentsetup.msha".
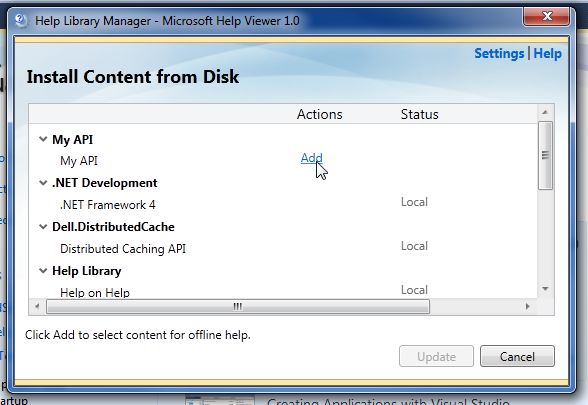
Now you are ready to integrate this with VS2010. You need to start VS2010 with Administrative privileges (right-click the icon or menu, and select "Run as administrator"). You will know you are running as Administrator because the title bar of VS will say "(Administrator)". Next select Help -> Manage Help Settings to start the Help Library Manager as shown:

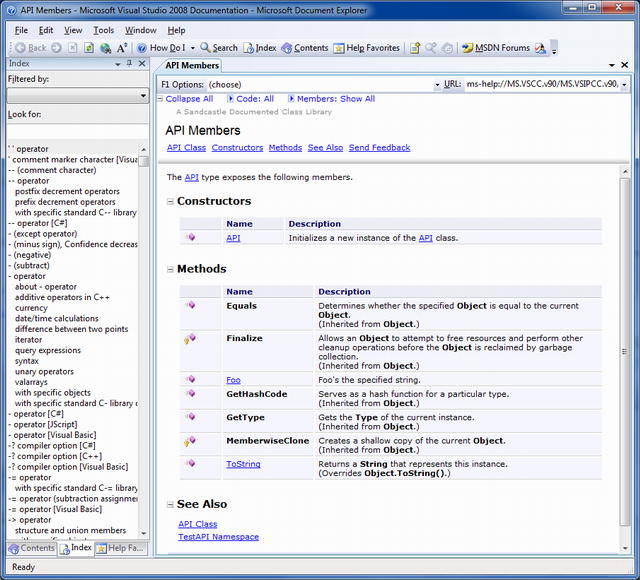
Select "Install content from disk" and browse to your newly created manifest file "helpcontentsetup.msha" and select it. This will show you your new API documentation, select "Add" and click the Update button to integrate it with the installed help files, as shown:
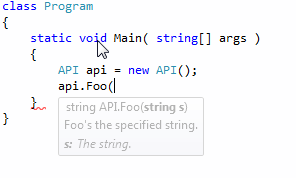
Viola! Your API is now registered with the local help files of VS2010.
To integrate with VS2008, we need to create a VS Extension installer. Add to your solution a new project (under Other Project Types -> Extensibility) a new Help Integration Wizard project. This can be either as a setup project or a merge module. In the wizard, simply step through the options and when you get to Source Files, add the *.HxS file we generated with Sandcastle.
Building and installing the resulting MSI will add the new help files to the locally installed help.
Note that in VS2008, after installing your MSI the first time you access the help system it will have to update itself, which will take a few minutes (a crazy long amount of time in my experience ... sigh).
Additional documentation for each of the tools mentioned is available on their respective web sites.
History
- 19th May, 2010: Initial post