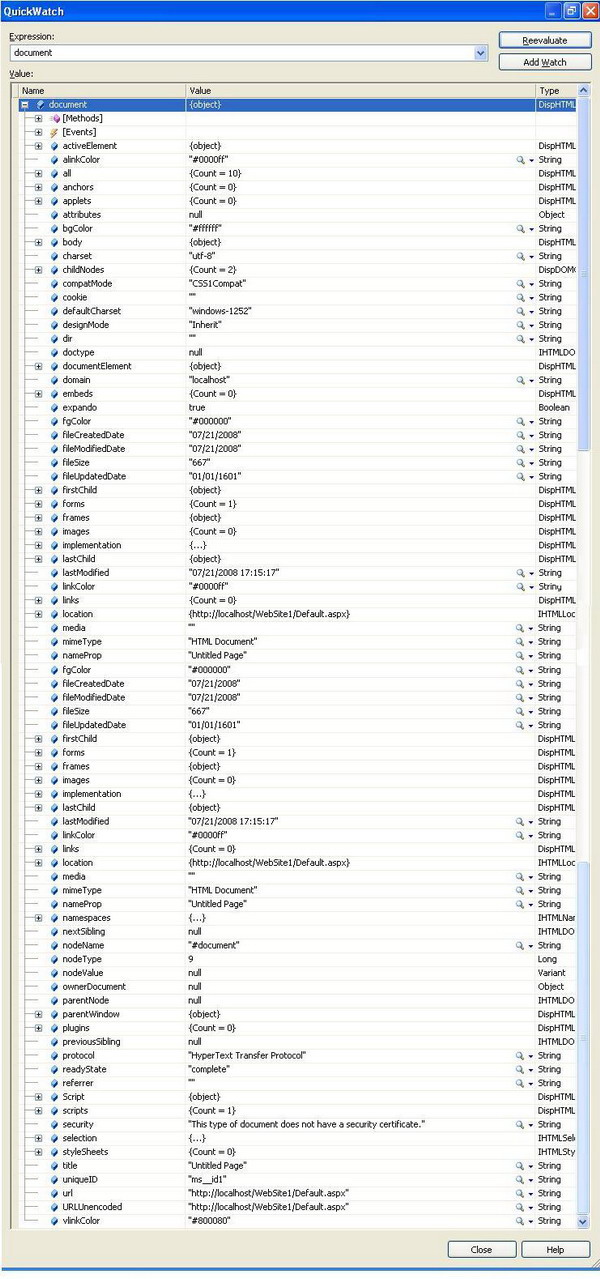
Introduction - Document Object Model (DOM)
As Wikipedia says, the Document Object Model (DOM) is a platform- and language-independent standard object model for representing HTML or XML and related formats. A web browser is not obliged to use DOM in order to render an HTML document. However, the DOM is required by JavaScript scripts that wish to inspect or modify a web page dynamically. In other words, the Document Object Model is the way JavaScript sees its containing HTML page and browser state.
The Levels of DOM
The levels of DOM are similar to the XML hierarchy. It’s like:

Tricks of Using JavaScript with DOM
If you are going to use JavaScript for HTML DOM, you should know the DOM properties of each element which are required for creating the elements in the page. Please refer to this link for HTML elements and their properties.
For creating the elements, you can use DOM to create an element otherwise you can inject your code in the innerHTML in the block element level. If your code is not well formed, the debugger would give an error so please try to use DOM for this purpose.
For Creating an HTML Element
For DIV
var el = document.createElement('div');
el.id="sample";
el.style.backgroundColor="#111FFF";
el.style.width="120px" ;
el.style.height="120px";
document.appendChild(el);
For Horizontal Rule
var el = document.createElement(hr);
el.id="sample";
el.style.width="120px" ;
document.appendChild(el);
If the commented codes get enabled, then the horizontal rule would look like a div element.
For Select or Dropdown Box
var el = document.createElement('div');
el.id="sample";
el.style.backgroundColor="#111FFF";
el.style.width="120px" ;
el.style.height="120px";
document.appendChild(el);
For adding new items or option items in the select element or in a dropdown box:
optionItem = new option(text, value, defaultSelected, selected)
Or:
Var opt = document.createElement(‘option’);
Opt.value=value;
Opt.text=text;
select.options.add(opt, index);
For Table
var tbl = document.createElement('table');
Or:
var tbl=document.getElementById(‘elementId’);
If the table is already there, the following line will retrieve the number of rows. Otherwise it will set the number of rows as 0.
var lastRow = tbl.rows.length;
insertRow is used to create a row.
var row = tbl.insertRow(lastRow);
insertcell is used to create a cell.
var cellLeft = row.insertCell(0);
From this logic, you can create a table dynamically:
var totalRows='1';
var totalCols='2';
var intRow;
var intCol;
for(intRow=0;intRow<totalRows;intRow++)
{
var row = tbl.insertRow(intRow);
for(intCol=0;intCol<totalCols;intCol++)
{
var cellLeft = row.insertCell(intCol);
}
}
For TextArea
var sample=document.getElementById('sample');
var el = document.createElement('textarea');
el.id="sample";
el.rows=20;
el.cols=20;
el.style.backgroundColor="#FFFFFF";
el.style.width="120px" ;
el.style.height="120px";
sample.appendChild(el);
For Input Element (textbox, fileupload, Button (submit, reset and normal button)
var sample=document.getElementById('sample');
var el = document.createElement('input');
el.id="sample";
For input text field:
el.type="text";
For input text password field:
el.type="password";
For input browse file element:
el.type="file";
For submit element:
el.type="submit";
For reset element:
el.type="reset";
For hidden html element:
el.type="hidden";
For checkbox and radio button:
el.type="radio"; or el.type="checkbox";
el.checked=true;
For image:
el.type="image";
el.src=""; or el.href="";
For TextNode
var textNode = document.createTextNode('hi');
document.appendChild(textNode);
This textnodes will be used to add text dynamically.
For Document Fragment and TextNode
Courtesy: From CodeProject User CCMint
<script type="text/javascript">
function AddText(node, text){
var tnode = document.createTextNode(text);
node.appendChild(tnode);
return node;
}
function Create(node, type){
node.type = type;
node.value = type;
return node;
}
window.onload = function(e){
var divFrag = document.createDocumentFragment();
for(var i=0; i<200; i++){
divFrag.appendChild(document.createElement('div'));
}
document.body.appendChild(divFrag);
var divs = document.getElementsByTagName('div');
var elements = [AddText(document.createElement('b'), 'Enter name: '),
Create(document.createElement('input'), 'textbox'),
Create(document.createElement('input'), 'button'),
document.createElement('hr')];
var frag = document.createDocumentFragment();
for(var i=0; i<elements.length;> frag.appendChild(elements[i]);
}
for(var i=0;i<divs.length;i++){>
divs[i].appendChild(frag.cloneNode(true));
}
}
</script>
In the HTML DOM, we can create new elements and we can do the validations too. If we know the client id of the element, then we can change attributes of the element even if it is in a master page or in a nested page.
For attaching the events, we can use the following code snippet:
var el=Iframe1.document.getElementById("button1");
if (el.addEventListener){
  el.addEventListener('onclick', sample, false);
}
else if (el.attachEvent)
{
  el.attachEvent('onclick', sample);
}
I would like to give special thanks to CCmint.
History
- 23rd July, 2008: Initial post
