Introduction
This article describes the building a WPF Barcode Application using a Barcode Library. At this moment, the Barcode Library implements only the Code 39 barcode, but more will be added in the near future.
The Barcode Library
At the core of this barcode application is a resusable Barcodes class, that represents a generic barcode implementing common barcode properties. The following lists its properties.
Input Properties
BarcodeType - There are many types of barcodes used in real life. For example, those used in retail are different from those used in warehouses and logistics. Currently, the barcode library implements a simple but widely used barcode symbology known as Code 39. This barcode is also known as Code 3 of 9. This barcode accepts only upper case characters 'A' to 'Z', the numeric digits '0' to '9' and the special characters - . [space] $ / + %. If you enter any other characters to the Data string, they will be ignored and filtered away.
The Code 39 barcode has the advantage of being simple, as each of the characters are represented by a pattern of 10 alternating white and black bars. However, because the algorithm does not include much compression, the resulting barcode out is not very dense. In other words, you get a rather long barcode for a short data string.
Data - This is the data to be encoded. For our WPF application, we have used "1234567" as the Data input string.
CheckDigit - Some barcodes specify that a check digit must be included into the barcode. The check digit is usually an additional character (or several characters) that is appended to the input Data string and encoded into the barcode. The CheckDigit helps the scanner to verify that the data that it reads is correct and complete. For the Code39 barcode, the CheckDigit is optional. You can specify Yes or No to include or exclude it.
Main Method
encode() - After you have specified the Input Properties, you can start letting the barcode class to create the black and white bars. This is done by calling the method encode(). When this is done, you can start retrieving the results using the Output Properties of the Barcodes class.
Output Properties
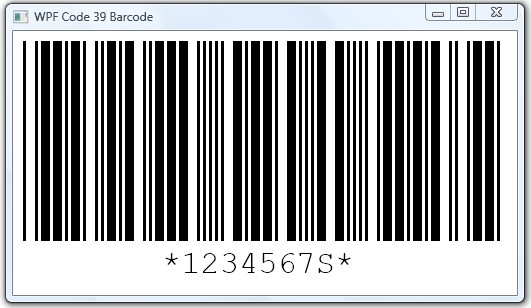
EncodedData - This is the result returned by the Barcodes after you have called the encode() method. The EncodedData returns a string in the form "twtwttwtttwtwttttwttwwttwtwttwttwtwttt". The "t" represents a thin bar, while the "w" represents a thick bar. A thick bar is usually 3 times the width of a thin bar. The way to interpret the result is that each character indicates alternating bar colors. For example for "twtw", the first "t" will be a thin black bar, the second "w" will be a thick white bar, the third "t" will be will be a thin black bar, and the fourth "w" will be a thick white bar. Our WPF application will use the string returned by EncodedData to draw a series of alternating black and white rectangles.
HumanText - This is a text that is usually placed below the barcode. The Human Text helps a person to read the content of the barcode when a scanner is not available. The HumanText is usually identical to the input Data, but that not always the case. Sometimes, the HumanText will be formatted with special Start/Stop "*" characters, otherwise, it will include the extra CheckDigit. Our WPF application will use the string returned by HumanText to draw the Human Readable Text below the barcode.
Drawing the Actual Barcode
We are now ready to describe the drawing of the barcode.
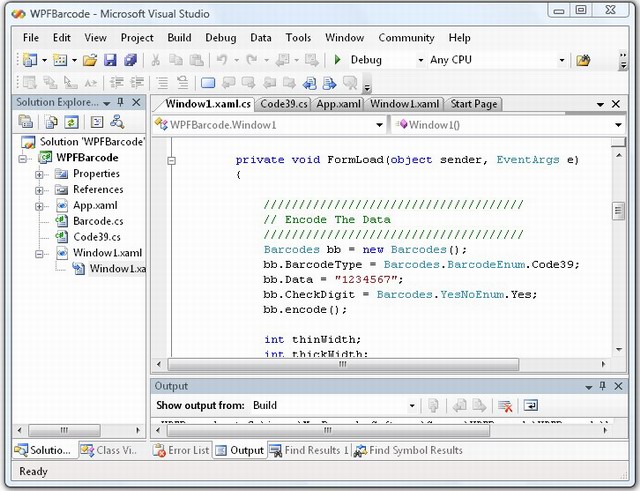
The first step is the Encoding of Data using the barcode library. We create an instance of Barcodes and set its Data to "1234567". This is the data we wish to encode into the barcode, and may be retrieved when it is placed under a scanner.
The BarcodeType is set Code39 and we specify the CheckDigit to Yes so that the CheckDigit will be appended into the barcode. When this is done, we call encode() and retrieve the EncodedData and HumanText.
Barcodes bb = new Barcodes();
bb.BarcodeType = Barcodes.BarcodeEnum.Code39;
bb.Data = "1234567";
bb.CheckDigit = Barcodes.YesNoEnum.Yes;
bb.encode();
int thinWidth;
int thickWidth;
thinWidth = 3;
thickWidth = 3 * thinWidth;
string outputString = bb.EncodedData;
string humanText = bb.HumanText;

We are now ready to draw the barcode using the EncodedData. This is the output of the Barcodes class and is saved into a variable outputString.
The algorithm for drawing the barcode is fairly simple. We find the length of the outputString and iterate through all its characters. If we encounter a 't' (ThinBar), we draw a rectangle with thin width. If we encounter a 'w' (ThickBar), we draw a rectangle with thick width. We set the thin width to be 3 pixels, and the thick width to be 3 times the thin width (i.e 9 pixels). Note : The thin width may also be set to other values such as 1,2,3,4,5 ..etc.
We use the variable currentPos to track the current X position of the rectangle. The Y position of the rectangle (currentTop) is fixed at 10. The height of the rectangle is fixed at 200. The currentColor variable tracks the color of the rectangle. If it is 0, then the rectangle is black. If it is 1, then the rectangle is white. The color alternates as each rectangle is drawn.
The rectangle is drawn using WPF by instantiating a Rectangle class and adding the instance to the main canvas.
int len = outputString.Length;
int currentPos = 10;
int currentTop = 10;
int currentColor = 0;
for (int i = 0; i < len; i++)
{
Rectangle rect = new Rectangle();
rect.Height = 200;
if (currentColor == 0)
{
currentColor = 1;
rect.Fill = new SolidColorBrush(Colors.Black);
}
else
{
currentColor = 0;
rect.Fill = new SolidColorBrush(Colors.White);
}
Canvas.SetLeft(rect, currentPos);
Canvas.SetTop(rect, currentTop);
if (outputString[i] == 't')
{
rect.Width = thinWidth;
currentPos += thinWidth;
}
else if (outputString[i] == 'w')
{
rect.Width = thickWidth;
currentPos += thickWidth;
}
mainCanvas.Children.Add(rect);
}
After the barcode is drawn, we proceed to add a Huamn Readable Text below it. This is done by instantiating a TextBlock class and setting its Text property to the HumanText string. The TextBlock is placed slightly below the barcode (the barcode height is 200, so the text is placed at 205) and centered horizontally.
TextBlock tb = new TextBlock();
tb.Text = humanText;
tb.FontSize = 32;
tb.FontFamily = new FontFamily("Courier New");
Rect rx = new Rect(0, 0, 0, 0);
tb.Arrange(rx);
Canvas.SetLeft(tb, (currentPos - tb.ActualWidth)/2);
Canvas.SetTop(tb, currentTop + 205);
mainCanvas.Children.Add(tb);
When the WPF application is run, you will see barcode drawn on it canvas. Notice there is an "S", appended to the input "1234567" in the Human Text. This happens because we have specified that we want to include the CheckDigit.
At this point, you can take a screen capture of the barcode, save it as an image file, and insert the image file into an editor such as MS Word and make a print out. You can then use a barcode scanner to scan the barcode to retrieve the original data.
Points of Interest
This is a simple application demonstrating the creation of a barcode in WPF. In the future, we will be adding other barcodes such as I2of5, ITF14, POSTNET to the Barcode Library. For updates on the Barcode Library and the WPF barcode software, please visit the link Barcode Software
History
01 May 2009 : v0.1 - WPF Barcode Library with limited number of Barcodes. Starting with the Code 39 Barcode.
