Introduction
The purpose for me in this application was to learn DirectX. I can not tell you how many times I have searched the web looking for decent examples on how developers like me can implement DirectX into a program. Video games are not one of the main reasons I got into programming, but I find that a lot of people want to be entertained. So, I say, if the people want cake, give them cake. :-)
With all the files and songs, this download could be 50MB or so. So, I divided it up. There is an upload limit of 6MB, so I could not include the songs in this article. But, if anybody were to contact me, I would try and find a way to get those over to you.
The general principles herein could be applied to many types of games, be they 2D strategy games, 2D overhead adventures, 2D puzzles, or more 2D strategy games. I am not sure about the utility of this for 3D games, except that it will be completely useless for graphics.
We will cover how to get the rendering part of your game up and running using Managed DirectX. Second, we will talk about images and how to draw them. After that, you should be knowledgeable enough to actually put a game together. Then, we will cover level architecture and how to draw a level (and by level architecture, I mean what structures define a level, not an individual level's contents). Next up would probably be the basics of display characters and objects in levels. That's pretty easy actually.
Then, we should probably cover the current endeavor a character is undertaking, and actions they are executing, if any. Next, we will do hit detection, and one of the most complicated to get right topics: event handling. That is, when A jumps on B, X happens, but when B jumps on A, Y happens. You got to handle all that stuff. That is tough to get right. That flows right into changing a character's goal or endeavor in response to events, or what I will call thinking. Actually, user input would be covered there too. And, that there is a decently complete overview of a game.
Requirements
The following versions of DirectX 9c were used, so you will need to have these installed if you don't already have them. Before we write any code, you have to add references to the Microsoft.DirectX assemblies that should have been installed with the SDK.
Versions:
- 1.0.2902.0 - Microsoft.DirectX.dll
- 1.0.2902.0 - Microsoft.DirectX.AudioVideoPlayback.dll
- 1.0.2902.0 - Microsoft.DirectX.Direct3D.dll
- 1.0.2911.0 - Microsoft.DirectX.Direct3DX.dll
- 1.0.2902.0 - Microsoft.DirectX.DirectInput.dll
- 1.0.2902.0 - Microsoft.DirectX.DirectSound.dll
Background
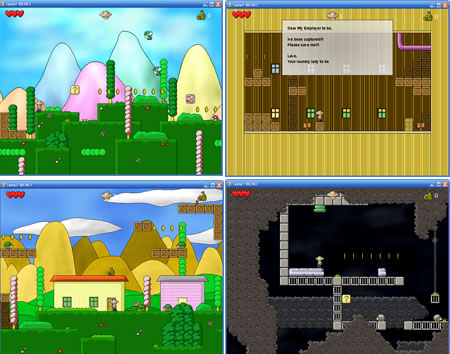
Let me start by saying that, no this is not original code. The original C# code can be found here. I simply needed to port it over to VB.NET so that I could study it more. The original author Aaron wrote it for his girlfriend. Read more and download here, and see more screenshots. Aaron has generously made the full source available for the game, so if you want some 2D scrolling sample code in C#, this would be a great place to look.
The Code
DirectX renders to a target of some sort, which in .NET is either a Form or a Control (technically, since a Form is a Control, it is always to a Control). So first, you have to have a window, and optionally, you can have a Control on that window to render to (this lets you surround the DirectX rendering with other controls, like buttons or list boxes). Simple enough, right? Well, lets write a Main function that does this. So, start your IDE, and create a VB.NET Windows Application project.
Public Shared Sub Main(ByVal args As String())
   Dim mw As MainWindow = New MainWindow ()
   mw.Show()

   Do While mw.Created
       Application.DoEvents()
   Loop
End Sub
This goes in your MainWindow class. It should be pretty straightforward what we are doing. Because we aren’t doing much, or anything related to DirectX at this point. All we are doing is creating a window, showing it, then while it is created, processing its events repeatedly (when you click the Close box, the Created property of the Form becomes False).
Now, compile, build, and run. Should work like a champ.
Controller Class
Now, we are ready to get to the good stuff. I like to separate the rendering from the internals required to set up the rendering, and separate that from the game engine as well as the code to start and stop the app, as best as possible. This leads to a few more classes which can be confusing at first, but once you figure it out, it works quite nicely.
Basically, the structure I have grown to like is to have a Controller class that handles everything related to getting the rendering ready to go, but doesn't render anything. The rendering is actually done through a Renderer class of which the Controller object has an instance. The reason is that you can toss out and plug in Renderer objects for different tasks on the fly without much work. In my game, I have a Renderer for the main part of the game that displays the map and everything, and then several for menus. It is not that hard really, and it keeps your code cleaner.
Now, what I said about the engine being separate from the rendering is very important too. All the Renderer does is display the current state of the game. It does not affect game state at all, ever. The engine does this. While they usually run in tandem, that is not required. Meaning, you can pause the engine and still render, or you can play 1000 turns of the game without rendering any of them. This is basic, but important. So, let's go ahead and create the Controller class I was talking about. Add a new class called Controller to your project. Add the following Import statements:
Imports System.Windows.Forms
Imports Microsoft.DirectX
Imports Microsoft.DirectX.Direct3D
Now, add the following private variables to the Controller class:
Private m_Target As Control
Private m_Device As Device
Private m_Renderer As Renderer
Private m_presentParameters As PresentParameters
Private DeviceLost As Boolean
m_Target variable is the target we talked about earlier, it is where all the rendering goes. The m_Device is the DirectX device interface that does the rendering and stuff to the target. The m_presentParameters is some information we setup to create the device. The reason we keep this is that occasionally, the device could be lost, and we might need to recreate it without having to restart the app. Which is related to the IsDeviceLost, which is a flag that is set when the device is lost. The m_Renderer variable is the Renderer we talked about earlier.
Now, change your constructor to be like this:
Public Sub New(ByVal target As Control, ByVal renderer As Renderer)
   Me.m_Target = target
   Me.m_Renderer = renderer
   IsDeviceLost = False

   m_presentParameters = New PresentParameters ()

   InitializeGraphics()
End Sub
Pretty simple, just sets up the private members, and calls IntializeGraphics, which should look like:
Protected Sub InitializeGraphics()
m_presentParameters.Windowed = True
m_presentParameters.SwapEffect = SwapEffect.Discard
m_presentParameters.AutoDepthStencilFormat = DepthFormat.D16
m_presentParameters.EnableAutoDepthStencil = True
Dim adapterOrdinal As Integer = Manager.Adapters.Default.Adapter
Dim caps As Caps = Manager.GetDeviceCaps(adapterOrdinal,DeviceType.Hardware)
Dim createFlags As CreateFlags
If caps.DeviceCaps.SupportsHardwareTransformAndLight Then
createFlags = CreateFlags.HardwareVertexProcessing
Else
createFlags = CreateFlags.SoftwareVertexProcessing
End If
If caps.DeviceCaps.SupportsPureDevice Then
createFlags = createFlags Or CreateFlags.PureDevice
End If
m_device = New Device(adapterOrdinal, DeviceType.Hardware, target, createFlags, _
presentParameters)
AddHandler m_device.DeviceReset, AddressOf OnDeviceReset
SetupDevice()
End Sub
Pretty complicated. And, heck if I know all of what it's doing. Like I said, read the other tutorials, or buy a book. Basically, most of what this does is get ready to create the device and then it creates it. Telling DirectX a whole lot of information about how to create it. It also does two things at the end, add a handler for DeviceReset and call SetupDevice. The device reset handler calls the setup device too because that is supposed to handle when the device has been lost and can hopefully be recovered.
SetupDevice does the camera, lighting, and view setup:
Protected Sub SetupDevice()
m_device.RenderState.AlphaBlendEnable = True
m_device.SetSamplerState(0, SamplerStageStates.MinFilter, _
CInt((TextureFilter.Linear)))
m_device.SetSamplerState(0, SamplerStageStates.MagFilter, _
CInt((TextureFilter.Linear)))
m_device.SetSamplerState(0, SamplerStageStates.MipFilter, _
CInt((TextureFilter.Linear)))
m_device.RenderState.Lighting = False
Dim width As Single = CSng(target.Size.Width)
Dim height As Single = CSng(target.Size.Height)
Dim centerX As Single = width / 2.0f
Dim centerY As Single = height / 2.0f
Dim cameraPosition As Vector3 = New Vector3(centerX, centerY, -5.0f)
Dim cameraTarget As Vector3 = New Vector3(centerX, centerY, 0.0f)
m_device.Transform.View = Matrix.LookAtLH(cameraPosition, cameraTarget, _
New Vector3(0.0f, 1.0f, 0.0f))
m_device.Transform.Projection = Matrix.OrthoLH(width, height, 1.0f, 10.0f)
End Sub
Protected Sub OnDeviceReset(ByVal sender As Object, ByVal e As EventArgs)
SetupDevice()
End Sub
This basically gets the device (camera, view, lighting) ready to draw the 2D stuff normally. Now, let's add the all important Render method:
Public Sub Render()
If DeviceLost Then
AttemptRecovery()
End If
If DeviceLost Then
Return
End If
m_Device.Clear(ClearFlags.Target Or ClearFlags.ZBuffer, _
System.Drawing.Color.Blue, 1.0f, 0)
m_Device.BeginScene()
m_Renderer.Render(Me)
m_Device.EndScene()
Try
m_Device.Present()
Catch e1 As DeviceLostException
m_DeviceLost = True
System.Diagnostics.Debug.WriteLine("Device was lost")
End Try
End Sub
First, we see if the device has been lost, and if so, we want to try to recover it. If after that, the device is still lost, then we return from this method without doing anything. As a note, the device can be lost when the screensaver comes on or things like that. If everything is OK, then we clear the display, and do BeginScene. All rendering must occur between the calls to BeginScene and EndScene. That’s just how DirectX works. Between the two, we call our Renderer’s Render method which should do all the drawing. Then, after that, we try to present the work we have done, and that is when we might notice we’ve lost the device, so we set that deviceLost flag to True in this case (so, the next time Render is called, we will attempt to get the device back).
Now, AttemptRecovery:
Protected Sub AttemptRecovery()
Try
device.TestCooperativeLevel()
Catch e1 As DeviceLostException
Catch e2 As DeviceNotResetException
Try
device.Reset(presentParameters)
deviceLost = False
System.Diagnostics.Debug.WriteLine("Device successfully reset")
Catch e3 As DeviceLostException
End Try
End Sub
Let's just assume this works. Finally, we have a simple property to get and set the Renderer:
Public Property Renderer() As Renderer
   Get
       Return m_Renderer
   End Get
   Set(ByVal value As Renderer)
       m_Renderer = value
   End Set
End Property
And, that is all for the Controller class for now. You can’t built it or run it yet, because we haven’t created the Renderer yet, so let's do that next.
Renderer Class
Create a new class in your project called Renderer. Add the Imports directives:
Imports Microsoft.DirectX
Imports Microsoft.DirectX.Direct3D
Then, add the Render method:
Public Class Renderer
   Public Sub New()
   End Sub

   Public Overridable Sub Render(ByVal controller As Controller)

   End Sub
End Class
And, that’s it. Right now the Render class is going to be dirt simple because it doesn’t do anything yet. Actually, the Render class itself will never really do anything, but its sub-classes will. In fact, we will make it an abstract class in the next version, because no one should ever need to use it as it is. For now though, if it was abstract, we couldn't test our fledgling program, so it's better to make it concrete.
Wrap Up
The last part we have to do is rewrite the Main function a bit:
Public Shared Sub Main(ByVal args As String())
   Dim mw As MainWindow = New MainWindow ()
   Dim r As Renderer = New Renderer ()
   Dim c As Controller = New Controller (mw, r)

   mw.Show()

   Do While mw.Created
     c.Render()
     Application.DoEvents()
   Loop
End Sub
Build it and run it. You should be the proud parent of a deeply blue window. Congratulations.

