
Introduction
The purpose of this article is to introduce you to a tool that will jump start your Silverlight development by converting any database schema you have into a Silverlight application. You can quickly check the live demo here: http://sphinx4.webhop.net/Silver, to see if this article is worth reading.
The tool is free, and available for download from http://www.z-software.com.
The tool will not only generate the code, but will also compile it so when you download your project it is ready to be used, and that’s where we will start our journey here.
The tool works by you submitting the database schema to the Z-Software server, and after a few minutes, you download a completed project which includes the SOAP service, the WCF service, and several clients. The download will also include the compiled binaries for the two services needed to connect the Silverlight application to the database server.
The tool you download from Z-Software includes a utility to generate the Silverlight code we are about to discuss here.
Using the code
- Unzip the contents into a folder. We will refer to this folder as ZProjectFolder from now on.
- Navigate to ZProjectFolder\Bin and double-click on WebAppMakerServiceConfig.exe.
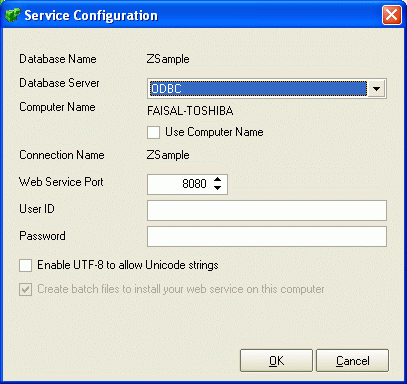
Service Configurations Utility
- Enter the correct parameters, and click OK.
- Navigate to ZProjectFolder\dotNET\Service\<Your-Project>Site and double click ZProjectFolder.
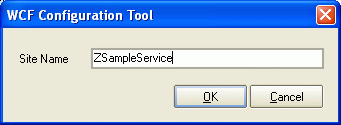
WCF Service Site Configuration Utility
- Enter the site name and press OK.
- You should now have a web site called http://localhost/ZSampleService hosting the WCF service, and you can test it by typing http://localhost/ZSampleService/service.svc in a web browser.
- Start Visual Studio 2008 (SP1 is required).
- Select New Project from the File menu.
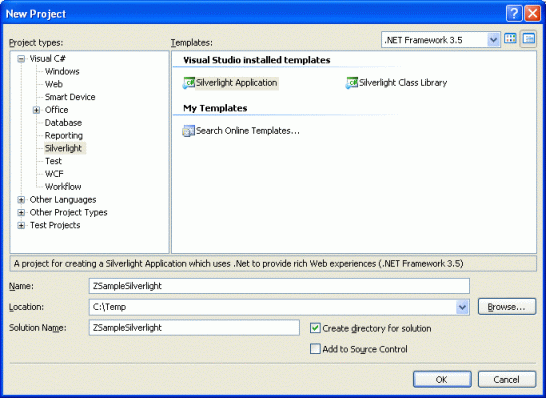
New Silverlight Project
- Enter the project name and press OK.
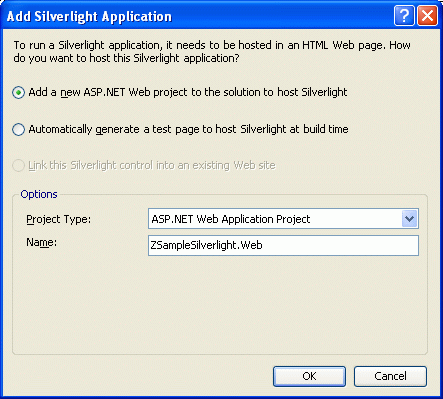
Project options
- Press OK to create the project skeleton.
- Right-click on the project node and select Add Service Reference...
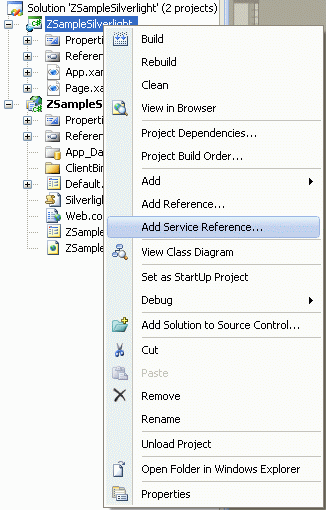
Add Service Reference
- The following dialog will appear:
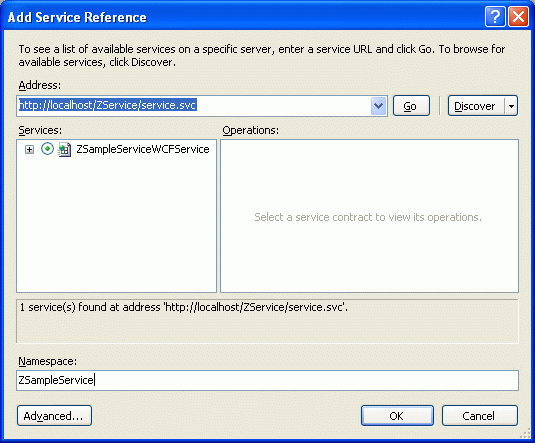
Add Service Reference dialog
- Type the URL that points to the WCF service and press Go.
- The service name should appear in the Services list box on the left.
- Type the name of the service reference, and press OK.
- Start the Z-Silverlight Gold utility, and select the database that was used to create the WCF service from the drop-down list.
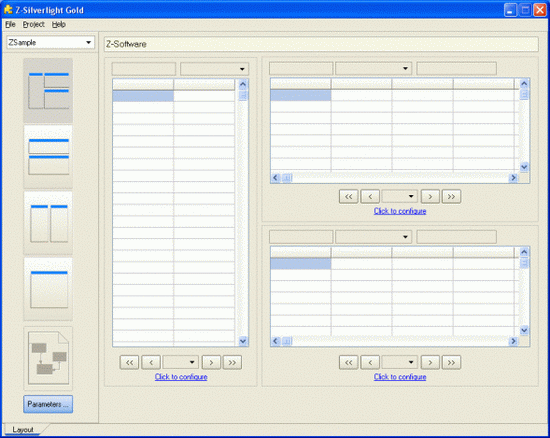
Z-Silverlight Gold
- Select the desired layout, and "Click to configure".

Configure table columns
- Repeat the process for other tables needed for the layout.
- The Relations button will be enabled.

The Relations button enabled
- Click the Relations button and configure the (one to many) relations.
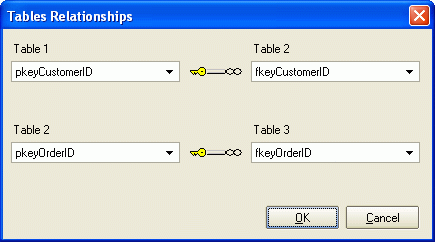
One to Many relations
- Press OK and then press the Parameters button.
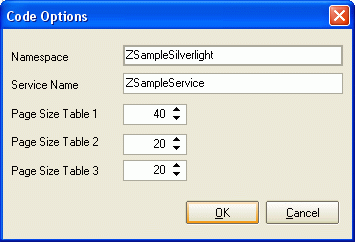
Code options
- Make sure you enter the same namespace you have in your C# project and press OK.
- The XAML and C# tabs will appear.
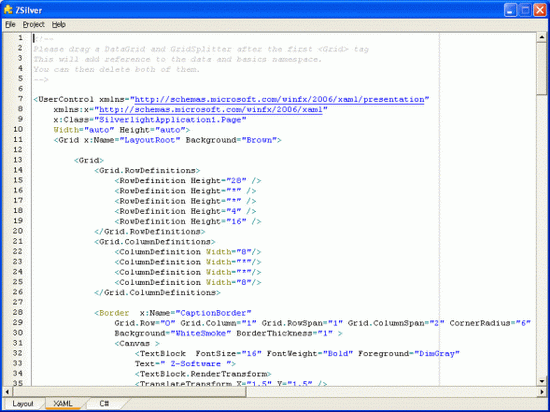
Generated XAML and C# code
- Copy the XAML code and replace the entire Page.XAML code.
- Drag a
Grid and GridSplitter from the Visual Studio Toolbox inside the first <Grid> tag.

- Drag the
Grid and GridSplitter to Add Namespace Reference to XAML Code.
- Make sure that the basics and data namespaces are added without messing up the XAML page.
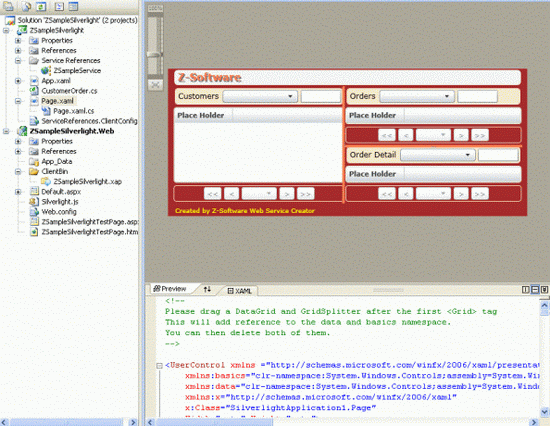
XAML rendered OK
- Right-click on the project and select Add Class...

Add Class
- Enter class name and press OK.
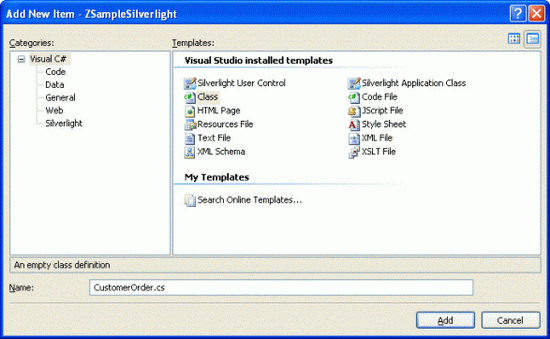
New Class dialog
- Copy the generated C# from the Z-Silverlight Gold tool, and replace the entire class with the generated code.
- Add a call to
zInit(); in the main Page.xaml.cs code.

Call zInit();
- Make sure you have the clientaccesspolicy.xml file in the root folder of your website. If you don't have one, download one from here: http://z-software.com/download/clientaccesspolicy.zip.
- Compile and run the project.
The browser should display the following:
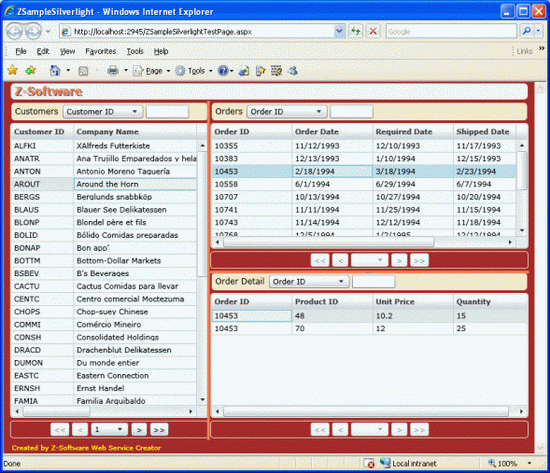
Published database
Points of interest
Make sure that when you drag the Grid or GridSplitter to the XAML code, the reference to the basics and data namespaces are added correctly.
