
Connecting Windows Form Application With ADO.NET in C#
4.83/5 (12 votes)
Connecting Windows Form Application With ADO.NET in C#
Introduction
When you work with database applications, it always needs to connect your application with a database like MSSQL or ORACLE or any others. But for beginners, it's hard to make database connection with the application. Once I faced this problem. So for beginners, now I am going to show you how to connect your application with MSSQL express edition using ADO.NET.
Using the Code
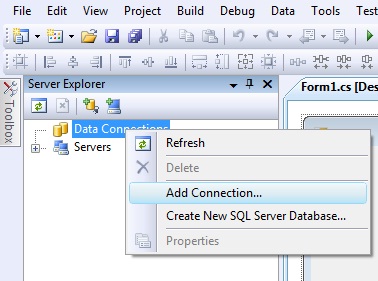
At first, create a winform project. Then go the View menu and click Server Explorer. Right click on the label named Data Connection and click on Add Connection.
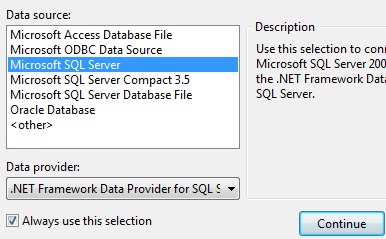
A new window will open. Select Microsoft SQL Server and click continue.
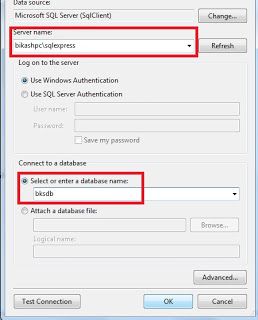
Then another new window will open. Write your server name on the first red rectangle area. Server name will be yourPCname\sqlexpress. Here my PC name is bikashpc. You can get your server name by clicking on the Servers node in Server Explorer window. If there is only one server, then there is no confusion.
Then give a name to your database on the second red rectangle area. Here, I give my database name bksdb. And then click ok.
Your application is now connected with the database. Let's go test it.
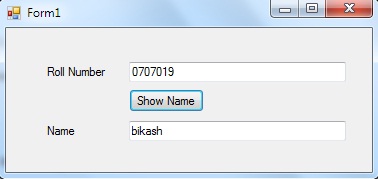
Let's create a form like this:
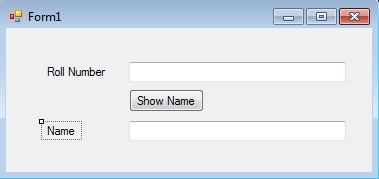
The task is you will put your friend's roll number in the text box and by clicking Show Name button you will get the name of that friend in the name text box. So let's create a table for storing friends' name and roll number.
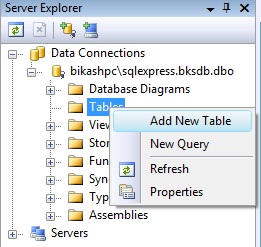
To create a table, go the Server Explorer and click on the + at the left side of your newly created database. It will expand and many other nodes will be shown including Tables,Views and so forth. Right click on the table and click Add New Table.
Then a new tab will open in which you have to put your column name and data type. Write and save table by right clicking on the tab like this:
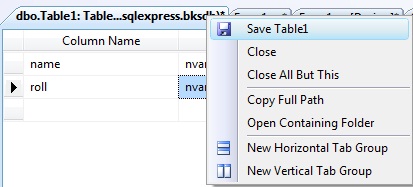
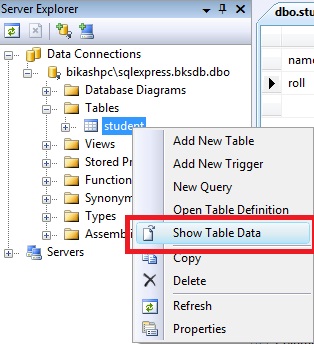
Here I add two columns, name and roll and name my table student. Let's put some data manually in the table. To do that, click the + node of the left side of the table. You can see your table here. Right click on your table name and click Show Table Data.
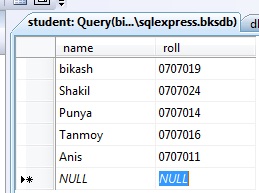
Add some name and roll.
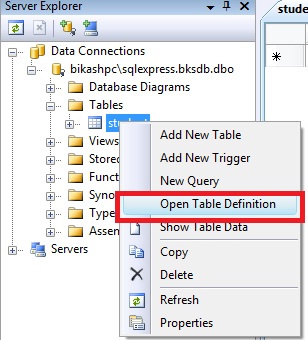
Sometimes, you need to change your table definitions: changing column name, adding column, changing data type and so on. To do that again, right click on your table name and click Open Table Definition.
Then modify what you want.
Let's write some program now for showing data into the text box. Double click on the button Show Name. In the code file, it will look like this:
private void button1_Click(object sender, EventArgs e)
        {
        }
Add namespace for sqlclient on the top of the code file writing the code below:
using System.Data.SqlClient;
Now you have to connect your application by writing some code. In the button action, write:
private void button1_Click(object sender, EventArgs e)
        {
           string connectionString = @"Data Source=bikashpc\sqlexpress;Initial Catalog=bksdb;
                                                            Integrated Security=True";
            SqlConnection sqlCon = new SqlConnection(connectionString);
        }
Your connection is complete.
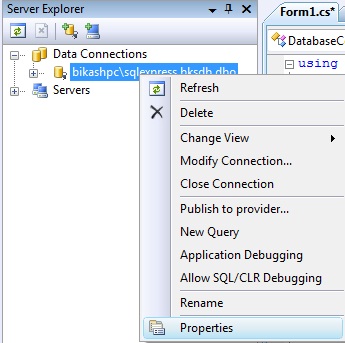
The question is how can you get your connection string. Let's find out your Connectionstring. Again, right click in your created database and click on the Properties:
Properties window will open.
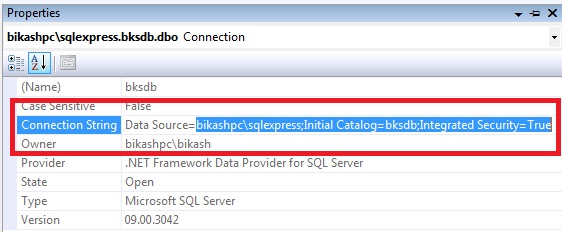
Copy your Data Source and paste it into Data Source of connectionString. So you can now go to fetch data from your database. To do that, you have to open your connection by writing:
sqlCon.Open();
Remember each time you open your connection, you have to close it by writing:
sqlCon.Close();
So let's add some code to your button action.
private void button1_Click(object sender, EventArgs e)
        {
           string connectionString = @"Data Source=bikashpc\sqlexpress;Initial Catalog=bksdb;
                                                       Integrated Security=True";
          SqlConnection sqlCon = new SqlConnection(connectionString);
            sqlCon.Open();
          string commandString = "select name from student where roll='" + textBox1.Text + "'";
            SqlCommand sqlCmd = new SqlCommand(commandString, sqlCon);
            SqlDataReader read = sqlCmd.ExecuteReader();
            while (read.Read())
            {
                textBox2.Text = read["name"].ToString(); // it will show your friend's name
            }
          sqlCon.Close();
        }
Colored portion is used to fetch data from your database and show it in the texbox. Run your program and write a roll number in the textbox and then click the Show Name button. Wow!!!! What you see is your friend's name shown in the name texbox.
This is all to inform you. I think it will help you a lot.
Have fun with C#.