
Multiple Values Slider
5.00/5 (2 votes)
Create and use a multiple value slider
Introduction
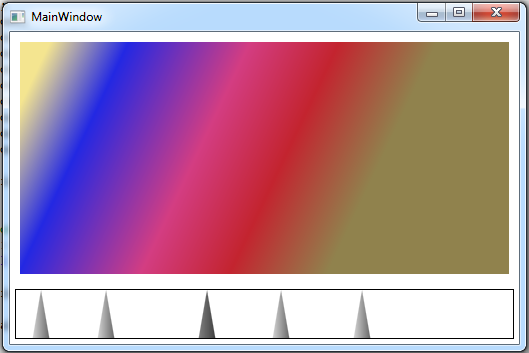
Multiple values slider can be very helpful for creating dynamically gradient brushes with user input.
The slider allows the user to select his own gradient points.
I made it with two classes:
MultiSlider- Type ofUserControl. This class manages all the sliders and raises all the events.MultiSliderPoint- ImplementsSystem.ComponentModel.INotifyPropertyChangingandSystem.ComponentModel.INotifyPropertyChangedinterfaces.
This class handles a single slider. It manages the location and style of the slider as well as the sliding event.
Using the Code
MultiSlider
The easiest way to set an items location is in a System.Windows.Controls.Canvas. The canvas allows you to set the left and top of a displayed object just like Windows Forms. I used the MouseKeyUp event to capture a mouse click that wasn't on any of the existing sliders, on that event I added a new slider at the cursor's X value.
I used an System.Collections.ObjectModel.ObservableCollection of MultiSliderPoints in order to manage the current sliders.
MultiSliderPoint
To display the slider, I used a System.Windows.Shapes.Polygon. I added four points in order to create a triangle.
Polygon.Points.Add(new Point(0, 10));
Polygon.Points.Add(new Point(5, 0));
Polygon.Points.Add(new Point(10, 10));
Polygon.Points.Add(new Point(0, 10));
Since the default value of the Polygon's Focusable property is false, you must change it to true in order to allow the selection of the slider.
Polygon.Focusable = true;
The constructor gets the center of the polygon and the canvas to put it in.
public MultiSliderPoint(double center, Panel parent)
{
    this.Parent = parent;
    this.Polygon = new Polygon { Width = defaultWidth, Height = defaultHeight };
    if (parent != null)
        this.Center = center;
    Polygon.Points.Add(new Point(0, 10));
    Polygon.Points.Add(new Point(5, 0));
    Polygon.Points.Add(new Point(10, 10));
    Polygon.Points.Add(new Point(0, 10));
    Polygon.MouseMove += Polygon_MouseMove;
    Polygon.MouseUp += Polygon_MouseUp;
    Polygon.MouseDown += Polygon_Down;
    Polygon.Focusable = true;
}
The slider must know its parent in order to add the polygon and calculate its location.
The sliding is done at the MouseMove event. Easy to do, all you need is just to update the Left value of the polygon with a value relative to the cursor's X value. The problem occurs when the user does a swift motion that slips out of the polygon unintentionally. I solved this problem by capturing the mouse on the MouseDown event and releasing the capture on the MouseUp event.
private void Polygon_MouseMove(object sender, MouseEventArgs e)
{
    if (e.LeftButton != MouseButtonState.Pressed) return;
    var poly = sender as Polygon;
    var point = Mouse.GetPosition(this.Parent);
    var center = point.X;
    if (center >= 0 && center <= this.Parent.Width)
        this.Center = center;
}

private void Polygon_MouseUp(object sender, MouseEventArgs e)
{
    var poly = sender as Polygon;
    poly.ReleaseMouseCapture();
}

private void Polygon_Down(object sender, MouseEventArgs e)
{
    var poly = sender as Polygon;
    poly.CaptureMouse();
    poly.Focus();
}
The capture prevents the mouse from leaving the polygon even though if you look closely, it's not over the polygon.
The center value is calculated as the left value minus half of the polygon width. The left value is implemented as such:
internal double Left
{
    get { return (double)Polygon.GetValue(Canvas.LeftProperty); }
    set
    {
        var changing = value == this.Left;
        if (changing)
            OnPropertyChanging(new System.ComponentModel.PropertyChangingEventArgs("Left"));
        Polygon.SetValue(Canvas.LeftProperty, value);
        if (changing)
            OnPropertyChanged(new System.ComponentModel.PropertyChangedEventArgs("Left"));
    }
}
To handle size changes, I used the System.Windows.Controls.Viewbox. If I didn't use it, I would've needed to calculate the points of the polygon according to the size of the parent as well as calculating the center. The viewbox lets me work in a static size and it handles the rest.