
Content
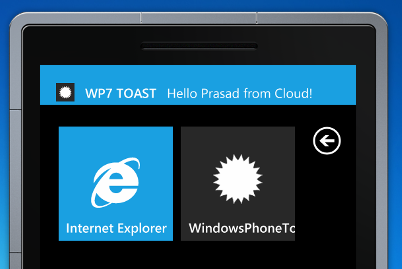
In this post, I am going to show the step by step approach to create the Toast Notification on Windows Phone7.
Before that, you need to understand what is Microsoft Push Notification. To understand Windows Phone 7 notifications and flow, please go through my earlier post from the below link:
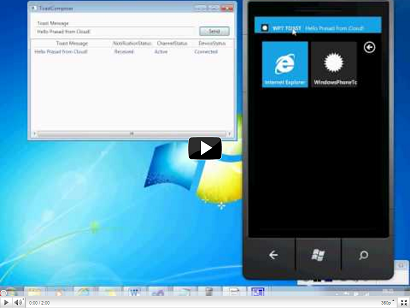
Please go through the 2 minute ToastNotification YouTube demo.
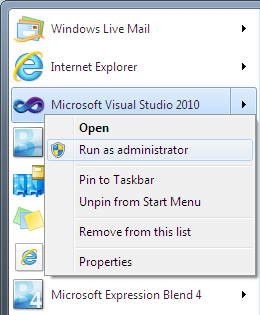
First let us start by creating the “Windows Azure Cloud Service with WCF Service Web Role”. Start Visual Studio 2010 with (UAC Account):
In the menu File->New->Projects, choose the project template “Windows Azure Cloud Service” and name it as MyCloudService accordingly.

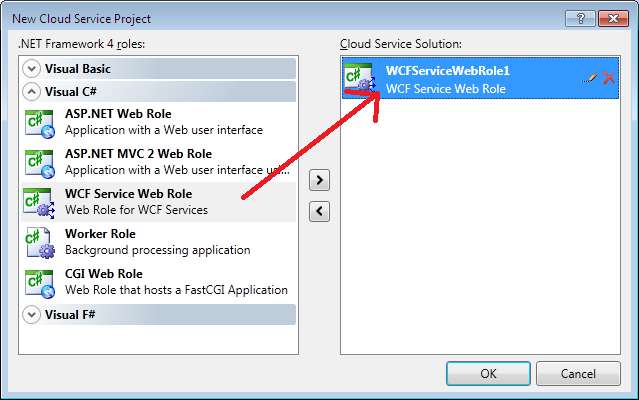
In the new Cloud Service project dialog, select the WCF Service web role and add to cloud service solution list and Click on Ok button.
In the IService1.cs interface file, just clear the auto generated code related to Composite type that is [DataContract] and methods that is [OperationContract] and create 2 interface methods [OperationContract] as shown below… One is to subscribe from Windows Phone 7 and the other is used to sendNotification from WPF Application.
using System;
using System.Collections.Generic;
using System.Linq;
using System.Runtime.Serialization;
using System.ServiceModel;
using System.ServiceModel.Web;
using System.Text;

namespace WCFServiceWebRole1
{
    [ServiceContract]
    public interface IService1
    {
        [OperationContract]
         void Subscribe(string uri);

        [OperationContract]
        string SendToastNotification(string message);
    }
}
Create the class DeviceRef ChannelURI with public property.
public class DeviceRef
{
    public DeviceRef(string channelURI)
    {
        ChannelURI = channelURI;
    }
    public string ChannelURI { get; set; }
}
In the Service1.svc.cs file, we need to implement interface methods. Below is the complete code:
using System;
using System.Collections.Generic;
using System.Linq;
using System.Runtime.Serialization;
using System.ServiceModel;
using System.ServiceModel.Web;
using System.Text;
using System.Collections.ObjectModel; using System.Net; using System.IO;
namespace WCFServiceWebRole1
{
public class Service1 : IService1
{
static Collection<deviceref> DeviceRefCollection = new Collection<deviceref>();
public void Subscribe(string channelURI)
{
DeviceRefCollection.Add(new DeviceRef(channelURI));
}
public string SendToastNotification(string message)
{
string notificationStatus = "";
string notificationChannelStatus = "";
string deviceConnectionStatus = "";
foreach (DeviceRef item in DeviceRefCollection)
{
HttpWebRequest request = (HttpWebRequest)WebRequest.Create
(item.ChannelURI);
request.Method = "POST";
request.ContentType = "text/xml; charset=utf-8";
request.Headers["X-MessageID"] = Guid.NewGuid().ToString();
request.Headers.Add("X-NotificationClass", "2");
request.Headers.Add("X-WindowsPhone-Target", "toast");
string notificationData = "<?xml version=\"1.0\" encoding=\"utf-8\"?>" +
"<wp:Notification xmlns:wp=\"WPNotification\">" +
"<wp:Toast>" +
"<wp:Text1>WP7 TOAST</wp:Text1>" +
"<wp:Text2>" + message + "</wp:Text2>" +
"</wp:Toast>" +
"</wp:Notification>";
byte[] contents = Encoding.Default.GetBytes(notificationData);
request.ContentLength = contents.Length;
using (Stream requestStream = request.GetRequestStream())
{
requestStream.Write(contents, 0, contents.Length);
}
using (HttpWebResponse response = (HttpWebResponse)request.GetResponse())
{
notificationStatus = response.Headers["X-NotificationStatus"];
notificationChannelStatus = response.Headers["X-SubscriptionStatus"];
deviceConnectionStatus = response.Headers["X-DeviceConnectionStatus"];
}
}
return notificationStatus + " : " + notificationChannelStatus +
" : " + deviceConnectionStatus;
}
}
public class DeviceRef
{
public DeviceRef(string channelURI)
{
ChannelURI = channelURI;
}
public string ChannelURI { get; set; }
}
}
Build the Windows Azure Cloud Service project and run. On the system tray, the below icon will appear related to cloud development fabric and development storage.

Verify the IP address with port in the development fabric.

The browser will be launched with the same IP address and port number, please provide the servicename for example service1.svc at the end of the URL if Service1.svc is not found.

Now the “Windows Azure cloud service with WCF web role” is ready to serve.
Second let us create the new project “WPF Application to send Notification”.
Create new WPF Application with the name “WPFNotificationComposer” as shown below:

Go to reference in the solution explorer and right click on that and choose Add Service Reference… in the popup menu as shown below:

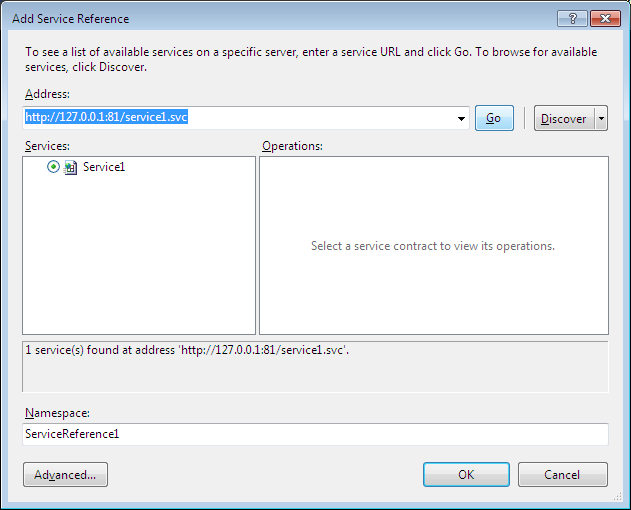
In the Add Service Reference Dialog, Enter the URL of the cloud service in the Address:, in this case, it is http://127.0.0.1:81/Service1.svc.
Give the name to the Namespace: ServiceReference1.
Click on Go button and then Click on Ok button once the Service1 is listed as below in the Services:
MainWindow.xaml
In the MainWindow.xaml, just add 4 controls, label, textbox, button and listview and design as shown below:
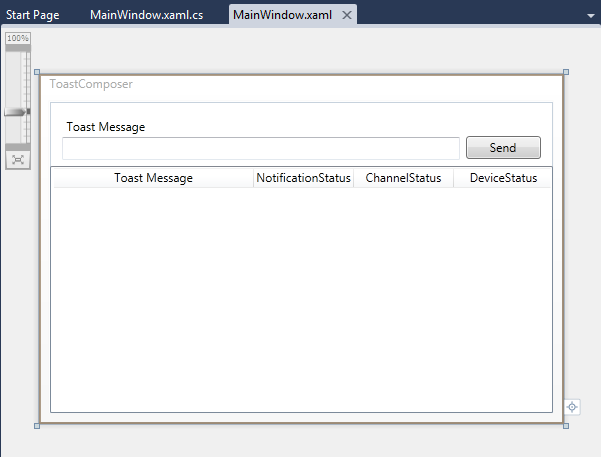
Below is the complete MainWindow.xaml code:
<Window x:Class="WpfAppNotificationComposer.MainWindow"
        xmlns="http://schemas.microsoft.com/winfx/2006/xaml/presentation"
        xmlns:x="http://schemas.microsoft.com/winfx/2006/xaml"
        Title="ToastComposer" Height="350" Width="525">
    <Grid>
        <TextBox Height="23" HorizontalAlignment="Left"
	Margin="12,35,0,0" Name="txtToast" VerticalAlignment="Top" Width="398" />
        <Button Content="Send" Height="23" HorizontalAlignment="Right"
	Margin="0,34,12,0" Name="btnSend" VerticalAlignment="Top" Width="75"
	Click="btnSend_Click" />
        <Label Content="Toast Message" Height="28" HorizontalAlignment="Left"
	Margin="12,12,0,0" Name="lblToast" VerticalAlignment="Top" />
        <ListView Margin="0,64,0,0" x:Name="lvStatus">
            <ListView.View>
                <GridView>
                    <GridViewColumn Width="200" Header="Toast Message"
			DisplayMemberBinding="{Binding Path=ToastMessage}" />
                    <GridViewColumn Width="100" Header="NotificationStatus"
			DisplayMemberBinding="{Binding Path=NotificationStatus}" />
                    <GridViewColumn Width="100" Header="ChannelStatus"
			DisplayMemberBinding="{Binding Path=ChannelStatus}" />
                    <GridViewColumn Width="100" Header="DeviceStatus"
			DisplayMemberBinding="{Binding Path=DeviceStatus}" />
                </GridView>
            </ListView.View>
        </ListView>

    </Grid>
</Window>
MainWindow.xaml.cs created a class ToastStatus and created a Service1Client object for Cloud service, and on the send button click event, called the cloud service and added the status to listview accordingly.
using System;
using System.Collections.Generic;
using System.Linq;
using System.Text;
using System.Windows;
using System.Windows.Controls;
using System.Windows.Data;
using System.Windows.Documents;
using System.Windows.Input;
using System.Windows.Media;
using System.Windows.Media.Imaging;
using System.Windows.Navigation;
using System.Windows.Shapes;
namespace WpfAppNotificationComposer
{
public partial class MainWindow : Window
{
private ServiceReference1.Service1Client proxy = null;
public MainWindow()
{
InitializeComponent();
}
private void btnSend_Click(object sender, RoutedEventArgs e)
{
if (proxy == null)
{
proxy = new ServiceReference1.Service1Client();
}
string status = proxy.SendToastNotification(txtToast.Text);
string[] words = status.Split(':');
lvStatus.Items.Add(new ToastStatus(txtToast.Text.Trim(),
words[0].Trim(), words[1].Trim(), words[2].Trim()));
}
}
public class ToastStatus
{
public ToastStatus(string toastMessage,string notificationStatus,
string channelStatus,string deviceStatus)
{
ToastMessage = toastMessage;
NotificationStatus = notificationStatus;
ChannelStatus = channelStatus;
DeviceStatus = deviceStatus;
}
public string ToastMessage { get; set; }
public string NotificationStatus { get; set; }
public string ChannelStatus { get; set; }
public string DeviceStatus { get; set; }
}
}
Just build and Run the project.
Now the “WPF Application to send notification” is ready to Compose & Send toast message.
Third and finally, let us create the new project “Windows Phone Application to receive notification”.
Start Visual Studio 2010 as administrator (UAC Account).
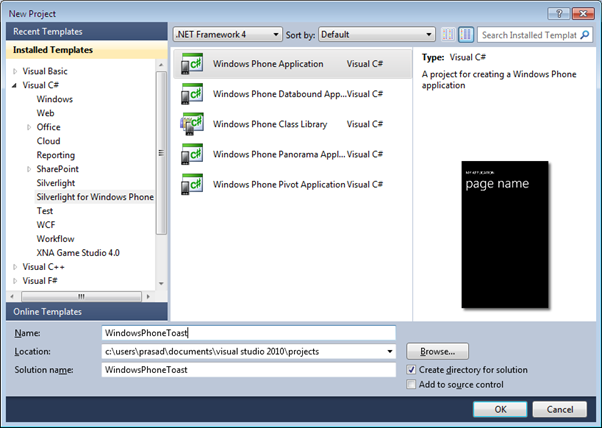
In the new projects template, choose the “Windows phone Application”. Name it as “WindowsPhoneToast” and click on Ok button.
Add service reference Cloud Service in the same way we added in the WpfAppNotificationComposer project, give the name to the Namespace: MyCloudServiceReference1.
In the app.xaml.cs, add the following reference:
using Microsoft.Phone.Notification; using System.Diagnostics;
Declare class level channel variable:
public static HttpNotificationChannel channel;
In the public App() constructor, just add the notification related code below InitializePhoneApplication();
InitializePhoneApplication();
channel = HttpNotificationChannel.Find("MyChannel");
if (channel == null)
{
channel = new HttpNotificationChannel("MyChannel");
System.Threading.Thread.Sleep((30 * 1000)); channel.ChannelUriUpdated += new EventHandler<
notificationchannelurieventargs>(channel_ChannelUriUpdated);
channel.Open();
}
if (!channel.IsShellToastBound)
channel.BindToShellToast();
channel.ErrorOccurred += new EventHandler<
notificationchannelerroreventargs>(channel_ErrorOccurred);
}
Add the following event handlers accordingly:
void channel_ErrorOccurred(object sender, NotificationChannelErrorEventArgs e)
{
Debug.WriteLine("An error occurred while initializing the notification channel");
Debug.WriteLine(e.Message);
}
void channel_ChannelUriUpdated(object sender, NotificationChannelUriEventArgs e)
{
MyCloudServiceReference1.Service1Client proxy =
new MyCloudServiceReference1.Service1Client();
Debug.WriteLine(e.ChannelUri.AbsoluteUri);
proxy.SubscribeCompleted += new EventHandler<
system.componentmodel.asynccompletedeventargs>(proxy_SubscribeCompleted);
proxy.SubscribeAsync(e.ChannelUri.AbsoluteUri);
}
void proxy_SubscribeCompleted(object sender,
System.ComponentModel.AsyncCompletedEventArgs e)
{
Debug.WriteLine("Successfully Subscribed");
}
We are done with the coding. Now launch the Windows Phone 7 app on the emulator.
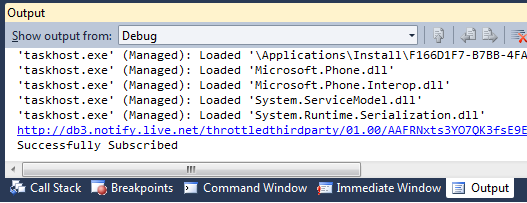
While running this Windows Phone 7 application, it will generate the unique URI from Microsoft Cloud Service as shown below and also it will subscribe the unique URI generated from Microsoft Cloud Service to the cloud service written above. And if cloud service created above is not running, we have to first launch the cloud service created above.
Once the application is running on the Emulator, we have to pin the Windows phone application to the start/home screen. please go through my earlier post.
How to Pin/Un Pin applications to Start/Home Screen on Windows Phone 7/Tiles on Windows Phone 7.
Stay in the start page of the Windows phone 7 after pinning the WindowsPhoneToast application.
Now run the ToastComposer – the WPF application created above.
Enter the toast message and click on send button:
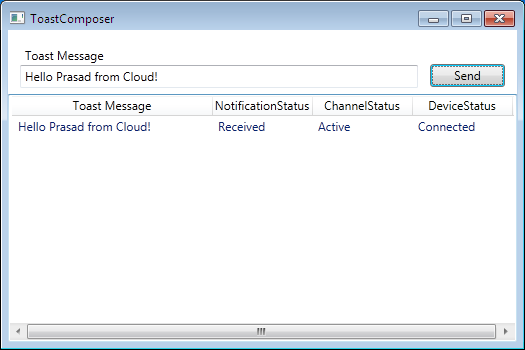
To understand the status, please go through the
Push Notification Service Response Codes for Windows Phone from MSDN.
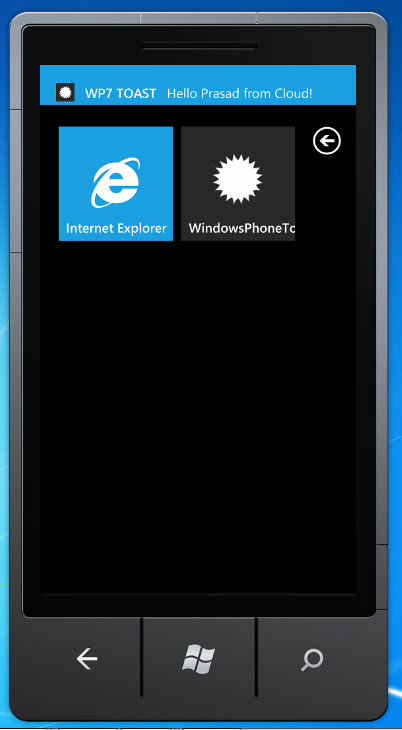
Now go back to the Windows Phone 7 Emulator and verify the toast message. Even when application is not running, we are able to receive the toast if the application is pinned to start.
Thank you. :)
- 10th December, 2010: Initial posting
