Introduction
JavaScript is an incredibly powerful scripting language. You can create all sorts of cool effects using different features provided by JavaScript. One of the coolest effects is the drag and drop feature. As the name implies, you can drag the items on the screen and drop it anywhere, hence changing the position of the items. Usually the draggable item is dropped in the zone known as the drop zone. In this article I will cover the basics of the drag and drop functionality provided by the JavaScript.
Creating a Drag Element
You can create any HTML element as the drag element. I prefer to use the <DIV> elements since they can contain other HTML elements. In the code below I have created a very simple <DIV> element.
The class dragElement gives the basic look for the element.
Creating the Drop Zone
Drop Zones represent the area in which the draggable element can be dropped. The basic idea behind the drop zone is to give the user certain options where they can drop the item. This way they won't be able to drop the item anywhere on the screen. It is also very important that when the user is in drop zone it should alert the user that you are in the drop zone. This can be done by changing the background color of the drop zone or adding different borders. Let's see how we create the drop zone.
<div id="dZone" style="position:absolute; top:100px; right:200; width:300px;
    height:300px" class="DefaultDropZoneColor">
        Drop Zone 1
</div>

<div id="dZone2" class="DefaultDropZoneColor" style="position:absolute;
    top:500px; right:200px; width:300px; height:300px">
        Drop Zone 2
</div>

<div id="dZone3" class="DefaultDropZoneColor" style="position:absolute;
    top:300;right:100px; width:100px; height:200px">
        Drop Zone 3
</div>
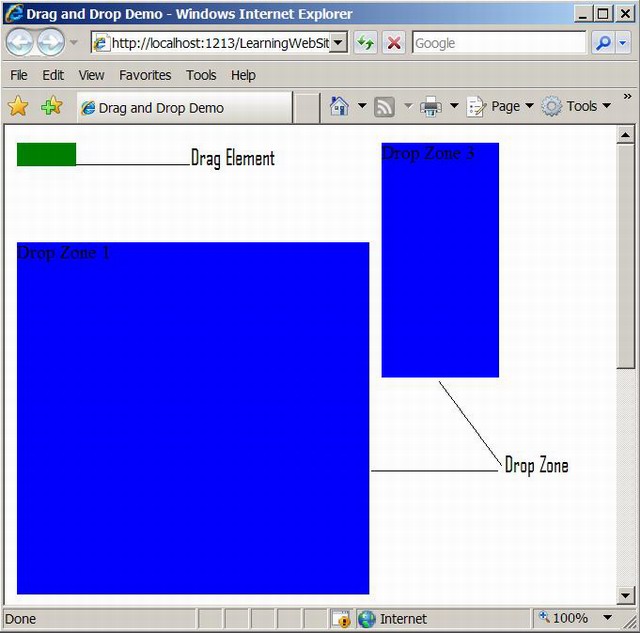
As, you can see in the code the drop zone are just simple DIV elements. Take a look at the screen shot below:
Drag and Drop Implementation
Now, let's see how you can make the element draggable. The function MakeElementDraggable is fired on the window.onload event. The parameter of the MakeElementDraggable is the element which is to be dragged. In this case the element is a DIV element whose id is "a".
window.onload = MakeElementDraggable(document.getElementById("a"));
The function MakeElementDraggable does not call any functions but registers an onmouseodown event handler to the InitiateDrag function.
function InitiateDrag(e)
{
    var evt = e || window.event;

    startX = parseInt(evt.clientX);
    startY = parseInt(evt.clientY);

    obj.style.top = parseInt(startY) + 'px';
    obj.style.left = parseInt(startX) + 'px';

    document.onmousemove = Drag;
    document.onmouseup = Drop;

    return false;
}
The InitiateDrag function set's the object's position to the mouse location and registers the onmousemove and onmouseup events. The onmousemove event fires the Drag function.
function Drag(e)
{
var dropZoneObject;
var evt = e || window.event;
obj.style.top = evt.clientY + 'px';
obj.style.left = evt.clientX + 'px';
if(IsInDropZone(evt))
{
dropZoneObject = evt.srcElement;
dropZoneObject.className = 'highlightDropZone';
}
else
{
ResetColor();
}
}
Inside the Drag function we check that if the drag element is inside the drop zone or not. This is done by the IsInDropZone function which iterates through the dropZone array and finds if the drag element is contained by the drop zone element. The dropZoneArray is declared as a global JavaScript variable.
var dropZoneArray = new Array(5);
dropZoneArray[0] = "dZone";
dropZoneArray[1] = "dZone2";
dropZoneArray[2] = "dZone3";
function IsInDropZone(evt)
{
var result = false;
var obj = evt.srcElement;
for(i = 0; i < dropZoneArray.length; i++)
{
if(obj.id == dropZoneArray[i])
{
result = true;
break;
}
}
return result;
}
Finally, the Drop function is fired when the onmouseup event occurs.
function Drop(e)
{
var evt = e || window.event;
if(IsInDropZone(evt))
{
document.onmouseup = null;
document.onmousemove = null;
}
}
The element is only dropped when the object is inside the DropZone. We set the document.onmouseup and document.onmousemove to null and hence it ends the drag.
Conclusion
Drag and drop is a handy feature that can be used to make the website more interactive. The code presented in this article works only on IE but with just a few modifications it can work on Mozilla.
I hope you liked the article, happy coding!


 General
  News
News  Suggestion
  Question
  Bug
Bug  Answer
  Joke
Joke  Praise
  Rant
Rant  Admin
Admin 


