Overview
Using SharePoint
to offer users the ability to fill out forms and archive them in SharePoint is
a very common requirement. In SharePoint you can add different type of
workflows for approval etc to them. Doing this without some extra product is
not an ideal solution. I struggle with this since WSS 3.0 . I will show you a
solution that will do this without any cost or add on.
Introduction
When it
comes to document management where users have to fill out forms in SharePoint and store them in a List or
Document Library you have mainly three
options.
- InfoPath
(The suggested way, together with forms services a nice solution)
- Office
documents (You could integrate them in the document library menu and have a
nice solution too. You could also add a conversion service to archive them in
PDF format.)
- You
use a SharePoint form and add all fields you want to use in your form as
columns and store them in a SharePoint List or SharePoint Document Library
using content types.
If you have
the right budget at hand, the first two options are pretty good solutions.
The third option will solve the problem too, but is not what I had in mind. My
intention was to give the user some kind of “read only” document they could
print and watch.
A fillable
PDF form would fit perfectly to that requirements but I didn’t see any way how
to automatically upload the filled out PDF document without any third party
tool using the Adobe Reader. (I didn’t added it to the list of options because
I have never seen this work, I’ve just looked over the products on the internet.)
What I came
to was a solution where the user has an HTML document where she/he can fill out
form fields and finally store a “read only” copy of the document in a Document
Library.
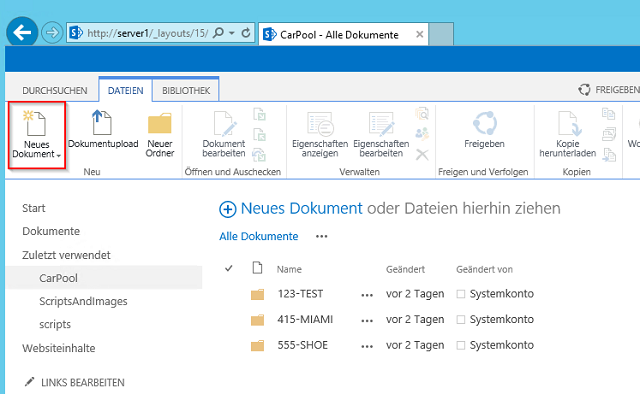
This is what it will look like if you add a new document to a SharePoint Document Library:
Select the document type:

Fill out the fields and upload them:
Notice the document in the document library:
And finally the archived document:
All this is
done by adding one html file to the SharePoint folder and store document
templates, images and JQuery in a SharePoint document library.
All file
editing is done using SharePoint designer
Background
Technical
details
All this
works by adding a html file to the Sharepoint directory within the file system
of the server. This redirector is needed to give us the ability to add our menu
entry at the new document dialog of the document library.
Another
thing we need is a space in a document library where we can place the JQuery library
file. This location should be readable by anybody.
As a last piece we need two document libraries,
one which stores the HTML template, the menu HTML file and the images for the
menu (called SriptsAndMenus in the sample) and a second one where we would like
to store our documents (called Cars in the sample).
To structure the data within the library, we have to manually generate a folder
for every car named by the number plate.
This hasn’t be done, but it will give us the advantage that all documents for
one car are in one pool (the folder) and can easily found.
The sample
project
For this
article I prepared an archive with files that implement a requirement for a
department that runs a car pool for a company.
They have
this kind of forms where people should be able to fill data in fields:
| Form
name
| Description
|
| Acquisition report
| Has
to be filled out whenever a new car is coming into the pool
|
| Washing report
| Has to be filled out
when the car was washed
|
| Maintenance report
| Has
to be filled out when maintenance (interval) was done
|
| Tire replacement report
| Has to be filled out
when tires were replaced
|
| Oil replacement report
| Has
to be filled out when the oil was replaced
|
| Repair report
| Has to be filled out
when some kind of repair was done
|
| Note report
| Has
to be filled if some kind of information for that car should be filed
|
| Disposal report
| Has to be filled out
when the car is disposed
|
Step by
step installation manual
For the
step by step manual I made a clean installation of Server 2012 and installed
SharePoint Server 2013 Foundation on it, so we start with an unmodified system.
All screenshots are made on a German system (preferred an English one, but
didn’t had a media and not time to wait for the GB download…).
In my
example my domain name is “test.local”, the server is named “server1” and the
site collection name is “sc1”.
Prerequisites:
- A
running SharePoint 2013 or SharePoint 2013 Foundation installation on a Windows
Server 2012. SharePoint 2010 may work too if the REST interfaces is configured.
(untested)
If you plan to install it in a farm environment, please notice that the
installation has to be done on all Frontend servers if you have some kind of
load balancing. - The
attached SP_CarPool.zip
- SharePoint
Designer 2013 (only if you plan to look at/modify the files in SharePoint)
[It’s free and greatly supports you when doing customizations, so there no
reason for not using it.]
Step 1: Configuring SharePoint
SharePoint has to be enabled to allow opening of .html pages in document libraries. This can be done in Central Administration at General Settings. Change the “Browser File Handling” option from Strict to Permissive.
Open Central Administration and open the list of Web Applications:
Select the SharePoint application:
Select General Settings from the General Settings menu:
At the “Browser File Handling” option select Permissive and save the changes:
Step 2: Extract the archive
Extract the SP_CarPool archive and you will find three folders:
- jquery
Contains the jquery .js file and the license terms for jquery - Redirector
Contains the redirector.aspx page that does the page
redirection for the user menu page as well as a textfile that describes
the Targetfolder of the redirector.aspx file for easier deployment. - ScriptsAndImages
Contains the folder scripts where all the html files
are located and the folder Images where all images used in the menu
page are located. Please notice the license in the license file for the
images.
Step 3: Copy jquery
Create a Document Library called “scripts” that is available to every user (read only access right) and copy the file jquery-2.0.3.min.js to it.
Create the Document Library:
Enter the name for the Document Library:
Open the newly created Document Library:
Upload the jquery file:
Finally we have it in the document library:
Press the right mouse button on the file and copy the path to the document:
We need this as it is our absolute path to the jquery file.
In my case it is:” http://server1/scripts/jquery-2.0.3.min.js ” (We will need this link in every forms document as a reference. If it differs at your server, you have to adjust it in the html files.)
Step 4: Copy the redirector.aspx file
Open the source redirector folder you extracted and open the “Targetfolder” text file:
Mark all of its content and press the right mouse button and select copy:
Open an additional Explorer window and copy the path in the location line:
Now drag and drop the redirector.aspx file from the first explorer window to the second to copy it:
Please notice that the .NET compiler is rebuilding the application due to modification in the .aspx LAYOUTS folder. This will make the next page access in SharePoint a little slower.
Step 5: Create the ScriptsAndImages Document Library
Create it the same way as you did for the scripts folder. The result should look like this:
To copy the files switch over to SharePoint Designer by using the SharePoint menu:
In SPD open the newly created Document Library:
Now drag and drop both folders from the extracted archive to the SPD window:
The result should look like this:
Step 6: Create the target document library
Create one last Document Library called CarPool using the Internet Explorer (or SPD, the result will be the same):
Add this folders to it using the add folder function:
- 555-SHOE
- 415-MIAMI
- 123-TEST
(Each folder will represent a car within the pool.)
Step 7: Enable content types and create a “New Document” button
To enable content types select the CarPool Document Library and open the Library settings:
Proceed to the advanced settings:
Set allow content types to yes and don't save now:
Scroll down a little bit and enable to open dialogs in a popup and click OK to save:
In the next step we have to create a new content type that shows our custom menu when selected.
For that scroll a little down at the page you are now to Content Types and select Add from existing Content Type:
Select Link “To a Document” as the base type:
After pressing O.K. you go back to the previous page. Scroll down again to the content types and select the previously created content type:
Click on Name and Description to provide it with a name:
Enter the name and the description:
Open the advanced settings:
In the document template link add this URL:
/_layouts/15/Redirector.aspx?newurl=http://server1/ScriptsAndImages/Scripts/CarMenu.html
(It redirects to the CarMenu.html page vie the Redirector.aspx.) :
Use the back button several times to come back to the page with the content types and select the “Document” content type:
Delete it using the “Delete this content type” link:
Finally we can do some tests by adding a few documents:
And instantly a tire replacement:
And when we open the documents:
Using the code
How to use it for your own projects:
First of all let’s check how it all works: We
have a webpage (CarMenu.html) that was bound to a SharePoint menu
button using a custom content type. That webpage loads a form where the
user is able to fill data in.
When the user press the save button,
the document will be transferred in a read only state and uploaded to a
Document Library for later use.
Think about your process. What
kind of documents do you need and what fields have to be filled. Do you
need some kind of document isolation (like the number plate numbers) or
can all documents go in one big pool.
When you installed the demo
project, you already have most of it. Just create a document library and
copy & rename the CarMenu.html and one of the form documents (e.g.:
Car_Acquisition.html) to it. This would be your base where to start.
If you have only one or two documents in your process you might don’t
need the menu popup. In that case just create multiple content types and
link directly to the “new document” pages. If you plan to use a menu than you have to adjust two code parts in the menu file:
The first one is the title that is displayed at the top of the menu, the second one is the menu content. The format for the menu entries is the shown image, followed by the menu entry text and at the end the documents URL that should be used when clicking the menu item.
In the forms document that are several points where you have to do adjustments.
The page title:
Just add a page title that describes the process.
Document specific settings:
Most settings are done in one code block:
- In the
mandatoryFields array you can ids of fields that should be checked for any input before the data is send to the server. Please have in mind that you have to mark the fields as mandatory by yourself (I use a red star for that). - The pathOfSite has to be filled if your site is deeper in the SharePoint hirarchie.
- Tha nameOfDocumentLibrary has to be filled with the name of the Document Library where the document should be stored. Spaces have to be replaced by %20 !
- The showSubfolderSelector enables/disables a dropdown box that has all folders at the top level of the Document Library. Folders that should be hidden should have a name starting with “Z_”.
- The targetFileNamePrefix and the targetFileNamePostfix will be used to build the filename that the document get in the Document Library. The Format is: “Prefix_YYYYMMDD_hhmmssPostfix”.
And finally we need the HTML form itself. It will be defined at the end of the document between the pagecontent tags:
Defining an id for the control:
If you ever plan to use the data the user entered in any other system than SharePoint, than you should define for all input tags a unique id, because controls value that have an id will be stored in a JSON variable which can be parsed in the final read only document:
Going back instead of close the popup:
In case you don’t want to use the forms in popup mode, you have to uncomment the history.back and comment out the
window.frameEelemnt.commitPopup(). This will cause that the browser goes back in history instead of closing the popup frame.
One last advice: If you plan to edit the page code, use SharePointDesigner. Not because I’m getting money for beating the drum for it, just because it makes a lot of things easier and the code completion will help too.
Points of Interest
Most of the code is straight forward, but I want to show a few code parts that are worth of mention them.
Stealing the digest:
$.ajax({
    url: "../_api/contextinfo",
    type: "POST",
    headers: { ACCEPT: "application/json;odata=verbose",  contentType: "application/json;odata=verbose" },
    success: function (data) {
    if(data.d)
    {
     digest = data.d.GetContextWebInformation.FormDigestValue;
    }
    },
    error: function (xhr) {
     alert("Error getting digest:" + xhr.status + ': ' + xhr.statusText+ "\n"+ xhr.responseText);
    }
});
How could
you save a document to a SharePoint without authentication/authorization?
You can’t!
But when the user is at a point where she/he can
access the form, she/he is logged on to SharePoint. We can “steal” the digest (some
kind of session cookie) and use it to upload our form.
Upload the form (or it kept me away from my rest ;) ):
The code that does the upload process took quite a while until it worked.
(Sorry, but the code formatter made errors here, so I add it as a picture):
All it does is using the SharePoint REST interface to upload the content. Getting the right format, so the server accepts it was a work of trial and error.
Conclusion
It’s not
rocket science to set up a HTML form based system for archiving documents in
SharePoint by using jquery and a little HTML with JavaScript. I just put
together all the pieces in the hope that it is useful for you too and the whole
is more than just the sum of its parts.
Legal Stuff
Microsoft,
ASP.NET, Sharepoint, Infopath, Microsoft Office are registered trademarks ofMicrosoft
Corporation in the United States and other countries. (http://www.microsoft.com)
Adobe, Adobe
Acrobat & PDF are TM of Adobe (http://www.adobe.com)
The images
in the car menu page were taken from Axialis free image library and are
licensed “Creative Commons Attribution License“ -> Axialis
History
Version 1.00 initial release 21.10.2013
Version 1.01 small typo and layout fixes 22.10.2013
License for sample code file
The whole article is licensed CPOL.
The code sample (my part) is licensed GPL v3 or later.
The code sample includes jquery which is licensed MIT.
The code sample incudes images from the Axialis image library which is licensed Creative Commons Attribution License.
Please note the included license files.
This member has not yet provided a Biography. Assume it's interesting and varied, and probably something to do with programming.


 General
  News
News  Suggestion
  Question
  Bug
Bug  Answer
  Joke
Joke  Praise
  Rant
Rant  Admin
Admin 


