Introduction
Welcome to a new topic where we will discuss about Nintex Workflows in Office 365.
Why Nintex when we have our own SharePoint Designer Workflows?
Nintex Workflow for Office 365 enables organizations to extend business process automation to more people, places and devices, delivering workflow for everyone. Nintex Workflow adds a drag-and-drop workflow designer, advanced connectivity, and rich workflow features to give customers more power and flexibility.
Nintex gives a user friendly approach and helps us to achieve a lot of functionality in fulfilling our requirements.
So let’s see its features.
Get into the list or Document Library and on the top navigation, you can see Nintex Workflow.
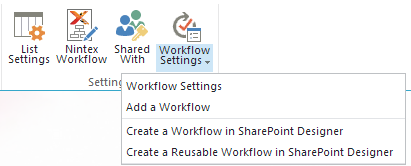
Once you click on it, you will see the below page where you have two options:
- Visit the Nintex Store
- Go to the Designer
Visit the Nintex Store: Yes, you are right. We have a store here, I will cover this in my next blog.
So, let’s go to the Designer.

Here, we are in the Designer page.
Welcome to the New SharePoint Designer Page.
Let’s see the top navigation where we have:
- Save: To save our workflow
- Publish: To make it available and its functionality to start in our list or Document Library.
- New: To create a new workflow
- Open: To open the workflow from the Nintex Library
- Close: To close the workflow
- Import: To import the Nintex Workflow file from other sites
- Export: To Export the Nintex Workflow so that it can be used in other sites
- Variables: To assign the variables to our workflows, you can create them in here as per the screen below
- Store: Coming soon in my next blog
- Then we have Help where you can find all kinds of it in a categorized view like Help, Support, Subscription overview, What’s new and About.
- Lastly we have Feedback, where you can provide feedback to Nintex directly thereby helping them to know your issues directly.
Now let’s come to our actions which are divided into the following:
Let’s discuss them one by one.
Integration
Here, we have the following functionalities under Integration:
- Call HTTP Web Service
- Query XML
- Start Workflow
- Update XML
Libraries & Lists
Here, we have the following functionalities under Libraries & Lists section.
Under the actions of Libraries and Lists, we have:
- Check In Item
- Check Out Item
- Copy Document
- Create List Item
- Delete Item
- Discard Check Out Item
- Office 365 check in items
- Office 365 check out items
- Office 365 create list item
- Office 365 delete items
- Office 365 discard check out
- Office 365 download file
- Office 365 new blog post
- Office 365 query list
- Office 365 send document set to repository
- Office 365 update item permissions
- Office 365 update items
- Office 365 upload file
- Set Field in Current Item
- Translate Document
- Update List Item
- Wait for even in List Item
- Wait for field change in Current Item
Logic & Flow
Here, we have the following functionalities under Logic & Flow section.
It contains the following functions:
- Condition Branch
- Loop N Times
- Loop with Condition
- Parallel Block
- Run If
- Set Next State
- Start Machine
Operations
Here, we have the following functionalities under Operations section:
It contains the following functions:
- Add Time to Date
- Build Dictionary
- Count Items in a Dictionary
- Do Calculation
- Get an Item from a Dictionary
- Log to History List
- Pause for Duration
- Pause until Date
- Set Time Portion of Date/Time Field
- Set Workflow Status
- Set Workflow Variable
User Interactions
Here, we have the following functionalities under User Interactions section:
It contains the following functions:
- Assign a task
- Send an Email
- Start a task Process
Utility
Lastly, here we have the following functionalities under Utility section.
It contains the following functions:
- Extract Substring from End of String
- Extract Substring from Index of String
- Extract Substring from Start of String
- Extract Substring from Index with Length
- Find Interval Between Dates
- Find Substring in String
- Replace Substring in String
- Trim String
So, in conclusion, Nintex is now much better with new functionalities, more options and all in one User friendly way.
Keep learning.
Cheers!
This member has not yet provided a Biography. Assume it's interesting and varied, and probably something to do with programming.


