Introduction
This script allows you to simulate, dimming the page, a pop up window message using a div. You can also use it to create an input window to ask for additional information.
This script has been tested only with Internet Explorer 6.0, Firefox 1.0.7 and Opera 8.51 on Windows 2003 Server.
How It Works
The first peculiarity of this script is to dim the page and to use any div, identified by an id, you write in your HTML code.
To dim the page, my code uses a dynamically added dimmer div having a semi-transparent PNG image as background. The source file contains a few PNG background images.
The script dynamically sets the dimmer's size equal to the window screen size as shown below:
function buildDimmerDiv()
{
document.write('<div id="dimmer" class="dimmer" style="width:'+
window.screen.width + 'px; height:' + window.screen.height +'px"></div>');
}
And this is its CSS style:
div.dimmer
{
visibility: hidden;
position:absolute;
left:0px;
top:0px;
font-family:verdana;
font-weight:bold;
padding:40px;
background-image:url(honey.png);
_background-image:none;
_filter:progid:DXImageTransform.Microsoft.AlphaImageLoader
(enabled=true, sizingMethod=scale src='honey.png');
}
The script changes its visibility to visible before showing the floating div.
document.getElementById('dimmer').style.visibility = "visible";
The second script's feature is the chance to move the div. We are able to do it writing handlers for the main mouse events.
function MouseDown(e)
{
if (over)
{
if (isMozilla) {
objDiv = document.getElementById(DivID);
X=e.layerX;
Y=e.layerY;
return false;
}
else {
objDiv = document.getElementById(DivID);
objDiv = objDiv.style;
X=event.offsetX;
Y=event.offsetY;
}
}
}
function MouseMove(e)
{
if (objDiv) {
if (isMozilla) {
objDiv.style.top = (e.pageY-Y) + 'px';
objDiv.style.left = (e.pageX-X) + 'px';
return false;
}
else
{
objDiv.pixelLeft = event.clientX-X + document.body.scrollLeft;
objDiv.pixelTop = event.clientY-Y + document.body.scrollTop;
return false;
}
}
}
function MouseUp()
{
objDiv = null;
}
function init()
{
isMozilla = (document.all) ? 0 : 1;
if (isMozilla)
{
document.captureEvents(Event.MOUSEDOWN | Event.MOUSEMOVE | Event.MOUSEUP);
}
document.onmousedown = MouseDown;
document.onmousemove = MouseMove;
document.onmouseup = MouseUp;
buildDimmerDiv();
}
How To Use It
The layout of the dimmer and floating div is customizable using the dimming.css file. To use the script, first you must insert the following HTML code in the head section of your page:
<link REL=StyleSheet HREF="dimming.css" TYPE="text/css">
<script LANGUAGE="JavaScript" SRC="dimmingdiv.js">
</script>
Then define in your HTML code, a div containing the code to display:
<!--  the following hidden div will be used by the script -->
<div style="width: 518px; height: 287px;visibility:hidden" id="windowcontent">
            <script language="javascript">
            function Hello()
            {
               alert('Hello '+  document.getElementById('yourname').value + '!');
            }
            </script>
            <table >
            <tr><td colspan="2"></td></tr>
            <tr>
            <td>Your name:</td>
            <td><input type="text" style="width: 292px" id="yourname" /></td>
            </tr>
            <tr>
            <td colspan="2">
            <input type="button" value="Hello button" onclick="Hello();"
                style="width: 119px"/></td>
            </tr>
            <tr><td colspan="2">
Click the left mouse button on the blue header then move the floating div!!!</td></tr>
            </table>
</div>
Call the displayFloatingDiv function to show the div. This function accepts six input parameters:
ID of the div to show title width height left position top position
function displayFloatingDiv(divId, title, width, height, left, top)
{
DivID = divId;
document.getElementById('dimmer').style.visibility = "visible";
document.getElementById(divId).style.width = width + 'px';
document.getElementById(divId).style.height = height + 'px';
document.getElementById(divId).style.left = left + 'px';
document.getElementById(divId).style.top = top + 'px';
var addHeader;
if (originalDivHTML == "")
originalDivHTML = document.getElementById(divId).innerHTML;
addHeader = '<table style="width:' + width + 'px" class="floatingHeader">' +
'<tr><td ondblclick="void(0);" onmouseover="over=true;" onmouseout=
"over=false;" style="cursor:move;height:18px">' + title + '</td>' +
'<td style="width:18px" align="right">
<a href="javascript:hiddenFloatingDiv(\'' + divId + '\');void(0);">' +
'<img title="Close..." alt="Close..." src="close.jpg" border="0" /</a>
</td></tr></table>';
document.getElementById(divId).innerHTML = addHeader + originalDivHTML;
document.getElementById(divId).className = 'dimming';
document.getElementById(divId).style.visibility = "visible";
}
A displayFloatingDiv calling example is shown below:
var w, h, l, t;
w = 400;
h = 200;
l = screen.width/4;
t = screen.height/4;
displayFloatingDiv('windowcontent', 'Floating and Dimming Div', w, h, l, t);
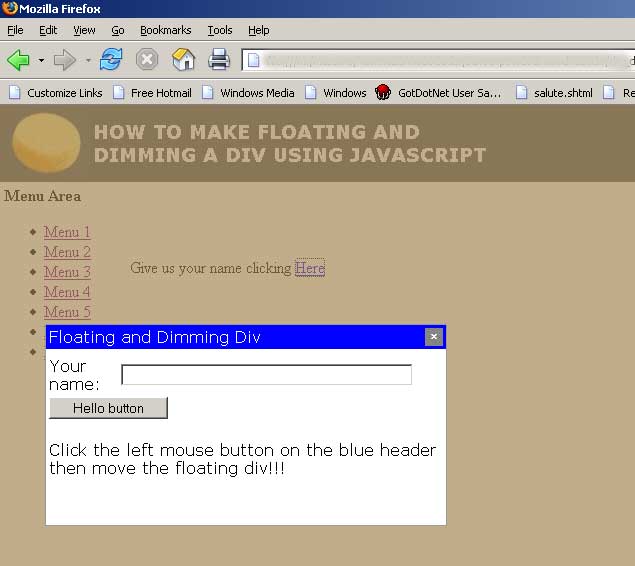
Screenshots

An Internet Explorer screenshot.
An Opera screenshot.
Conclusion
The zip source file contains the script, CSS, PNG images and a demo HTML page.
I hope you enjoy this article.
Code4dotnet
This member has not yet provided a Biography. Assume it's interesting and varied, and probably something to do with programming.


 General
  News
News  Suggestion
  Question
  Bug
Bug  Answer
  Joke
Joke  Praise
  Rant
Rant  Admin
Admin 


 Your script has to run after the ,

