Contents
Introduction
It has been a while since I wrote an article here at CodeProject, so I apologize for that. I have been pretty busy doing, um nothing I guess.
Anyway late last year I found a bit of spare time, so I looked at my to-do / must learn list, and sitting there glaring at me was "Node.Js" in 60 ft letters. So I thought
OK, why not give Node.js a try. At the time I was doing a fair amount of ASP MVC /
jQuery at work, so thought now would be a good time to do this, as I kinda already had my head in the web zone at work, so it would be a good time to give Node.js a go.
So this article is me playing around with Node.js a bit, and coming up with a small demo project. The demo project is tiny as I did not want to overload people with too much, that said the choice of
the demo app I have made ensures (at least in my mind it does) that by the time you have read this article you will get to learn about the following elements:
- Node.Js itself and how a Node.js application is structured (well, one potential way it could be structured, that is)
- Express which is a MVC type Node.js framework
- NPM which is Node Package Management
- Jade view engine
- Stylus which is a CSS generator that works a lot like the popular SASS/LESS CSS generators
- Socket.IO which is a Web Socket package for Node.JS (star of the show if you ask me)
- D3.Js which is a data visualization JavaScript library
- Mongo DB document database Node.js integration
Just for the record, Node.js does not need to be used to create web sites. It can be used just to create servers, it just so happens I have chosen to create a web site with it.
Brief Node.Js Overview
As I have stated I have decided to write this article using Node.js, so what exactly is Node.js? Let's see a few descriptions of it before we carry on, shall we?
Node.js is a platform built on Chrome's JavaScript runtime for easily building fast, scalable network applications. Node.js uses an event-driven, non-blocking I/O model that makes it lightweight and efficient, perfect for data-intensive real-time applications that run across distributed devices.
-- http://nodejs.org/
Node.js is a server side software system designed for writing scalable Internet applications, notably web servers. Programs are written on the server side in JavaScript, using event-driven, asynchronous I/O to minimize overhead and maximize scalability.
Node.js is a packaged compilation of Google's V8 JavaScript engine, the libUV platform abstraction layer, and a core library, which is itself primarily written in JavaScript.
Node.js was created by Ryan Dahl starting in 2009, and its growth is sponsored by Joyent, his employer. Dahl's original goal was to create the ability to make web sites with push capabilities as seen in web applications like Gmail. After trying solutions in several other programming languages he chose JavaScript because of the lack of an existing I/O API. This allowed him to define a convention of non-blocking, event-driven I/O.
--http://en.wikipedia.org/wiki/Nodejs
Here is a trivial node example, where this is a complete implementation of Hello
World as an HTTP server in Node.js:
var http = require('http');

http.createServer(
  function (request, response)
  {
    response.writeHead(200, {'Content-Type': 'text/plain'});
    response.end('Hello World\n');
  }
).listen(8000);

console.log('Server running at http://localhost:8000/');
JS Everywhere
One of the big things that comes by using Node.Js is that you are effectively using JavaScript on both the client and server side code bases,
so if you are familiar with JavaScript the promise is that this single language on both sides of the wire could speed up your development time quite substantially.
Prerequisites
Before we start the break down of how the demo app works, if you intend to actually run the demo code you will need to grab a few things before you start.
These are listed below:
1. Mongo DB
You will need to download and unzip Mongo DB, which is available from here (I chose the Windows 64-bit version, but you will need to pick one that suits your machine specifics):
2. Node.js
You will need to download Node.js, which is available from here:
Node.Js Basics
In this section we will try and examine the inner workings of the demo app. By the end I would hope you know a bit about Node.js and some of its standard components.
Required Packages
Node.Js is geared around packages, kind of like NuGet, where you request a certain package from the package manager and it will download and place the relevant package files in the correct location.
Package management in Node.Js is achieved using the "Node.js Command Prompt", where we use NPM.exe (Node Package Manager) to install the packages.
Here is an example (in fact this is the full example of how I set up the demo codes packages).
These are the steps I followed to install node packages (You will not have to
do this)
It should be noted that the following steps also create a dummy Express (more on this later) application shell.
- From node command prompt
- mkdir WebSocketDemoApp
- cd WebSocketDemoApp
- express -c stylus
- npm install -d
- npm install socket.io
- Edit package.json to include Mongo DB ("mongo DB": ">= 0.9.6-7")
- npm install -d
When you install a package using NPM.exe you should see that the packages file "package.json" is updated (you can also tweak this file a bit if you have very specific requirements, as I did where I wanted to ensure the Mongo DB driver must be > 0.9.6-7 version).
Package.Json
Here is the resulting packages file "package.json" for the attached demo app:
{
  "name": "application-name" ,
  "version": "0.0.1" ,
  "private": true ,
  "scripts": {
    "start": "node app"
  } ,
  "dependencies": {
    "express": "3.0.0rc4" ,
    "jade": "*" ,
    "stylus": "*" ,
	"Mongo dB": ">= 0.9.6-7"
  }
}
What The Packages Typically Look Like
When Node.Js / NPM.exe have successfully downloaded and installed packages they will be placed in a "node_modules" folder:

If we examine one of the package folders, say "Express", we can see that all the relevant files are present:
Note: For the demo app I have obviously installed all the relevant packages for you, so you do not need to do any of that.
So that is essentially how you get packages installed, we will be talking more about packages as the demo app makes use of several packages, so don't worry you will see more on how they are used.
Express (Node.js Package)
Express is a standard Node.js package that provides standard features such as:
- Routing
- Routing data
- Rendering
- HTTP Listener
When you create a new
Express application, you also get a certain folder structure and a skeleton application file. Shown below is a typical empty
Express project:
We will dissect this a bit further as it will help us when we get to look at the real demo app code:
App skeleton
The actual "Node.js application" you get when you create a new
Express application is called "pap's" which contains some skeleton code for you, that provides the following:
- Configuration
- Routing
- Http Listening/Server
Here is what that "app.js" starts out like before it is changed, as it has been for this article's demo code:
var express = require('express')
, routes = require('./routes')
, user = require('./routes/user')
, http = require('http')
, path = require('path');
var app = express();
app.configure(function(){
app.set('port', process.env.PORT || 3000);
app.set('views', __dirname + '/views');
app.set('view engine', 'jade');
app.use(express.favicon());
app.use(express.logger('dev'));
app.use(express.bodyParser());
app.use(express.methodOverride());
app.use(app.router);
app.use(require('stylus').middleware(__dirname + '/public'));
app.use(express.static(path.join(__dirname, 'public')));
});
app.configure('development', function(){
app.use(express.errorHandler());
});
app.get('/', routes.index);
app.get('/users', user.list);
http.createServer(app).listen(app.get('port'), function(){
console.log("Express server listening on port " + app.get('port'));
});
It can be seen that this is mainly broken down into three parts:
- App configuration
- Setting up the routing
- Creating a Http server and starting to listen
Public folder
This contains things that are, um well, public, such as Images/JavaScript/CSS, where you would put the files into the relevant folder:
Routes folder
This folder contains all the code which manage the routes and their views. So you would typically have
- GET/POST handlers
- Rendering views
- Building up models
Here is a small example of one of the views you get with a fresh
Express application:
exports.index = function(req, res){
res.render('index', { title: 'Express' });
};
Views folder
This folder holds the views for your application. Since Jade is the default view engine you get with
Express, all the views you get with a fresh
Express application will be Jade view files. As we will be covering Jade in just a moment, we will save that discussion for the next section.
Jade
Jade is one of the many view engines you can use with Express. It also happens to be the default one that you get when you choose to use
the Node.Js Express package.
Jade is very sophisticated in loads of areas, and really dumb in
one. Unfortunately that one area where it is dumb turns out to be a real sticking point for me.
The Pros
This is what the Jade site lists as the features:
- client-side support great readability
- flexible indentation
- block-expansion
- mixins
- static includes
- attribute interpolation
- code is escaped by default for security
- contextual error reporting at compile & run time
- executable for compiling jade templates via the command line
- html 5 mode (the default doctype)
- optional memory caching
- combine dynamic and static tag classes
- parse tree manipulation via filters
- template inheritance
- block append / prepend
- supports Express JS out of the box
- transparent iteration over objects, arrays, and even non-enumerables via each
- block comments
- no tag prefix
- filters
I guess it may be better to see an example. So let's consider one of the two demo app views, where we can examine the Jade markup and the HTML it produces.
Here is my "layout.jade" page (think master page if you are coming from Microsoft land like I do):
doctype 5
html
  head
  link(rel='stylesheet', href='http://www.codeproject.com/stylesheets/style.css')
  script(src='http://www.codeproject.com/javascripts/jquery-1.8.2.min.js')
  script(src='http://www.codeproject.com/javascripts/d3.v2.js')
  link(rel='stylesheet', href='http://www.codeproject.com/jquery-ui-1.9.1.custom/css/ui-lightness/jquery-ui-1.9.1.custom.css')
  script(src='http://www.codeproject.com/jquery-ui-1.9.1.custom/js/jquery-ui-1.9.1.custom.js')
  block head
body
  div(id='mainContent')
    img(src='http://www.codeproject.com/images/Header.png')
    block content
And here is the demo apps view "home.jade" which is an extending view (that's Jade's way of dealing with Master page like functionality).
Pretty precise, huh?
extends layout

block head
  link(rel='stylesheet', href='http://www.codeproject.com/stylesheets/home.css')
  script(src='http://www.codeproject.com/javascripts/home.js')

block content
  form(method='post', id='homeForm', action='http://localhost:2000/home')
    div(id='dialog', title='error', style='display:none;')
      p(id='homeWarn') You need to supply a valid email
    div(id='NewDetailsArea')
      p Enter your email address, and then click enter
      | <input type='text' id='email' name='email' class='email'></input>
      div#homeSubmit
        input(type='submit', value='Enter', id='enterEmail')
And here is what is produced:
<!DOCTYPE html>
<html>
<head>
</head>
<link rel="stylesheet" href="http://www.codeproject.com/stylesheets/style.css">
<script src="http://www.codeproject.com/javascripts/jquery-1.8.2.min.js"></script>
<script src="http://www.codeproject.com/javascripts/d3.v2.js"></script>
<link rel="stylesheet" href="http://www.codeproject.com/jquery-ui-1.9.1.custom/css/ui-lightness/jquery-ui-1.9.1.custom.css">
<script src="http://www.codeproject.com/jquery-ui-1.9.1.custom/js/jquery-ui-1.9.1.custom.js"></script>
<link rel="stylesheet" href="http://www.codeproject.com/stylesheets/home.css">
<script src="http://www.codeproject.com/javascripts/home.js"></script>
</html>
<body>
    <div id="mainContent">
        <img src="http://www.codeproject.com/images/Header.png"><form method="post" id="homeForm" action="http://localhost:2000/home">
        <div id="dialog" title="error" style="display: none;">
            <p id="homeWarn">
                You need to supply a valid email</p>
        </div>
        <div id="NewDetailsArea">
            <p>
                Enter your email address, and then click enter
            </p>
            <input type='text' id='email' name='email' class='email'></input><div id="homeSubmit">
                <input type="submit" value="Enter" id="enterEmail"></div>
        </div>
        </form>
    </div>
</body>
I can't really go into every aspect of
Jade, if you want to know more, you can read about
it here: https://github.com/visionmedia/jade#readme.
The 1 Big Con (At least in my opinion)
Jade uses semantic white space, and it is very very fussy about mixing tabs/spaces. Even when I was a gazillion % sure I had used all spaces, it would complain. And when it complains, all you get rendered instead of the view is a crappy Exception message.
Now it could be more you use it the better you get with it. I just found I was forever getting these Exceptions, and was at a real loss to fix them at times. It felt like they got fixed more by luck than anything else.
Being fair to Jade this is the only complaint I have, it really is a very capable view engine.
Stylus
Now I don't profess to like CSS very much, but being a software developer, I am interested in
all aspects of software design, so I have taken note of things like SASS/LESS for greatly improving how you work with CSS. Where these frameworks provide things like
- Variables within CSS
- Nested CSS declarations (more explicit)
- Mix-ins
- Scoping
As it turns out there is a very funky package you can use with Node.js that you can choose to use with the Express package, which is what we get when we use
"NPM.exe" and issue the command "npm express -c stylus" which we talked about earlier. As you may have guessed from that command line, it is called "Stylus" and it does most of the things listed above and more.
Here is an example of one of the demo apps "Stylus" files, and the resultant CSS files. I am not using all the tricks, but rest assured "Stylus" is very capable, just check
learnboost.github.com/stylus/ for more details
Here is the raw .Styl file, notice how I am using global variables there, and that there are no semi-colons at all:
foreground-color = white
background-color = black
font =  12px Verdana
general-margin = 10px

body
  padding: 50px
  font: font
  font-weight:normal
  background-color: background-color
  width: 100%
  height: 100%
  margin: none
  padding: none

a
  color: #00B7FF

.popupText
 color : background-color

#summary
	 text-align: center

p
 color : foreground-color

input[type="submit"], input[type="button"]
  border: 1px solid black
  padding: 4px
  width: 120px
  margin-top: general-margin
  margin-right: general-margin
  height:23px
  font: font
  foreground : foreground-color

input[type="text"]
  height:23px
  font-weight:normal

.nodetext
  pointer-events: none
  font: font
  fill : foreground-color

.circle
 z-index:999

.link
  stroke: foreground-color

#graph
  width: 1000px
  height: 400px
  margin-left: auto
  margin-right: auto
  border: 1px dashed foreground-color

#mainContent
  width: 1000px
  height: 600px
  margin-left: auto
  margin-right: auto

#NewDetailsArea
  margin-left: 15px
  margin-top: general-margin

#email, #NewPersonEmail, #sourcePeople, #targetPeople
    width : 350px
    margin-left: 0px
    margin-top: general-margin
    margin-bottom: general-margin
    margin-right: general-margin
Resultant .css file
And here is the resulting CSS file:
body {
  padding: 50px;
  font<span class="code-none">: 12px Verdana<span class="code-none">;
  font-weight<span class="code-none">: normal<span class="code-none">;
  background-color<span class="code-none">: #000<span class="code-none">;
  width<span class="code-none">: 100%<span class="code-none">;
  height<span class="code-none">: 100%<span class="code-none">;
  margin<span class="code-none">: none<span class="code-none">;
  padding<span class="code-none">: none<span class="code-none">;
<span class="code-none">}
a <span class="code-none">{
  color<span class="code-none">: #00b7ff<span class="code-none">;
<span class="code-none">}
.popupText <span class="code-none">{
  color<span class="code-none">: #000<span class="code-none">;
<span class="code-none">}
#summary <span class="code-none">{
  text-align<span class="code-none">: center<span class="code-none">;
<span class="code-none">}
p <span class="code-none">{
  color<span class="code-none">: #fff<span class="code-none">;
<span class="code-none">}
input[type="submit"],
input[type="button"] <span class="code-none">{
  border<span class="code-none">: 1px solid #000<span class="code-none">;
  padding<span class="code-none">: 4px<span class="code-none">;
  width<span class="code-none">: 120px<span class="code-none">;
  margin-top<span class="code-none">: 10px<span class="code-none">;
  margin-right<span class="code-none">: 10px<span class="code-none">;
  height<span class="code-none">: 23px<span class="code-none">;
  font<span class="code-none">: 12px Verdana<span class="code-none">;
  foreground<span class="code-none">: #fff<span class="code-none">;
<span class="code-none">}
input[type="text"] <span class="code-none">{
  height<span class="code-none">: 23px<span class="code-none">;
  font-weight<span class="code-none">: normal<span class="code-none">;
<span class="code-none">}
.nodetext <span class="code-none">{
  pointer-events<span class="code-none">: none<span class="code-none">;
  font<span class="code-none">: 12px Verdana<span class="code-none">;
  fill<span class="code-none">: #fff<span class="code-none">;
<span class="code-none">}
.circle <span class="code-none">{
  z-index<span class="code-none">: 999<span class="code-none">;
<span class="code-none">}
.link <span class="code-none">{
  stroke<span class="code-none">: #fff<span class="code-none">;
<span class="code-none">}
#graph <span class="code-none">{
  width<span class="code-none">: 1000px<span class="code-none">;
  height<span class="code-none">: 400px<span class="code-none">;
  margin-left<span class="code-none">: auto<span class="code-none">;
  margin-right<span class="code-none">: auto<span class="code-none">;
  border<span class="code-none">: 1px dashed #fff<span class="code-none">;
<span class="code-none">}
#mainContent <span class="code-none">{
  width<span class="code-none">: 1000px<span class="code-none">;
  height<span class="code-none">: 600px<span class="code-none">;
  margin-left<span class="code-none">: auto<span class="code-none">;
  margin-right<span class="code-none">: auto<span class="code-none">;
<span class="code-none">}
#NewDetailsArea <span class="code-none">{
  margin-left<span class="code-none">: 15px<span class="code-none">;
  margin-top<span class="code-none">: 10px<span class="code-none">;
<span class="code-none">}
#email,
#NewPersonEmail,
#sourcePeople,
#targetPeople <span class="code-none">{
  width<span class="code-none">: 350px<span class="code-none">;
  margin-left<span class="code-none">: 0px<span class="code-none">;
  margin-top<span class="code-none">: 10px<span class="code-none">;
  margin-bottom<span class="code-none">: 10px<span class="code-none">;
  margin-right<span class="code-none">: 10px<span class="code-none">;
<span class="code-none">}</span></span></span></span></span></span></span></span></span></span></span></span></span></span></span></span></span></span></span></span></span></span></span></span></span></span></span></span></span></span></span></span></span></span></span></span></span></span></span></span></span></span></span></span></span></span></span></span></span></span></span></span></span></span></span></span></span></span></span></span></span></span></span></span></span></span></span></span></span></span></span></span></span></span></span></span></span></span></span></span></span></span></span></span></span></span></span></span></span></span></span></span></span></span></span></span></span></span></span></span></span></span></span></span></span></span></span></span></span></span></span>
It can be seen that the global variables have been substituted where needed, and all semi-colors, braces, etc., have been rendered. What happens when you run a Node.Js/Express
app that has been configured to use "Stylus" is that the "Stylus" files *.styl are transformed into standard *.css files.
The Demo App
This section talks about what the demo app does, and also talks you through how to get the demo app up and running on your own box.
What Does The Demo App Do?
In theory what the demo app tries to do is dead simple, and can be broken down into the following steps:
- Hosts a Socket.IO WebSocket server
- Provide two routes (valid known URLs that will serve content) that a connected client can use
- /home :
- Which has a GET, which allows the home page to be viewed. The 1st time this route is called some initial seed data will be placed into the application MongoDB database (Providing there is not already some data present)
- Which also has a POST which will accept the entered Email address for a new user, and will save that in the application MongoDB database, and the redirect the user to the /d3Demo route
- /d3Demo
- Which has a GET which simply grabs all the previously stored Person and Link objects from the application MongoDB database and shows this in a D3.js Force type (think spring connected) graph layout
- Has a button to add a new Person, which will launch a jQuery UI dialog to allow the new details to be entered. If entered correctly, shall call the Socket.IO "
addNewPersonMessage" message to ask the node application server to add a new Person to the application MongoDB database - Has a button to add a new Link, which will launch a jQuery UI dialog to allow the new details to be entered. If entered correctly shall call the Socket.IO "
addNewLinkMessage" message to ask the node application server to add a new Person to the application MongoDB database - Initialises a Socket.IO WebSocket client connection back to the applications Socket.IO WebSocket server, which allows the following messages and callbacks to be sent and
received
addNewPersonMessage: Message from client to server to add new Person object to application MongoDB databaseaddNewLinkMessage: Message from client to server to add new Link object to application MongoDB databasenewPersonCallback: Message from server to
all clients, which allows client(s) to respond to the new Person that has been added. In this demo this simply means adding the new Person to the D3.js Force type (think spring connected) graph layoutnewLinkCallback: Message from server to all clients, which allows client(s) to respond to the new Link that has been added. In this demo this simply means adding the new Link to the D3.js Force type (think spring connected) graph layout
If that is all to hard to understand, this diagram may help to illustrate this further (click the image for
a larger version):
Running The Demo App
- Make sure you have started the "Mongod.exe" process from wherever you unzipped the MongoDB download to (for me "mongodb-win32-x86_64-2.2.1\bin\mongod.exe" is the location for the EXE). If you want to start with a clean database to see how things work, the MongoDB files are available
in the "C:\data\db" directory, where the demo app will create a database (providing you don't change anything) called "node-mongo-socketDemo.XXXX", so just delete all those file with that file name
- Using the "Node.Js command prompt" from where Node.Js installed for you (usually gives you a menu item for this) navigate to the folder where you downloaded
this articles code to, and issue the following command to the Node.js command line : "node app"
If you have successfully started the demo app you should see something like this:
Demo App Structure
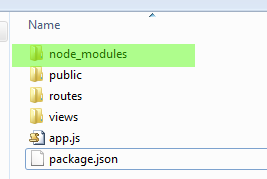
The demo app is made up of several folders/parts which can be seen in the screen shot below:
I will endeavor to go through these parts within the rest of this article.
The Demo App Itself
As I have stated the attached demo app makes use of
Express which we went through in the Node.Js sections above, it should hopefully be a little bit familiar.
So here is the entire demo app ("app.js") code, which I will describe in a bit of detail:
var express = require('express');
var home = require('./routes/home');
var d3demo = require('./routes/d3demo');
var PersonProvider = require('./public/javascripts/personProvider').PersonProvider;
var personProvider = new PersonProvider('localhost', 27017);
var LinkProvider = require('./public/javascripts/linkProvider').LinkProvider;
var linkProvider = new LinkProvider('localhost', 27017);
var CommonHelper = require('./public/javascripts/commonHelper').CommonHelper;
var commonHelper = new CommonHelper();
var http = require('http');
var path = require('path');
var app = express();
app.configure(function(){
app.set('port', process.env.PORT || 2000);
app.set('views', __dirname + '/views');
app.set('view engine', 'jade');
app.use(express.favicon());
app.use(express.logger('dev'));
app.use(express.bodyParser());
app.use(express.methodOverride());
app.use(app.router);
app.use(require('stylus').middleware(__dirname + '/public'));
app.use(express.static(path.join(__dirname, 'public')));
});
app.configure('development', function () {
app.use(express.errorHandler({ dumpExceptions: true, showStack: true }));
});
app.configure('production', function () {
app.use(express.errorHandler());
});
app.get('/home', function (req, res) {
home.homeGet(req, res, commonHelper, personProvider, linkProvider);
});
app.post('/home', function (req, res) {
home.homePost(req, res, personProvider);
});
app.get('/d3demo', function (req, res) {
d3demo.d3demoGet(req, res, commonHelper, personProvider, linkProvider);
});
var server = http.createServer(app);
var io = require('socket.io').listen(server);
server.listen(app.get('port'), function(){
console.log("Express server listening on port " + app.get('port'));
});
io.sockets.on('connection', function (socket) {
socket.on('addNewPersonMessage', function (data) {
console.log("addNewPersonMessage recieved person (email:'" + data.email + "')");
personProvider.save({
email: data.email
}, function (error, docs) {
if(error == null) {
console.log('Sucessfully saved new person');
console.log(docs[0]);
io.sockets.emit('newPersonCallback', { _id: docs[0]._id, email: docs[0].email });
}
});
});
socket.on('addNewLinkMessage', function (data) {
console.log("addNewLinkMessage recieved link (source:'" + data.source + "', target:'" + data.target + "')");
linkProvider.save({
source: data.source,
target: data.target
}, function (error, docs) {
if(error == null) {
console.log('Sucessfully saved new link');
console.log(docs[0]);
io.sockets.emit('newLinkCallback', { _id: docs[0]._id, source: docs[0].source, target: docs[0].target });
}
});
});
});
It can be seen that the code above pretty much achieves the following functions:
- Creates a couple of MongoDBProviders (which will see more on later)
- Configures
Express
- Creates the Http server
- Creates a Socket.IO WebSocket server, and sets up message handlers and callbacks to the clients
I think most of this is self explanatory, but I we will be covering some of it, such as the routes and how the
Socket.IO WebSockets stuff works in more detail
Demo App Screens And How They Work
Assuming you have managed to get the demo app up and running you should now be able to browse using the following URL:
Home Route
http://localhost:2000/home: Which should show you something like this:
From here you can fill in a email address (which will be validated as being correctly formatted) and then click enter to proceed to the next screen. I use
jQueryUI to show validation errors.
Recall from earlier that this is what this route does
- It has a GET, which allows the home page to be viewed. The 1st time this route is called some initial seed data will be placed into the application MongoDB database (Providing there is not already some data present)
- It also has a POST which will accept the entered Email address for a new user, and will save that in the application MongoDB database, and the redirect the user to the /d3Demo route
The Home route is handled by the following code:
exports.homeGet = function(req, res, commonHelper, personProvider, linkProvider){
commonHelper.seedData(personProvider, linkProvider, function() {
res.render('home');
});
};
exports.homePost = function (req, res, personProvider) {
var newUserEmail = req.body.email;
console.log("/Home posted Email :" + newUserEmail);
personProvider.save({
email: newUserEmail,
}, function (error, docs) {
if(error == null) {
res.redirect('/d3demo');
} else {
res.render('home');
}
});
};
I think most of this explained in the comments above, apart from how the data is seeded which is done as follows:
CommonHelper = function () {
};


CommonHelper.prototype.getPersistedDataCount = function (provider, callback) {
    provider.findAll(function (error, docs) {
        var data = 0;
        if (error == null) {
            callback(docs.length);
        }
        else {
            callback(data);
        }
    });
}


CommonHelper.prototype.seedData = function (personProvider, linkProvider, callback) {
    personProvider.findAll(function (error, docs) {
        var data = 0;
        if (error == null) {
            if (docs.length == 0) {
                seedPeople(personProvider, function () {
                    seedLinks(linkProvider, callback);
                });
            } else {
                callback();
            }
        }
        else {
            callback();
        }
    });
}

function seedPeople(personProvider, callback) {
    console.log('No existing users were found so seeding people data');
    personProvider.save(
        [
            { "email": "andy.monks@gmail.com" },
            { "email": "ryanW@gmail.com" },
            { "email": "sarah2008@gmail.com" },
            { "email": "sarahb@hotmail.com" },
            { "email": "sachabarber@gmail.co.uk" }
        ]
        , function (error, docs) {
            if (error != null) {
                console.log("There was an error seeding the data, bugger all can be done....ooops");
            }
            else {
                console.log('There are now ' + docs.length + ' users');
            }
            callback();
        });
}

function seedLinks(linkProvider, callback) {
    console.log('No existing links were found so seeding link data');
    linkProvider.save(
        [
            { "source": "andy.monks@gmail.com", "target": "ryanW@gmail.com" },
            { "source": "andy.monks@gmail.com", "target": "sarah2008@gmail.com" },
            { "source": "andy.monks@gmail.com", "target": "sachabarber@gmail.co.uk" }
        ]
        , function (error, docs) {
            if (error != null) {
                console.log("There was an error seeding the data, bugger all can be done....ooops");
            }
            else {
                console.log('There are now ' + docs.length + ' links');
            }
            callback();
        });
}

exports.CommonHelper = CommonHelper;
The only other thing that really needs further explanation is how the MongoDB database providers work.
This is shown below for the PersonProvider
where this code is based on the code found in this article :
http://howtonode.org/express-mongodb
var Db = require('mongodb').Db;
var Connection = require('mongodb').Connection;
var Server = require('mongodb').Server;
var BSON = require('mongodb').BSON;
var ObjectID = require('mongodb').ObjectID;

PersonProvider = function (host, port) {
    this.db = new Db('node-mongo-socketDemo', new Server(host, port, { safe:true, auto_reconnect: true }, {}));
    this.db.open(function () { });
};

PersonProvider.prototype.getCollectionSafe = function (callback) {
    this.db.collection('people', { safe: true }, function (error, person_collection) {
        if (error) callback(error);
        else callback(null, person_collection);
    });
};

PersonProvider.prototype.getCollection = function (callback) {
    this.db.collection('people', function (error, person_collection) {
        if (error) callback(error);
        else callback(null, person_collection);
    });
};

PersonProvider.prototype.findAll = function (callback) {
    this.getCollection(function (error, person_collection) {
        if (error) callback(error)
        else {
            person_collection.find().toArray(function (error, results) {
                if (error) callback(error)
                else callback(null, results)
            });
        }
    });
};

PersonProvider.prototype.findById = function (id, callback) {
    this.getCollection(function (error, person_collection) {
        if (error) callback(error)
        else {
            person_collection.findOne({ _id: person_collection.db.bson_serializer.ObjectID.createFromHexString(id) },
                function (error, result) {
                    if (error) callback(error)
                    else callback(null, result)
            });
        }
    });
};

PersonProvider.prototype.save = function (people, callback) {
    this.getCollection(function (error, person_collection) {
        if (error) callback(error)
        else {
            if (typeof (people.length) == "undefined")
                people = [people];
            person_collection.insert(people, function () {
                callback(null, people);
            });
        }
    });
};
exports.PersonProvider = PersonProvider;
The LinkProvider is exactly the same code but it deals with a different collection.
D3Demo Route
This is the route that will you will be directed to when you come from the home route. It should be noted that the 1st time you go through the home route some seed data is placed in the Mongo DB database, such that the demo has some nice data to see the 1st time you run it.
You are however completely fine to navigate to this url at any time you like, and it should show you the uber cut down social network graph something like that shown below, which you can add to using the buttons provided
http://localhost:2000/d3demo: Which should show you something like this (click the image for larger version):
Recall from earlier that this is what this route does
- Has a GET which simply grabs all the previously stored Person and Link objects from the application MongoDB database and shows this in a D3.js Force type (think spring connected) graph layout
- Has a button to add a new Person, which will launch a jQuery UI dialog to allow the new details to be entered. If entered correctly shall call the Socket.IO "
addNewPersonMessage" message to ask the node application server to add a new Person to the application MongoDB database - Has a button to add a new Link, which will launch a jQuery UI dialog to allow the new details to be entered. If entered correctly shall call the Socket.IO "
addNewLinkMessage" message to ask the node application server to add a new Person to the application MongoDB database - Initialises a Socket.IO WebSocket client connection back to the applications Socket.IO WebSocket server, which allows the following messages and callbacks to be sent and
received
addNewPersonMessage: Message from client to server to add new Person object to application MongoDB databaseaddNewLinkMessage: Message from client to server to add new Link object to application MongoDB databasenewPersonCallback: Message from server to ALL clients, which allows client(s) to respond to the new Person that has been added. In this demo this simply means adding the new Person to the D3.js Force type (think spring connected) graph layoutnewLinkCallback: Message from server to ALL clients, which allows client(s) to respond to the new Link that has been added. In this demo this simply means adding the new Link to the D3.js Force type (think spring connected) graph layout
The basic D3Demo route is a simple GET which returns a model which is made up of an array of Person and their count, and Links and their count
exports.d3demoGet = function (req, res, commonHelper, personProvider, linkProvider) {
personProvider.findAll(function (errorPeople, people) {
if (errorPeople == null) {
var peopleCount=people.length;
var peopleJson = JSON.stringify(people);
linkProvider.findAll(function (errorLinks, links) {
if (errorLinks == null) {
var linksCount=links.length;
var linksJson = JSON.stringify(links);
res.render('d3demo',
{
peopleCount: peopleCount,
people: peopleJson,
linksCount: linksCount,
links: linksJson
});
}
else {
res.render('d3demo',
{
peopleCount: peopleCount,
people: peopleJson,
linksCount: 0,
links: JSON.stringify([]),
});
}
});
}
else {
res.render('d3demo',
{
peopleCount: 0,
people: JSON.stringify([]),
linksCount: 0,
links: JSON.stringify([]),
});
}
});
};
When the page is rendered it will create a
D3.JS force directed graph. Here is the code that creates the graph of the model data.
function createGraph() {
graph = new myGraph("#graph");
var people = $.parseJSON($('#people').val());
peopleCount = people.length;
for (var i = 0; i < people.length; i++) {
graph.addNode(people[i]._id, people[i].email);
}
var links = $.parseJSON($('#links').val());
linksCount = links.length;
for (var i = 0; i < links.length; i++) {
graph.addLink(links[i].source, links[i].target);
}
}
function myGraph(el) {
this.addNode = function (id, email) {
nodes.push({ "id": id, "email": email });
update();
}
this.removeNode = function (email) {
var i = 0;
var n = findNode(email);
while (i < links.length) {
if ((links[i]['source'] == n) || (links[i]['target'] == n)) links.splice(i, 1);
else i++;
}
nodes.splice(findNodeIndex(email), 1);
update();
}
this.addLink = function (source, target) {
links.push({ "source": findNode(source), "target": findNode(target) });
update();
}
var findNode = function (email) {
for (var i in nodes) { if (nodes[i]["email"] === email) return nodes[i] };
}
var findNodeIndex = function (email) {
for (var i in nodes) { if (nodes[i]["email"] === email) return i };
}
var w = $(el).innerWidth(),
h = $(el).innerHeight();
var vis = this.vis = d3.select(el).append("svg:svg")
.attr("width", w)
.attr("height", h);
var force = d3.layout.force()
.gravity(.05)
.distance(100)
.charge(-100)
.size([w, h]);
var nodes = force.nodes(),
links = force.links();
var update = function () {
var link = vis.selectAll("line.link")
.data(links, function (d) { return d.source.id + "-" + d.target.id; });
link.enter().insert("line")
.attr("class", "link");
link.exit().remove();
var node = vis.selectAll("g.node")
.data(nodes, function (d) { return d.email; });
var nodeEnter = node.enter().append("g")
.attr("class", "node")
.call(force.drag);
nodeEnter.append("image")
.attr("class", "circle")
.attr("xlink:href", "../Images/Friend.png")
.attr("x", "-8px")
.attr("y", "-8px")
.attr("width", "40px")
.attr("height", "40px");
nodeEnter.append("text")
.attr("class", "nodetext")
.attr("dx", 12)
.attr("dy", ".35em")
.text(function (d) { return d.email });
node.exit().remove();
force.on("tick", function () {
link.attr("x1", function (d) { return d.source.x; })
.attr("y1", function (d) { return d.source.y; })
.attr("x2", function (d) { return d.target.x; })
.attr("y2", function (d) { return d.target.y; });
node.attr("transform", function (d) { return "translate(" + d.x + "," + d.y + ")"; });
});
force.start();
}
update();
}
I can't really go into a blow by blow account of how to use
D3.Js but it has very good demos and good documentation at
http://d3js.org/. If you have not come across D3.Js you should really check it out, as it
really it quite a mad library, which has the following features to name a few:
- jQuery like selectors
- SVG Based graphics
- Dynamic layouts
There is also a very good D3.Js tutorial here by Espen Harlinn:
http://www.codeproject.com/Articles/523444/D3-crash-course which I recommend you read
From the d3Demo page you are also able to manipulate your own session, and submit edits back to the server via a WebSocket which will be broadcast to other clients connected to the
application's server socket.
Let's continue to have a look at how you can use the WebSockets.
Client Side WebSocket Comms
We have already seen the server side portion of the Socket.IO WebSocket setup which was done as follows:
io.sockets.on('connection', function (socket) {

    socket.on('addNewPersonMessage', function (data) {
        console.log("addNewPersonMessage recieved person (email:'" + data.email + "')");

        personProvider.save({
            email: data.email
        }, function (error, docs) {
            if(error == null) {
                console.log('Sucessfully saved new person');
                console.log(docs[0]);
                io.sockets.emit('newPersonCallback', { _id: docs[0]._id, email: docs[0].email });
            }
        });
    });
    socket.on('addNewLinkMessage', function (data) {
        console.log("addNewLinkMessage recieved link (source:'" + data.source + "', target:'" + data.target + "')");
        linkProvider.save({
            source: data.source,
            target: data.target
         }, function (error, docs) {
            if(error == null) {
                console.log('Sucessfully saved new link');
                console.log(docs[0]);
                io.sockets.emit('newLinkCallback', { _id: docs[0]._id, source: docs[0].source, target: docs[0].target });
            }
        });
    });
});
So how does this server side socket code interact with the client side
JavaScript code. Well that is all handled within the "socketComms.js" client side code file, where the socket is setup as follows:
$(document).ready(function () {

    var socket = io.connect('http://localhost');
    socket.on('newPersonCallback', onNewPersonCallback);
    socket.on('newLinkCallback', onNewLinkCallback);
}
Add Person
Which will show a jQuery UI dialog which allows a new Person to be added, which if
successfully added to the Mongo DB database will be broadcast to everyone using the Node.js Socket.IO package, which provides WebSocket communications between server and client.
It can be seen from this dialog that a new person (for the uber simple social network) requires a email. Essentially assuming that the the user picks the correct data the following code is called which calls the server side socket code, which results in a new Person being persisted to the database. This new Person is then broadcast to ALL connected server socket clients, where they
all handle the callback, and add the new Person to their own graphs.
The important line below is the "Socket.Emit(..)" which is the client writing data to the server socket
$("#new-people-dialog").dialog({
autoOpen: false,
height: 250,
width: 500,
title: 'Enter a email for the new person',
modal: true,
buttons: {
"Add email": function () {
var isValid = true;
var email = $('#NewPersonEmail');
allFields = $([]).add(email);
allFields.removeClass("ui-state-error");
isValid = isValid && checkLength(email, 6, 80);
isValid = isValid && checkRegexp(email, ......);
if (isValid) {
var emailValue = email.val();
socket.emit('addNewPersonMessage', { email: emailValue });
$(this).dialog("close");
}
},
Cancel: function () {
$(this).dialog("close");
}
},
close: function () {
allFields.val("").removeClass("ui-state-error");
}
});
function onNewPersonCallback(data) {
peopleCount = peopleCount + 1;
createSummary();
graph.addNode(data._id, data.email);
}
And here is the relevant server side socket code
socket.on('addNewPersonMessage', function (data) {
    console.log("addNewPersonMessage recieved person (email:'" + data.email + "')");

    personProvider.save({
        email: data.email
    }, function (error, docs) {
        if(error == null) {
            console.log('Sucessfully saved new person');
            console.log(docs[0]);
            io.sockets.emit('newPersonCallback', { _id: docs[0]._id, email: docs[0].email });
        }
    });
});
Add Link
Which will show a jQuery UI dialog which allows a new Link between two existing people to be added, which is broadcast to everyone using the Node.js Socket.IO package:
It can be seen from this dialog that a new link (for the uber simple social network) requires
two existing people (from existing people). Essentially assuming that the the user picks the correct data the following code is called which calls the server side socket code, which results in a new Link being persisted to the database. This new Link is then broadcast to
all connected server socket clients, where they all handle the callback, and add the new Link to their own graphs.
The important line below is the "Socket.Emit(..)" which is the client writing data to the server socket
$("#new-links-dialog").dialog({
    autoOpen: false,
    height: 300,
    width: 500,
    title: 'Enter a link between existing people',
    modal: true,
    buttons: {
        "Add link": function () {
            var isValid = true;
            var sourcePeople = $('#sourcePeople');
            var targetPeople = $('#targetPeople');

            allFields = $([]).add(sourcePeople, targetPeople);
            allFields.removeClass("ui-state-error");
            isValid = isValid && checkHasSelection('#sourcePeople option:selected');
            isValid = isValid && checkHasSelection('#targetPeople option:selected');
            if (isValid) {
                var sourcePerson = $('#sourcePeople option:selected').text();
                var targetPerson = $('#targetPeople option:selected').text();
                socket.emit('addNewLinkMessage', { source: sourcePerson, target: targetPerson });
                $(this).dialog("close");
            }
        },
        Cancel: function () {
            $(this).dialog("close");
        }
    },
    close: function () {
        allFields.val("").removeClass("ui-state-error");
    }
});


function onNewLinkCallback(data) {
    console.log('onNewLinkCallback');
    console.log(data);
    linksCount = linksCount + 1;
    createSummary();
    graph.addLink(data.source, data.target);
}
And here is the relevant server side socket code
socket.on('addNewLinkMessage', function (data) {
    console.log("addNewLinkMessage recieved link (source:'" + data.source + "', target:'" + data.target + "')");
    linkProvider.save({
        source: data.source,
        target: data.target
        }, function (error, docs) {
        if(error == null) {
            console.log('Sucessfully saved new link');
            console.log(docs[0]);
            io.sockets.emit('newLinkCallback', { _id: docs[0]._id, source: docs[0].source, target: docs[0].target });
        }
    });
});
My Final Thoughts
The Good
I have to say I really enjoyed creating this article/small demo application, and I found Node.js to very well thought out, and it does have a great community behind it, and there are many many great packages out there. Generally I would get stuck (yes that happened a few times), but the answer would generally be pretty obvious, and if I really got stuck which I did once, I would find the answer on StackOverflow.com pretty easily. One of the things I really liked about Node.js is just how light weight it is.
So that's the good what about the bad. Sadly there was one bad apple, at least for me there was.
The Bad
One area where I really struggled was using the Jade view engine, which as I have stated uses semantic white space. I would find that I would be using a text editor and putting in what I thought to be quite reasonable spaces, and I would fire the app up, and I would just end up with an Exception being shown in place of my desired HTML contents. When the Exception would state "You can not mix spaces and tabs", to my mind I had not used any tabs. This was really really tricky to work with, which is a shame as Jade itself its mad and very feature rich, and in many ways is light years ahead of other view engines such as Microsoft Razor which is used in ASP MVC. I just have to question the sanity of anything that uses semantic white space.
I guess this could be fixed by using the correct editor, and being more familiar with Jade I guess. Problem was I really could not see what the Exception was
talking about.
The Outstanding Questions I Still Have
I still have a few unanswered questions about Node.js, which are out lined below. Feel free to answer these in this articles forum if you feel you have some opinions on them
- How do you manage all the related files for a fully Node.Js application, as there is not really any idea that brings it all together in a single project. Sure I could use a nice text editor such as Sublime text editor, but that is still opening 1 file at a time. I am looking for an integrated IDE that manages a Node.js project. I resorted to creating a dummy VS2010 solution and dragging all my Node.js apps files into it, such that I could manage it all by opening one single file (the VS2010 solution file).
- What text editor do people use wih Jade files. As stated above this was a definite sticking point for me.
- I am still not clear what constitutes a good/useful/appropriate Node.Js
application. Sure Node,js talks about fast, scalable network applications, but when you out HTML views and the like on top of that, it seems to be just like any other HTML solution that supports some sort of web sockets / SignalR (where SignalR is actually using Socket.IO anyway) comms. I guess what I am asking is what is a real god example of an application that would be a good fit for Node.js.
As I say if some of you reading this feel you have answers to these questions, please make them known in this articles forum
That's It
I hope you have enjoyed this article and have got something out of it. I have quite enjoyed writing this one, and think it turned out
OK. If you did enjoy it, a vote or a comment are most welcome.


 General
  News
News  Suggestion
  Question
  Bug
Bug  Answer
  Joke
Joke  Praise
  Rant
Rant  Admin
Admin 


 – find node.js-visualstudio-intellisense, nodeintellisense. Just in case someone is still searching "the right" IDE. Hope this helps. cu.