Drawing
The InkPicture control provides the ability to place an image in an application and enable users to add ink on top of it. It is intended for scenarios in which ink is not recognized as text but is instead stored as ink. InkPicture control extends the default picturebox control. This post is about working with the InkPicture control.
You can drag and drop this control to the form and without changing / setting any properties you can start drawing. You can modify the color, size, transparency, etc. of the brush using DrawingAttributes class. Also you can modify the DefaultDrawingAttributes property of the InkPicture control.
var drawingAttributes = new DrawingAttributes();
drawingAttributes.Color = Color.Red;
drawingAttributes.AntiAliased = true;
drawingAttributes.Height = 100;
drawingAttributes.Width = 100;
inkPicture1.DefaultDrawingAttributes = drawingAttributes;
inkPicture1.DefaultDrawingAttributes.Transparency = 255;
All the drawings are created as strokes, which you can access using InkPicture.Ink.Strokes. Unlike .NET Framework PictureBox, InkPicture has AutoRedraw property which helps to persist the drawing without any code.
Selection
You can select and resize any stroke you created by changing EditingMode property. By default, the value is Ink. For enabling selection, change it to Select.
inkPicture1.EditingMode = InkOverlayEditingMode.Select;
Delete / Erase
Similar like Selection, changing the EditingMode from Ink or Select to Delete helps to erase the strokes created. InkPicture control has some special properties available for Delete, it's EraserMode and EraserWidth. EraserMode helps to decide what kind of erase feature is required; the values are StrokeErase and PointErase. StrokeErase mode clears the entire stroke once the mouse is moved over the stroke. But PointErase clears the point where mouse is clicked. Both modes mouse cursor will be changed. EraserWidth will help to configure the size of the eraser.
inkPicture1.EditingMode = InkOverlayEditingMode.Delete;
inkPicture1.EraserMode = InkOverlayEraserMode.PointErase;
inkPicture1.EraserWidth = 20;
Save as Image
You cannot save images directly from InkPicture control. Directly GIF format only supported. Using the following code, you can save the image to any format.
string targetFilename = @"C:\Windows\Temp\Sample.jpg";
var bytes = inkPicture1.Ink.Save
    (PersistenceFormat.Gif, CompressionMode.Maximum);
using (MemoryStream ms = new MemoryStream(bytes))
{
    using (Bitmap bmp = new Bitmap(ms))
    {
        bmp.Save(targetFilename);
    }
}
Deleting All Strokes
Sometimes, you may want to clear all strokes. You can use the DeleteStrokes method to achieve it.
inkPicture1.Ink.DeleteStrokes();
inkPicture1.Refresh();
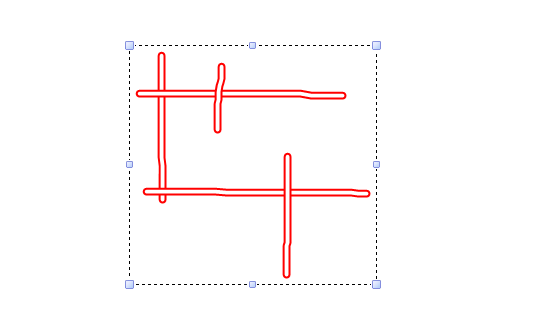
Drawing with Custom Line Style or Pattern
By default, InkPicture only supports drawing with normal line only. But you can override this behavior by changing the DefaultDrawingAttributes.Transparency property to 255. Thus, the default stroke lines will be hidden. Here is an implementation, which draws a pattern using HatchBrush class.
private int _x;
private int _y;
private bool _isDrawing = false;
private HatchBrush _hatchBrush;
private Pen _pen;

public Form1()
{
    InitializeComponent();
    _hatchBrush = new HatchBrush(HatchStyle.Cross,
        Color.Red, Color.Transparent);
    _pen = new Pen(_hatchBrush, 20);
}

private void inkPictureMouseDown(object sender, MouseEventArgs e)
{
    if (e.Button == MouseButtons.Left)
    {
        _isDrawing = true;
        _x = e.X;
        _y = e.Y;
    }
}

private void inkPictureMouseMove(object sender, MouseEventArgs e)
{
    inkPicture1.DefaultDrawingAttributes.Transparency = 255;
    if (_isDrawing &&
        inkPicture1.EditingMode == InkOverlayEditingMode.Ink)
    {
        inkPicture1.CreateGraphics()
            .DrawLine(_pen, _x, _y, e.X, e.Y);
        _x = e.X;
        _y = e.Y;
    }
}

private void inkPictureMouseUp(object sender, MouseEventArgs e)
{
    _isDrawing = false;
}
The above code will draw something like this:

Note: If you draw using custom brush, selection and stroke erase will not work properly.
Happy coding!
Related Content
- Image cropping control in C# for Windows Forms
- System.InvalidOperationException – Cross-thread operation not valid
- WPF interoperability with Windows Forms
- Drag and Drop in Silverlight 3
- Implementing Print using C#


 General
  News
News  Suggestion
  Question
  Bug
Bug  Answer
  Joke
Joke  Praise
  Rant
Rant  Admin
Admin 


 I had to implement some features of the control in one of my project, and I couldn't find any decent documentation. Thats why I wrote this article, again these are my findings, there may be a better way to do this. As you said, most of the links are dead or outdated.