Introduction
This is the Entity Framework article series. In our previous articles, we have learned various approaches of Entity Framework, Database initialization strategy using Entity framework, how to handle inheritance using Table per Hierarchy implementation, you can read them here:
In our previous article, we have discussed that there are three different implementations of inheritance in Entity Framework, and those are:
- Table per hierarchy
- Table per type
- Table per concrete type
In our previous article, we implemented Table per Hierarchy; in this article, we will learn Table per Type implementation. The concept of table per type is, Table will get created for each and every type. For example, if there is class relationship like this:
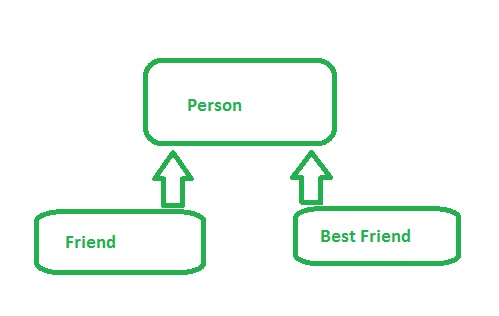
Then for all three classes, three different tables will get created. Let’s take a look at an example. Have a look at the following code:
using System;
using System.Collections.Generic;
using System.ComponentModel.DataAnnotations;
using System.ComponentModel.DataAnnotations.Schema;
using System.Data.Entity;
using System.Linq;
using System.Text;
using System.Threading.Tasks;

namespace ConsoleApp
{
    public class Person
    {
        [Key]
        public int PersonId { get; set; }
        [MaxLength(10)]
        public string name { get; set; }
        public string surname { get; set; }
    }
    [Table("Friend")]
    public class Friend : Person
    {
        public Boolean IsClassmate { get; set; }
    }

    [Table("BestFriend")]
    public class BestFriend : Person
    {
        public string Address { get; set; }
    }

    public class personContext : DbContext
    {
        public personContext()
            : base("DBConnectionString")
        {
        }
        public DbSet<person> Person { get; set; }
        public DbSet<friend> Friend { get; set; }
        public DbSet<bestfriend> BestFriend { get; set; }
    }
}
The implementation is very simple to understand. We have used Data annotation technique to map relationship between entity and relational database. Friend and BestFriend class are derived from Person class. Now, point to discuss, to implement Table per type, we just have to add “Table” attribute above the class definition, that’s all and Entity Framework will create a separate table for each class. In hierarchical relationship, it’s not necessary to decorate base class with “Table” attribute. Because of that, we did not add in this example and even those lines are too optional. It’s enough to specify the base type.
public DbSet<Friend> Friend { get; set; }
public DbSet<BestFriend> BestFriend { get; set; }
Once you run the code and seed database, you will find the below database structure, here we are seeing three tables for three different classes.

Save Data in Three Tables
Now, we will try to save data in those tables and we will observe how data gets saved in tables. Have a look at the below code:
using System;
using System.Collections.Generic;
using System.Linq;
using System.Text;
using System.Threading.Tasks;
using ConsoleApp.Company;
using System.Collections;
namespace ConsoleApp
{
public class Program
{
public static void Main(string[] args)
{
using (var ctx = new personContext())
{
ctx.Person.Add(new Person { name = "sourav", surname = "kayal" });
ctx.SaveChanges();
ctx.Friend.Add(new Friend { name = "foo", surname = "foo", IsClassmate = false });
ctx.SaveChanges();
ctx.BestFriend.Add(new BestFriend { name = "Ram", surname = "Shyam", Address = "Kolkata" });
ctx.SaveChanges();
}
}
}
}
The code is pretty simple to understand. If we run the code and open database, we will see that the data got saved in this structure in three different tables.
Fine, we have seen how data gets saved in database, now we will retrieve data in various forms.
Retrieve “Friend” Object using query
We will fetch only “Friend” object from Person table, please try to remember that Person is the base table in this hierarchy. We can use OfType in LINQ to access only property of Person object. Here is a sample example.
public static void Main(string[] args)
       {
           using (var ctx = new personContext())
           {
               var data = (from m in ctx.Person.OfType<friend>() select m).ToList();
               Console.WriteLine("Name :" + data[0].name);
               Console.WriteLine("Surname :" + data[0].surname);
               Console.WriteLine("Is Classmate :" + data[0].IsClassmate);
               Console.WriteLine("Person Id :" + data[0].PersonId);
           }
       }
Retrieve BestFriend Object
This is similar to the previous one, if we want only object of “BestFriend”, then we can pass the parameter through OfType.
public static void Main(string[] args)
        {
            using (var ctx = new personContext())
            {
                var data = (from m in ctx.Person.OfType<bestfriend>() select m).ToList();
                Console.WriteLine("Name :" + data[0].name);
                Console.WriteLine("Surname :" + data[0].surname);
                Console.WriteLine("Address :" + data[0].Address);
                Console.WriteLine("Person Id :" + data[0].PersonId);
            }
        }
And here is the output of this example:
Retrieve Person Object
Now, if we want to access base class object, we need not specify anything in query. In this example, we will retrieve object of person class.
public static void Main(string[] args)
        {
            using (var ctx = new personContext())
            {
                var data = (from m in ctx.Person select m).ToList();
                Console.WriteLine("Name :" + data[0].name);
                Console.WriteLine("Surname :" + data[0].surname);
                Console.WriteLine("Person Id :" + data[0].PersonId);
            }
        }
And only we are getting the property of person class.
Border Line
In this article, we have learned the concept of Table per Type implementation to implement inheritance in Entity Framework, hope you have got the fundamental idea. In our following article, we will discuss the concept of “Table per concrete type”.
I am software developer from INDIA. Beside my day to day development work, i like to learn new technologies to update myself. I am passionate blogger and author in various technical community including dotnetfunda.com , c-sharpcorner.com and codeproject. My area of interest is modern web technology in Microsoft stack. Visit to my personal blog here.
http://ctrlcvprogrammer.blogspot.in/


 General
  News
News  Suggestion
  Question
  Bug
Bug  Answer
  Joke
Joke  Praise
  Rant
Rant  Admin
Admin 


