Introduction
Welcome to the Search feature in SharePoint 2013. This is a wonderful feature now available for all our important tasks. I know as a developer how many requirements we get on Search and as we don’t have much freedom in other versions of SharePoint we land up making custom search boxes for the users.
But history is not going to be repeated. Welcome to Search in SharePoint 2013.
I know your excitement. Let’s see what it has got for us developers.
Result Sources
Starting with the Result Sources, we can use this feature to scope our search queries. As per the below screen shot, we can see the following default search query which is provided by the external search service and SharePoint.

You can also have your own Query by creating one of your own. Like we can see:
- Add the Name
- Description
- Protocol as to from where you want to query within SharePoint, or in another Remote Connection, Open Search or Exchange
- Add the type whether it is SharePoint search results related to the indexing of SharePoint or it is People Search results where an index is set up to people.
- Then we have Query Transform where you can build a query to index your search results.
- Lastly, we have Credential Information where the search can be set up as if it is allowed to certain people or certain groups.
Result Types
Next, we have in here is Result Types as to how you want the result to display. As in the screen shot, we can see we have Person, Microsoft Excel, Microsoft PowerPoint. These are special templates created to show the search results so if you search a particular user it will come in a specific people template and the others in a similar way.
We almost have everything in our default result types, but if you create a Custom content type then for that we need a different template. But don’t worry, we can create one as below:
As stated, give it a name, conditions as to how you want to query and then select a Template. Template is nothing but a platform to show your results. You can easily create a template in Look & Feel section in Site Settings to display your query results.
Query Rules
When it comes to Query Rules, you can have one to create queries using default rules like shown below:
As we can see, a Result Source from where you can select a source for your query, once you select any you have options to narrow down the query using user segments and categories.
Using this, you can have your own rule set up for your own search queries.
Schema
Managed Properties
Let’s come to the schema part we need not search for our schema files as it is present in the site settings itself as we can see we can look them up under Managed Properties
Crawled Properties
In a similar way, we have Crawled Properties which can be viewed from the Schema.
Categories
Here lastly, we have Categories which can be viewed as to under what category our search schema falls.
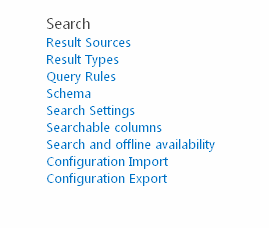
Search Settings
Here, we have search settings where you can enter a search URL if you want it to get searched from an external URL as well. In a similar way, you can identify a page to which the query results should go to and display the results and lastly you can configure the search navigation. These are so good and easy settings which were not available in our configurations in our last versions of SharePoint.
Searchable Columns
We would be aware by the term itself searchable columns which states it contains all the column names which are searchable and included as well can be included in the queries.
Search and Offline Availability
Then, we an exciting option for search and offline availability where we can index the site content as well as the aspx page content, we can also configure the offline client availability and lastly we can render the site and configure it as per our requirements.
Configuration Import & Configuration Export
Then, we have Configuration Import functionality where for every site you need not configure the above settings again. You can just export them from the site you want to use to and import it to your desired site, hereby saving lots of efforts.
A real interesting feature, isn’t it?
It does not even save our efforts but also our time which developers like us already have less of.
So keep learning.
Cheers!
This member has not yet provided a Biography. Assume it's interesting and varied, and probably something to do with programming.


