Introduction
We see COM objects being used mostly in scripting languages like VBScript and JavaScript. In this article, I would like to show you how to use it in the Tcl/Tk scripting language. This article assumes that the reader already has good understanding of COM. This article also cannot be good to understand Tcl/Tk fully. The reader is expected to get hold on Tcl/Tk using other available resources. This article is intended only to demonstrate the use of COM objects in Tcl/Tk. Before showing how to instantiate COM component and use the interfaces in Tcl/Tk, I would like to give a brief introduction about TclTk itself.
Background
Tcl/Tk is a programming system developed by John Ousterhout at the University of California, Berkeley, which is easy to use, and which has very useful graphical interface facilities. Tcl is the basic programming language, while TK is a ToolKit of widgets, which are graphical objects similar to those of other GUI toolkits, such as Win32 SDK or MFC on Windows platform and Motif on UNIX platform. TCL stands for Tool Command Language which is an interpreted language and Tk stands for Toolkit which is an extension to the language itself provided in order to manipulate the widgets, and useful applications can be built very rapidly once some expertise of the Tcl/Tk system has been gained. The very nature of the interpreted language makes it very easy to interactively create and test GUI elements using Tk.
Tcl/Tk can be obtained for platforms like Windows, Linux, Solaris and Mac from http://www.activestate.com.
On Windows, the ActiveState installer installs many useful extension packages to the Tcl language one of which is the COM extension. The package name for COM is tcom. To use this package, you must first load it in the beginning of the Tcl script by using the command package require tcom. Without going too much into details of the Tcl/Tk (left to the reader to explore), let us see a quick way of interactively creating a button and assigning a command to it and showing it up in a window.
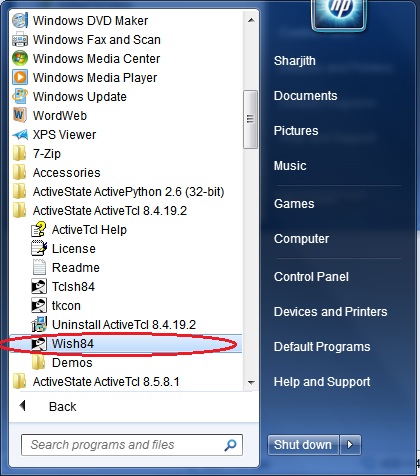
Start the Tk wish interpreter (Wish stands for Window Shell). Note: You can also start the Tcl shell but you cannot start issuing the widget commands outright without loading the Tk package by the command package require Tk.
The wish interpreter starts and gives you a root window and a command shell.

Enter the following lines, each followed by a carriage return, in the command shell.
button .b -text "Hello" -command hello
pack .b
button .q -text "Quit" -command exit
pack .q
proc hello { } {
puts "Hello Tk"
}
After you enter the line pack .b itself, the button will be visible in the root window.
Finally, after you write the procedure for the hello command and click the Hello button, it will print the string Hello Tk in the command shell. You can also write the lines ahown above and store in a file with the extension .tcl. Then, in Windows Explorer, double-clicking the file will launch the wish interpreter and run the application. You can also use the command source <filename> in the interpreter to run the script.
Clicking the Quit button will exit the interpreter and thus the window and shell.
Note, the Quit button is attached to the system command exit in the line:
button .q -text "Quit" -command exit
and the Hello button is attached to a user defined procedure in the line:
button .b -text "Hello" -command hello
The user defined procedure is defined by the keyword proc.
proc hello { } {
puts "Hello Tk"
}
Using tcom
Having seen the capabilities of Tk, let us move on to see how COM objects can be instantiated and the functionality accessed via the respective interfaces it implements.
In this article, we have a COM Library called SimpleCOM (source code and VS2008 project provided in the download) which has an object called GraphicPoint. GraphicPoint implements three interfaces, all derived from IDispatch for scripting support...
IPointIGraphicPointIColor
- Methods
SetColor GetColor (OLE_COLOR)
We would instantiate 2 GraphicPoint objects, get their IPoint interfaces and set the coordinates of the Points using the method SetCoord. The coordinates are obtained from the user input through the GUI that we would develop using Tk. We will also set the colors for both the points by getting the interface IColor. Here we will see how to convert RGB components, obtained from the color dialog, into OLE_COLOR. Then we will calculate the distance between the 2 points by calling the Distance method from the IPoint interface. We will also simulate the drawing of the point by popping up message boxes which show the coordinates and colors of each point. For this, we call the Draw method of the IGraphicPoint interface. When the points are instantiated, from the Tk code, we will also pop a messagebox showing the coordinates we have set. For this, we will call the X, Y and Z properties of the point object. All this will cover the activities of instantiating a COM object, querying for respective interfaces and using the methods and properties.
The first line required to load tcom package is package require tcom.
The following code shows how to create the GUI elements (widgets) and the callback procedures for the buttons. The code has comments starting with # and explains the steps involved in creating the GUI and instantiating the component and using it.
# Create the widgets
# Container frames
frame .f1 -bd 5
frame .f2 -bd 5
frame .f3 -bd 5
pack .f1 -expand y -fill both
pack .f2 -expand y -fill both
pack .f3 -expand y -fill both

# Point 1
labelframe .f1.pt1frm -text "Point 1" -bd 2 -padx 3 -pady 3
pack .f1.pt1frm -side left -expand y -fill both
frame .f1.pt1frm.xfrm -bd 2
frame .f1.pt1frm.yfrm -bd 2
frame .f1.pt1frm.zfrm -bd 2
frame .f1.pt1frm.cfrm -bd 2

pack .f1.pt1frm.xfrm -expand y -fill both
pack .f1.pt1frm.yfrm -expand y -fill both
pack .f1.pt1frm.zfrm -expand y -fill both
pack .f1.pt1frm.cfrm -expand y -fill both


label .f1.pt1frm.xfrm.xlab -text "X" -justify left
label .f1.pt1frm.yfrm.ylab -text "Y" -justify left
label .f1.pt1frm.zfrm.zlab -text "Z" -justify left


pack .f1.pt1frm.xfrm.xlab -side left -expand y -fill both
pack .f1.pt1frm.yfrm.ylab -side left -expand y -fill both
pack .f1.pt1frm.zfrm.zlab -side left -expand y -fill both

entry .f1.pt1frm.xfrm.xent
.f1.pt1frm.xfrm.xent insert 0 "0.0"
entry .f1.pt1frm.yfrm.yent
.f1.pt1frm.yfrm.yent insert 0 "0.0"
entry .f1.pt1frm.zfrm.zent
.f1.pt1frm.zfrm.zent insert 0 "0.0"

pack .f1.pt1frm.xfrm.xent -side right -expand y -fill both
pack .f1.pt1frm.yfrm.yent -side right -expand y -fill both
pack .f1.pt1frm.zfrm.zent -side right -expand y -fill both

# Point 2
labelframe .f1.pt2frm -text "Point 2" -bd 2 -padx 3 -pady 3
pack .f1.pt2frm -side right -expand y -fill both

frame .f1.pt2frm.xfrm -bd 2
frame .f1.pt2frm.yfrm -bd 2
frame .f1.pt2frm.zfrm -bd 2
frame .f1.pt2frm.cfrm -bd 2

pack .f1.pt2frm.xfrm -expand y -fill both
pack .f1.pt2frm.yfrm -expand y -fill both
pack .f1.pt2frm.zfrm -expand y -fill both
pack .f1.pt2frm.cfrm -expand y -fill both

label .f1.pt2frm.xfrm.xlab -text "X" -justify left
label .f1.pt2frm.yfrm.ylab -text "Y" -justify left
label .f1.pt2frm.zfrm.zlab -text "Z" -justify left

pack .f1.pt2frm.xfrm.xlab -side left -expand y -fill both
pack .f1.pt2frm.yfrm.ylab -side left -expand y -fill both
pack .f1.pt2frm.zfrm.zlab -side left -expand y -fill both

entry .f1.pt2frm.xfrm.xent
.f1.pt2frm.xfrm.xent insert 0 "0.0"
entry .f1.pt2frm.yfrm.yent
.f1.pt2frm.yfrm.yent insert 0 "0.0"
entry .f1.pt2frm.zfrm.zent
.f1.pt2frm.zfrm.zent insert 0 "0.0"

pack .f1.pt2frm.xfrm.xent -side right -expand y -fill both
pack .f1.pt2frm.yfrm.yent -side right -expand y -fill both
pack .f1.pt2frm.zfrm.zent -side right -expand y -fill both

# Color button 1. The command onSelectColor1 receives the toplevel window
and the button as argument
button .f1.pt1frm.cfrm.btn -text "Choose Color"
	-command "onSelectColor1 . .f1.pt1frm.cfrm.btn"
pack .f1.pt1frm.cfrm.btn -expand y -fill both

# Color button 2
button .f1.pt2frm.cfrm.btn -text "Choose Color"
	-command "onSelectColor2 . .f1.pt2frm.cfrm.btn"
pack .f1.pt2frm.cfrm.btn -expand y -fill both

# Distance Result
label .f2.lab1 -text "Distance Between Point 1 and Point 2"
# Text Entry holding the distance result. Note the -textvariable option
# The ::res variable when set with a value updates the Entry
entry .f2.ent1 -state readonly -textvariable ::res

pack .f2.lab1 -side left -padx 2
pack .f2.ent1 -side right -expand y -fill both -padx 2

# Buttons
button .f3.apply -text "Apply" -width 10 -command onApply
button .f3.quit -text "Quit" -width 10 -command exit
pack .f3.quit -side right -fill y -padx 2
pack .f3.apply -side right -fill y -padx 2

# Globals to hold the Points colors
set ::g_Color1 [.f1.pt1frm.cfrm.btn cget -bg]
set ::g_Color2 [.f1.pt2frm.cfrm.btn cget -bg]
The Apply button, when clicked calls back the procedure onApply in which we instantiate the GraphicPoint object and use it.
# Callbacks
proc onApply { } {
# rgbcolor is the list holding the RGB components of the global variable ::g_Color1
set rgbcolor [winfo rgb . $::g_Color1]
set hx 0xff
set r [lindex $rgbcolor 0]
set g [lindex $rgbcolor 1]
set b [lindex $rgbcolor 2]

# code for converting RGB values to UInteger (OLE_COLOR)
set color1 [expr ((($hx & $b) << 16) | (($hx & $g) << 8) | ($hx & $r))]

set rgbcolor [winfo rgb . $::g_Color2]
set hx 0xff
set r [lindex $rgbcolor 0]
set g [lindex $rgbcolor 1]
set b [lindex $rgbcolor 2]

# code for converting RGB values to UInteger (OLE_COLOR)
set color2 [expr ((($hx & $b) << 16) | (($hx & $g) << 8) | ($hx & $r))]

# Get typelib info from registry
# The UUID FA3BF2A2-7220-47ED-8F07-D154B65AA031 is the Library ID of SimpleCOM.
set SimpleCOM [registry get HKEY_CLASSES_ROOT\\TypeLib\\
	{FA3BF2A2-7220-47ED-8F07-D154B65AA031}\\1.0\\0\\win32 {}]

::tcom::import $SimpleCOM

# This also directly works with dll in physical location
# ::tcom::import SimpleCOM.dll

# Prints all the available commands in the library
# Useful only in interactive shell
info commands SimpleCOMLib::*

# First Point CreateInstance
set aGrPoint [::SimpleCOMLib::GraphicPoint]

# QueryInterface for IPoint
set aPoint [::SimpleCOMLib::IPoint $aGrPoint]

# Call Interface method
$aPoint -method SetCoord [.f1.pt1frm.xfrm.xent get]
	[.f1.pt1frm.yfrm.yent get] [.f1.pt1frm.zfrm.zent get]

# Call Interface get property
tk_messageBox -message "Point Created At X [$aPoint -get X],
    Y [$aPoint -get Y], Z[$aPoint -get Z]" -title "From TkCOMGUI" -type ok -icon info

# QueryInterface for IColor
set aColor [::SimpleCOMLib::IColor $aGrPoint]

$aColor -method SetColor $color1
$aGrPoint -method Draw

# Second Point CreateInstance
set aGrPoint2 [::SimpleCOMLib::GraphicPoint]

# QueryInterface for IPoint
set aPoint2 [::SimpleCOMLib::IPoint $aGrPoint2]

# Call interface put properties
$aPoint2 -set X [.f1.pt2frm.xfrm.xent get]
$aPoint2 -set Y [.f1.pt2frm.yfrm.yent get]
$aPoint2 -set Z [.f1.pt2frm.zfrm.zent get]

# Call Interface get property
tk_messageBox -message "Point Created At X [$aPoint2 -get X],
    Y [$aPoint2 -get Y], Z[$aPoint2 -get Z]" -title "From TkCOMGUI" -type ok -icon info

# QueryInterface for IColor
set aColor2 [::SimpleCOMLib::IColor $aGrPoint2]
$aColor2 -method SetColor $color2
$aGrPoint2 -method Draw

# Calculate distance between points by calling method Distance
set distVal [$aPoint -method Distance $aPoint2]
tk_messageBox -message "Distance between Points is $distVal"
	-title "From TkCOMGUI" -type ok -icon info

# Update the Entry value
set ::res $distVal
update
}

proc onSelectColor1 {p b} {
# pop up the color chooser and store selection in global color variable
set ::g_Color1 [tk_chooseColor -title "Choose a color" -parent $p]
# set the button color
$b configure -bg $::g_Color1
update
}

proc onSelectColor2 {p b} {
# pop up the color chooser and store selection in global color variable
set ::g_Color2 [tk_chooseColor -title "Choose a color" -parent $p]
# set the button color
$b configure -bg $::g_Color2
update
}
The callback for the color selection buttons simply shows up a color chooser dialog and stores the selected color in a global variable which is accessed by the callback procedure for Apply button. The color is stored as a list of 3 values of RGB. We take each element and with the following code convert it into the OLE_COLOR equivalent.
# rgbcolor is the list holding the RGB components of the global variable ::g_Color1
set rgbcolor [winfo rgb . $::g_Color1]
set hx 0xff
set r [lindex $rgbcolor 0]
set g [lindex $rgbcolor 1]
set b [lindex $rgbcolor 2]

# code for converting RGB values to UInteger (OLE_COLOR)
set color1 [expr ((($hx & $b) << 16) | (($hx & $g) << 8) | ($hx & $r))]
To access an Interface method, the interface variable followed by the -method option followed by the method name and arguments is used and to set or get a property value the option -set or -get followed by the property name and argument is used. e.g.
$aPoint1 -set X 100
$aPoint2 -set Y 200
$aPoint1 -method Distance $aPoint2
I hope you enjoyed this article. The Tcl script file for this demo and the COM VS2008 project file is included in the downloadable zip file. Windows 7 users would need to run Visual Studio in Administrator mode to build the project and register the COM DLL.
Points of Interest
The power is COM and the IDispatch is once again proven. The flexibility it provides to access Components from RAD tools and scripts is immense.
Further References
History
- 16th April 2010: First release
Part 2 (Python)
Sharjith is a Mechanical Engineer with strong passion for Automobiles, Aircrafts and Software development.


