Here is the step by step guide to automate build, publish, and deploy (release) package to NuGet.
Introduction
In the modern era of DevOps, automation has become more popular whereas creating/uploading packages has become the thing of the past. Moreover, day by day, the packages count is increasing in the developer’s life. So, it is not easy to build, publish, and deploy all the packages manually on NuGet.org. We can manage a few packages (1-2) manually, but if we need to manage more packages (5,10 and so on), then it will become a tedious job.
Using GitHub's actions, we can make this process fully automatic.
Here is the step by step guide to automate build, publish, and deploy (release) package to NuGet.
Steps
Step 1
Create a new repository on GitHub and upload your code.
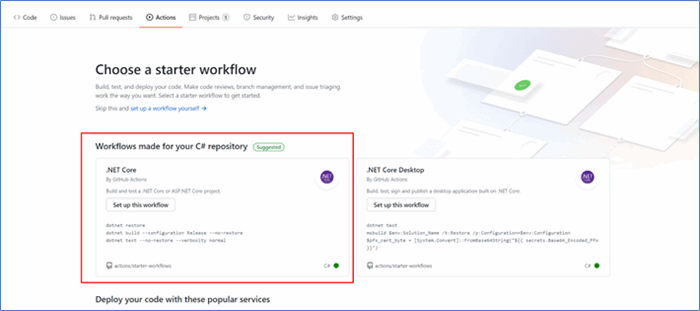
Step 2
Create a GitHub Action, which makes it easy to build and publish. When we are creating a workflow, it creates a .yaml file. In this example, I am creating a workflow for .NET Core (C#).
Step 3
The previous step creates the workflow for .NET Core environment. It has a predefined structure which is the nice starting point for build and test. It has the below sample code.
name: .NET Core

on:
  push:
    branches: [ master ]
  pull_request:
    branches: [ master ]

jobs:
  build:

    runs-on: ubuntu-latest

    steps:
    - uses: actions/checkout@v2
    - name: Setup .NET Core
      uses: actions/setup-dotnet@v1
      with:
        dotnet-version: 3.1.101
    - name: Install dependencies
      run: dotnet restore
    - name: Build
      run: dotnet build --configuration Release --no-restore
    - name: Test
      run: dotnet test --no-restore --verbosity normal

Step 4
The above default code is enough to build and test the code. But we have a requirement to publish the package at NuGet.org. For this, we need to add a publish step in .yaml file.
Note: I have added the working directory tag as I have multiple projects in the same solution.
- name: Publish
  uses: brandedoutcast/publish-nuget@v2.5.2
  with:
   PROJECT_FILE_PATH: Extensions/Extensions.csproj
   NUGET_KEY: ${{secrets.NUGET_API_KEY}}
brandedoutcast has created a reusable GitHub Action to publish NuGet packages. This action looks for changes to the <version>{}</version> tag in the .csproj file.
While deploying on NuGet.org, we need an API key to validate this. For this, we are using the variable.
Step 5
Create the API key from NuGet.org and then add this under the Settings>Secrets in GitHub repository. Create a variable name “NUGET_API_KEY”.
Step 6
Save your .yaml file and start the action. You will see that the solution will be built and published on NuGet.org.
Step 7
Package on NuGet.org.
Summary
Whenever we are updating the package and pushing the code in the master branch, then the GitHub action will initiate automatically and push the package to NuGet.org. Now, we don’t need to manage our packages manually and there is no need to worry about the number of packages.
Try this and enjoy it!
History
- 29th June, 2020: Initial version
9+ years of experience and expertise in the diverse areas of Microsoft Technologies. He is working as a development lead in Vineforce IT Services Pvt. Ltd.


