Here we demonstrate how to test the model, both manually using images uploaded via the custom vision UI and automatically using a test data set. Then we demonstrate how to add additional data and re-train the model if additional training is required.
This three-part series demonstrates how to efficiently train, test, and deploy a pedestrian-detection AI model using Azure Custom Vision.
The previous article demonstrated how to train a model to detect the presence of a human in images. This article will test the previously-trained model in Azure Custom Vision. It will also demonstrate how to train the model further and improve its accuracy.
Note that all code in this series is available on GitHub.
Quickly Testing the Model
Azure Custom Vision provides various options for testing a model. A quick test uses an image URL or an uploaded test file.
First, go to the Azure Custom Vision service and select your project.
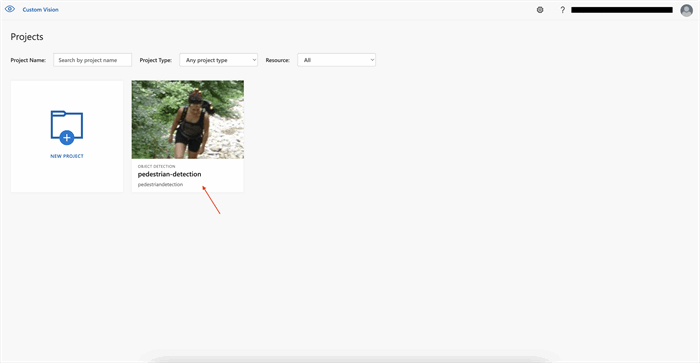
On the next page, click Quick Test in the upper right corner.

Now, choose an image you didn’t use to train the model. Once the picture is successfully uploaded, the model returns the prediction and creates a boundary box around the object. You can also see the predicted object tag along with the probability.
The model predicted that the testing image had a 99.9 percent probability of being human. However, this test was relatively easy — the picture was clear and featured no other objects.
Find another image to test the model again. This time, use a picture similar to the one below to learn how the model will perform with a more complex picture.
Oops! The model was not able to detect humans in the image. The angle and perspective might be significantly different than those in the first image. Regardless of the reason, the model is not yet ready for deployment and requires further training.
Training the Model with More Images
To increase the model’s accuracy, we must train it with more images. Provide additional pictures for this iteration, ensuring to select images captured from different angles. Additionally, consider adding photos with varying levels of occlusion and truncation to improve identification in those circumstances. These diverse photos also help the model cover extreme cases and forecast more accurately.
Click Add images to add more photos for training within the pedestrian-detection project.
This action opens a window to select and upload the new training images. Once you’ve uploaded the desired photos, select and tag each one. Be sure to add a few images that include different objects and some that don’t contain any objects. Additionally, consider using images with objects that look similar to humans.
Once you’ve uploaded and tagged all the new images, click Train in the upper right corner.
Select Quick Training again on the next page to start training the model. You can also adjust the Probability threshold.
Once the training is complete, test model performance again.
Click Quick Test in the upper-right corner and upload an image for prediction.
The model is now accurately detecting humans in the image — even those that previously confused it.
Testing the Model Using the Prediction API
So far, all the model testing has been via test images uploaded to the Custom Vision UI. However, Azure Custom Vision also provides the Prediction API to get predictions from a trained model.
Before we call the Prediction API, its resource must access the model. So, we must publish the model.
In your project, click the Performance tab.
Select the iteration you want to publish on the Performance tab and click Publish at the top.
Specify the Model name and select the Prediction resource from the menu on the next page. Once done, click Publish.
When the model is published, you’ll see a Published label appear next to the published iteration.
Retrieving the Prediction URL and Key
Once the model is published, the next step is to invoke the Prediction API. For that, retrieve the required information from the Prediction URL found on your project's Performance tab.
The Prediction URL provides instructions for using the Prediction API, the Prediction URL, and Prediction-Key.
Note the Prediction URL and Prediction-Key, as you need them to invoke the API.
Invoking the Prediction API
The Prediction API allows submitting the image data from local storage and the Internet using the Prediction URL. First, try to invoke the service using an image from local storage.
Various methods can invoke the Prediction API. In this case, create a simple Python program that submits the image to the Prediction API and returns the prediction.
Create a Python file named prediction.py. Add the following code:
import requests

url="<YOUR_PREDICTION_URL>"
headers={'content-type':'application/octet-stream','Prediction-Key':'<YOUR_PREDICTION_KEY>'}
result =requests.post(url,data=open("./test.jpeg","rb"),headers=headers)
json_obj = result.json()

for prediction in json_obj["predictions"]:
print(prediction)
The code takes the specified images and posts a request to the Custom Vision service using the Prediction URL and Prediction Key. It also scores the image using the selected model in the Prediction URL and returns the prediction.
Don’t forget to replace the URL and Prediction Key with those provided. Additionally, ensure that the data argument in requests.post points to the test image.
Once finished, execute the program:
$ python3 prediction.py
On successful execution, the program returns the prediction with probability, tagName, and even a boundingBox.
Go to the Custom Vision web portal and navigate to Predictions to verify the prediction. Here, you should find the image you just used to invoke the service. Click the image.
The boundary box is now visible around the human in the image. Feel free to test a few more pictures to ensure the model performs well.
Enabling Active Learning
When submitting an image to the prediction endpoint, whether using the prediction model or testing the model by uploading an image via the UI, the Custom Vision service stores those images. Developers can view these images on the Predictions tab and use them to improve the model's performance further.
Move to the Predictions tab to see all the predicted images for this iteration. Hover over the image to see the predicted tags.
These images are in order of those that can most improve the model.
To add these images to training data, select the image and correct the tags.
Click the accurately-predicted regions and skip over the ones that weren’t. The boundaries of the selected areas appear in white instead of red.
Remove the corrected image from the Predictions tab and add it to the set of training images. Developers can view these images in Training Images.
Once you’ve corrected all the images, click Train for another training round.
Next Steps
This article demonstrated how to quickly test the previously-trained AI model by using the Custom Vision service’s Quick Test function. It also showed that Azure’s Custom Vision service allows developers to re-iterate and improve the model’s performance at any stage. Finally, it discussed publishing the model and testing it by invoking the prediction API.
Now that you have trained and tested the model, the next step is to deploy the model to an edge device. The final article in this series will demonstrate how to deploy a Custom Vision model on a Raspberry Pi device to detect pedestrians in front of a vehicle.
To learn how to drive app innovation and reap lasting business benefits with a faster approach to AI, check out Forrester study: Fuel Application Innovation with Specialized Cloud AI Services.
C# Corner MVP, UGRAD alumni, student, programmer and an author.


 General
  News
News  Suggestion
  Question
  Bug
Bug  Answer
  Joke
Joke  Praise
  Rant
Rant  Admin
Admin 


