Introduction
This article shows how to edit individual cells in gridview in ASP.NET. This example is in Visual Web Developer 2005 Express Edition.
Using the Code
Download the project, unzip it to somewhere on your hard disk. You'll find a database and a gridview (test this project after you finish reading this article).
For this article, you can use the database from the project. If you use any other database, you have to specify a primary key (this is very important).
Steps to Create the Project Manually
In your project (I suppose you have a database with a primary key):
- In the design view, drag a gridview from toolbox (if you can't see it, press ctrl+alt+x).
- Click the GridView SmartTag to open up its Tasklist.
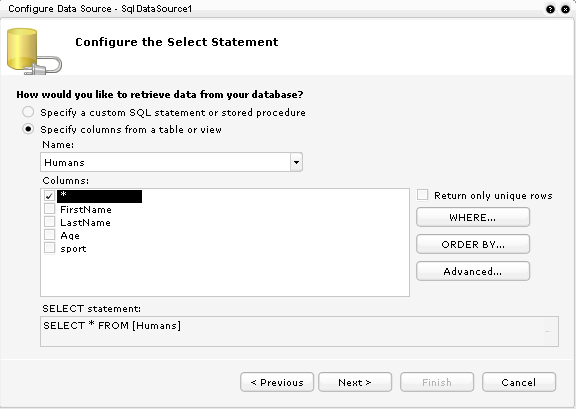
- Choose data source (your database). Select all from your table. Then next and finish.
- In the tasklist, click 'Auto Format' and select a scheme.
- Check 'Enable Paging'. Go to 'Properties' (press F4) and search for 'Page Size'.

- In 'Properties', set '
AutoGenerateEditButton' to true.
Edit an Entire Row
Remember, you can't modify the field which is the primary key. So, we'll edit the fields 'LastName', 'Age' and 'Sport'. For this, we must add the Update statement to our sqldatasource.
Edit Individual Cell
We want to edit only the 'sport' cell and we don't want to see the textboxes for the other cells.
- Click the GridView SmartTag to open up its Tasklist.
- Go to 'configure data source' and modify the
update statement so it looks like this:
- Click Next and Finish.
- In the gridview's tasklist, click 'Edit Columns'. Click the '
LastName' field and set 'ReadOnly' to true.
- Set '
ReadOnly' to true for the 'Age' field. - Click Ok. Save(Ctrl+S). On your page, right-click and 'View in browser'.
History
- 12th February, 2009: Initial post
This member has not yet provided a Biography. Assume it's interesting and varied, and probably something to do with programming.


 General
  News
News  Suggestion
  Question
  Bug
Bug  Answer
  Joke
Joke  Praise
  Rant
Rant  Admin
Admin 


