Introduction
This article describes how to build a surveillance cam based on a Raspberry Pi micro-computer which records HD video when something moves in the monitored area. Live picture can be viewed from any web browser, even from your mobile while you're on the road.
What you will get:
- See live stream in any web browser from anywhere
- Record any motion into video file
Usually, such a cam will cost you around US$1,000, but with the result from this article, you will get such a cam for only about US$120.
Background
Have you ever heard of Raspberry Pi? It's a low-cost micro-computer that is able to run Linux and has endless extension possibilities. It cost only about US$35 and opens up endless possibilities of what you can build with it. The official website can be found at http://www.raspberrypi.org/
Hardware components
We need some hardware for this project. This is a list of the major things we need:
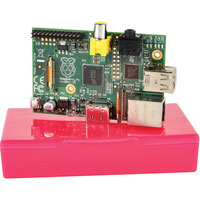
- Raspberry Pi Model B: This is the larger model of the Raspberry computer system with 700MHz and 512MB Ram. It supports HD video. You can easily order it from i.e. here. Cost: about US$40
You could also use the Raspberry Pi Model A which is slightly cheaper and consumes less energy. Stefan Knight has written an excellent article on how to run this whole project on a model A. If you plan to use a model A, please read that article.
- Raspberry Pi Camera Module: This module was specially build for the Raspberry micro-computer. It has a connector to be plugged directly into the Raspberry board and supports HD video up to 1080p. The website http://www.rs-components.com/raspberrypi will show you where you could order it from your country. I.e. http://www.alliedelec.com/lp/130513rasocameramodule/ ships this camera in the US for only US$29.
There will be an infrared camera module for the Raspberry Pi soon as well (http://www.raspberrypi.org/archives/5089). We've not yet had the chance to test it, but it should work for this surveillance camera as well.

- A housing for the camera: you don't need to buy a high-price-housing for your Raspberry. There are loads of very cheap fake security cameras available which perfectly fit our needs here. Search the web for "surveillance camera dummy" and you will find loads of housings for your new camera for only a few dollars. I.e. this one will do the job: http://amzn.to/15XLaAj for only US$9. We have ordered this camera housing for about 20€ in Germany that had enough space for all the components: http://amzn.to/19CTEaN. You can use any camera housing, but only be careful about the size of the housing so that the Raspberry board will fit in there. The dimensions of the Raspberry board are 85.6 x 53.98 x 17 mm (approx 3.37 x 2.13 x 0.67 in).
- Power supply: The Raspberry computer does not come with any power supply, you have to get one on our own. Any power supply with a micro-USB plug can do the job as long as it supplies at least 1A of power. We have ordered such a power supply which already has a micro-USB plug for about US$10
- SD card: as the Raspberry Pi does not have any storage on board, you need to add some so that you can install and run the operating system for this device. Any SD or microSDHC should do the job, but we recommend using a Class 10 SD card. It's only around US$7
- To connect this cam to your network, you also need some kind of network connection. One possibility is to use a LAN connection, but you would need to put LAN cable to the point where you want to mount the camera. A better alternative is such a WiFi USB adapter for only about US$10:
That's all: for about US$120 we have all the hardware we need to build this HD surveillance cam.
Install Raspbian
At first, you should install the OS and software to the Raspberry Pi before mounting it all together. An OS is the basic operating system software that tells the Raspberry hardware what to do. Linux is perfect for this. We have chosen Raspbian, as it's one of the most advanced OS for the Raspberry with loads of help and tutorials on the internet.
You need to prepare the SD card to be able to run Raspbian on the Raspberry: this excellent tutorial from Adafruit will explain the necessary steps.
Now temporarily connect your Raspberry Pi board to LAN cable, a monitor (HDMI TV works out of the box, but a HDMI-to-DVI cable like this will do the job as well) and a USB keyboard for the basic setup.
Insert the prepared SD card with the Raspbian installer on it and attach the power supply.
The Raspberry should boot up and guide you through the setup process as explained in this Adafruit tutorial. After this, you should have a basic Raspbian OS running.
Be sure to enable SSH in Raspbian so that you are able to control the Raspberry device also when there is no monitor and keyboard attached. And you should also enable the camera from the Raspbian setup menu so that we can use it for motion detection.
Now make sure your RPI is up to date:
sudo apt-get install rpi-update
sudo rpi-update
And also update all packages:
sudo apt-get update
sudo apt-get upgrade
Connect via SSH
Now that the basic setup is done, you should connect to your Raspberry device from your computer. You can connect to Linux console from any computer in your local network and control it like you where sitting directly in front of it. This is very important as once mounted far away from your desktop, you need to be able to make updates and change the configuration of this camera any time later without the need to detaching it from the wall and bringing it back to your desk.
Remember that this cam is not just a dump cam device but a very powerful computer with Linux OS running on it. It's not limited to what we explain in this article now; it will follow any development in software so that you will be able to install updated software and more modules any time later.
First, you need a software to connect to the Linux console on the Raspberry. For Windows, you will need the extra (free) software PuTTY. Download it from the PuTTY website, install it and connect to your Raspberry Pi device:
From now on, you don't need any monitor and keyboard attached to the Raspberry anymore.
Enable WiFi
If you want to run this camera with a WiFi USB dongle (like we've suggested above), you will need to do some quick additional steps to make WiFi work on the Raspberry:
From the console (PuTTY window), edit the network properties of the Raspberry:
sudo nano /etc/network/interfaces
Now add these lines at the end of the file (or change existing lines to match these):
allow-hotplug wlan0
iface wlan0 inet dhcp
wpa-ssid "YOUR NETWORK SSID"
wpa-psk "WIFI PASSWORD"
(Fill in the SSID and password for your WiFi network)
Reboot the Raspberry with this command and see if it correctly connects to your WiFi network:
sudo reboot
Put the hardware together
Now it's time to assemble all the hardware components together into the housing. Depending on the housing, this should not be a too complicated job:
Be sure to mount the Raspberry board safely so that it doesn't tumble around in the housing:
As our housing had a very large glass window at the front, we have closed it with a black paper with a hole in it:
This has the advantage that the "tech" of the camera is not visible anymore. If you like the camera recording led to be visible, don't cover it. Whenever the camera is detecting any motion or is recording, the led light will glow in a very bright red.
You can also turn off the camera red LED by adding this line to /boot/config.txt:
disable_camera_led=1
Installing the motion detection software
A very good (and free open-source) motion detection/surveillance software with many configuration options is motion.
We now need to install it using the command line (log in to your raspberry as user "pi"):
sudo apt-get install motion
Some packages will be installed in the installation process; just type "y" to proceed with the installation.
As the current version of motion does not (yet) support the Raspberry camera module, we need to download and install a special build with support for this camera module.
cd /tmp
sudo apt-get install -y libjpeg62 libjpeg62-dev libavformat53 libavformat-dev libavcodec53 libavcodec-dev libavutil51 libavutil-dev libc6-dev zlib1g-dev libmysqlclient18 libmysqlclient-dev libpq5 libpq-dev
wget https://www.dropbox.com/s/xdfcxm5hu71s97d/motion-mmal.tar.gz
And now you need to unpack the downloaded file to the /tmp directory:
tar zxvf motion-mmal.tar.gz
After this unzipping, you now need to update your installed motion with the downloaded build:
sudo mv motion /usr/bin/motion
sudo mv motion-mmalcam.conf /etc/motion.conf
You also need to enable the motion daemon so that motion will always run:
sudo nano /etc/default/motion
and change the line to:
start_motion_daemon=yes
We're pretty sure that the official build of motion will shortly also support the Raspberry camera module as well.
A very important command to edit the motion configuration file is
sudo nano /etc/motion.conf
Note: in the standard motion installation, the motion.conf is in /etc/motion/, but in the special motion-mmal build from dropbox-url (see above) it's in /etc/. If you follow this tutorial with all steps, this is no problem at all.
Be sure to have the file permissions correct: when you install motion via ssh while being logged in as user "pi", you need to make sure to give the user "motion" the permissions to run motion as service after reboot:
sudo chmod 664 /etc/motion.conf
sudo chmod 755 /usr/bin/motion
sudo touch /tmp/motion.log
sudo chmod 775 /tmp/motion.log
We've made some changes to the motion.conf file to fit our needs. Our current motion.conf file can be downloaded here: raspberry_surveillance_cam_scavix.zip. Just download, unzip and save as /etc/motion.conf if you would like to use the exact config options we describe below.
Some of the main changes in our motion.conf are:
Make sure that motion is always running as a daemon in the background:
daemon on
We want to store the logfile in /tmp instead (otherwise autostart user won't be able to acces it in /home/pi/ folder):
logfile /tmp/motion.log
As we want to use a high quality surveillance video, we've set the resolution to 1280x720:
width 1280
height 720
We don't need real-time video, 2 pictures per second are totally ok for our needs:
framerate 2
This is a very handy feature of the motion software: record some (2 in our configuration) frames before and after the motion in the image was detected:
pre_capture 2
post_capture 2
We don't want endless movies. Instead, we want to have max. 10 minutes slices of the motion videos. This config option was renamed from max_movie_time to max_mpeg_time in motion. If you use the motion-mmal build, this one will work. If you get an error 'Unknown config option "max_mpeg_time"' either change this one to max_movie_time or make sure to really use the motion-mmal build as shown above.
max_mpeg_time 600
As some media players like VLC are unable to play the recorded movies, we've changed the codec to msmpeg4. Then, the movies play correctly in all players:
ffmpeg_video_codec msmpeg4
Enable access to the live stream from anywhere. Otherwise only localhost (= the Raspberry device) would be allowed to access the live stream:
stream_localhost off
If you want to protect the live stream with a username and password, you should enable this:
stream_auth_method 2
stream_authentication SOMEUSERNAME:SOMEPASSWORD
All configuration parameters are explained in detail in the motion config documentation.
After your changes to the motion.conf, reboot the Raspberry:
sudo reboot
After the reboot, the red light of the camera module should be turned on, which shows that motion currently is using the camera to detect any movement.
Save videos on Windows shared folder
As the SD card of the Raspberry Pi is a pretty limited resource, we've decided to let the Raspberry cam store the videos on one of our Windows Servers. This is pretty easy:
First share a folder from some Windows machine. Just follow some guides on the internet if you've never shared a folder from a Windows machine before.
Then open the fstab configuration on your Raspberry from a PuTTY console or directly from the device:
sudo nano /etc/fstab
Now add an extra line with the configuration of your Windows network shared folder:
Be sure that the user has the correct permissions to save files to that shared folder.
After a reboot, the Raspberry should have an extra folder /mnt/camshare mounted to the Windows shared folder. You should now set in your motion.conf:
target_dir /mnt/camshare
so that motion saves all movies to the shared folder on the Windows machine.
Fix motion autorun
We had some trouble that motion was not automatically started on a reboot of the Raspberry. We've found out that this was because the mounted folder of the Windows machine was not yet ready when motion tried to access it.
A very quick fix solved our problem:
Just edit the motion file with
sudo nano /etc/init.d/motion
and add the line
sleep 30
to the start-sequence:
Our changed /etc/init.d/motion script can be found in the attached raspberry_surveillance_cam_scavix.zip
Mounting the camera
After all these steps, you can finally mount the surveillance camera to the destination point:
Some helpful hints:
- Be sure to place the power supply in a dry and safe place
- Keep an eye on the WiFi signal: if you mount the camera out of range of the WiFi, it won't be able to send any live video nor save any motion videos
Accessing the live stream
Now you can access the live stream from the camera from any browser via the url http://IPADDRESSOFRASPBERRY:8080
Where 8080 is the port that we've configured for our stream in the motion.conf file. See your own configuration setting "stream_port" in motion.conf for the port.
We've found out that Google Chrome 30 (not even on iOS) wasn't able to play this stream directly due to a bug in the underlying Chromium project.
A workaround for this is to create a simple html file that contains one large image with the stream-url of the camera. See the file cam.html from raspberry_surveillance_cam_scavix.zip. This way, Chrome can show the live stream as well. Let's hope that Chrome will fix this issue in their browser.
But other browsers like FireFox, Safari and even VLC media player was able to show the live stream of the camera.
We were not able to make the live stream work in Internet Explorer as it doesn't support Motion JPEG. Kenneth Lavrsen (the maker of motion) has described workaround for live stream in Internet Explorer here.
Access live stream from anywhere
To make the live stream accessible from anywhere, you will need to enable some kind of dynamic domain services to your local network. This will enable you to always be able to connect to your local IP address from the outside even if your local IP address changes (over here in Germany, every private DSL ip address changes every 24 hours).
Such a (free) service enables you to access your Raspberry from anywhere even if your ip address changes. A very good service we're using for some years now is dyn.com. They have some free services and are integrated in many routers. Another good service is anydns.com.
Once you have set up the dynamic ip url, you can access the camera stream from anywhere in your browser (i.e. http://YOURDYNAMICDOMAIN:8080):
And this also works from the browser on your mobile device:
Next steps
There are a thousand things you can do with such a surveillance cam basic setup now. How about sending Growl notifications when some motion was detected? This guide explains how to add this functionality easily.
Or you could easily add a temperature-sensor to the cam. It's only a few bucks and can be integrated very easily.
We're currently working on integrating the live stream into MediaPortal server so that we can switch to a TV channel to see the live stream from the cam in our office. (Doesn't work)
If you want extra security, you could also add a battery pack to the camera. Be sure to buy one that is able to charge simultaneously while powering the Raspberry. This would enable you to detect if some bad guy cuts the power strips of your camera and send some alert messages to you (i.e. SMS or email) including the video of the disturber.
What are you going to add? Let us know!
History
10/11/2013:
Initial release of article
11/1/2013:
Updated the motion.conf (new file can be found in attached zip file) to use /tmp folder for logs, use msmpeg4 codec and some other changes
11/24/2013:
Rewritten the "Installing the motion detection software" paragraph
Added some notes from users (i.e. model A and live streaming to Internet Explorer). Thanks for the help (see comments below)!
Updated the attached motion.conf
11/26/2013:
Added some notes about permissions, max_mpeg_time config and motion.conf location. Thanks for the comments (see below)!
Changed the ports 8080/8081 in the attached motion.conf to match the ones described in the article
11/28/2013:
Added "sudo" to some commands
Added "sudo touch /tmp/motion.log" so that motion.log is created correctly if it doesn't exist
05/10/2014:
Some text changes and minor updates.
Scavix Software offers high quality software development and consulting. That's what customers like Intel, AMD, eBay and Sage Software trusted in the last years. Be it on the desktop, in the web browser, on a mobile phone, on a tablet or on the TV: we can make your software visions come true.
Are you our next customer? Don't hesitate to contact us.
Imprint/Impressum: https://www.scavix.com/imprint/
Working as Software Developer for years with all kinds of programming languages
from basic microcontroller programming in ANSI C to high level C# Application Development.
Focusing on website and webservice programming in the last few years with PHP, MySQL, JavaScript,...


 General
  News
News  Suggestion
  Question
  Bug
Bug  Answer
  Joke
Joke  Praise
  Rant
Rant  Admin
Admin 


